Add/ edit images in VSC
This guide describes how to add images and graphics to a markdown file using the Visual Studio Code editor (VSC), and how to update images and graphics.
Prerequisites
Before you proceed complete the following:
- Install Visual Studio Code
- Install Docs Authoring Pack
- Install Word Count extension
- Install Pull Requests extension
- Install Azure Repos extension
- Install Git client
- Set Git credentials
- Terminology and concepts
- General project workflow
- Download course files (clone repo)
- Project branching policies
- Create new branch in VSC
- Send (push) files
- Markdown syntax guide
- Add/ edit markdown in VSC
Topics in this guide
Add an image or graphic to a markdown file using VSC
Complete the following steps to add an image or graphic into a markdown file using VSC.
-
Find a suitable image or graphic file to use, from an approved source, and save it to your computer in Portable Network Graphics format (.PNG).
In the following image, the PNG file try-it_small@3x .png, from the WayPoint Ventures’ test repository (Testrepo1) on GitHub, is an example of a suitable image. Modify the instructions to suit your preferred source of images or graphics, and PNG file.
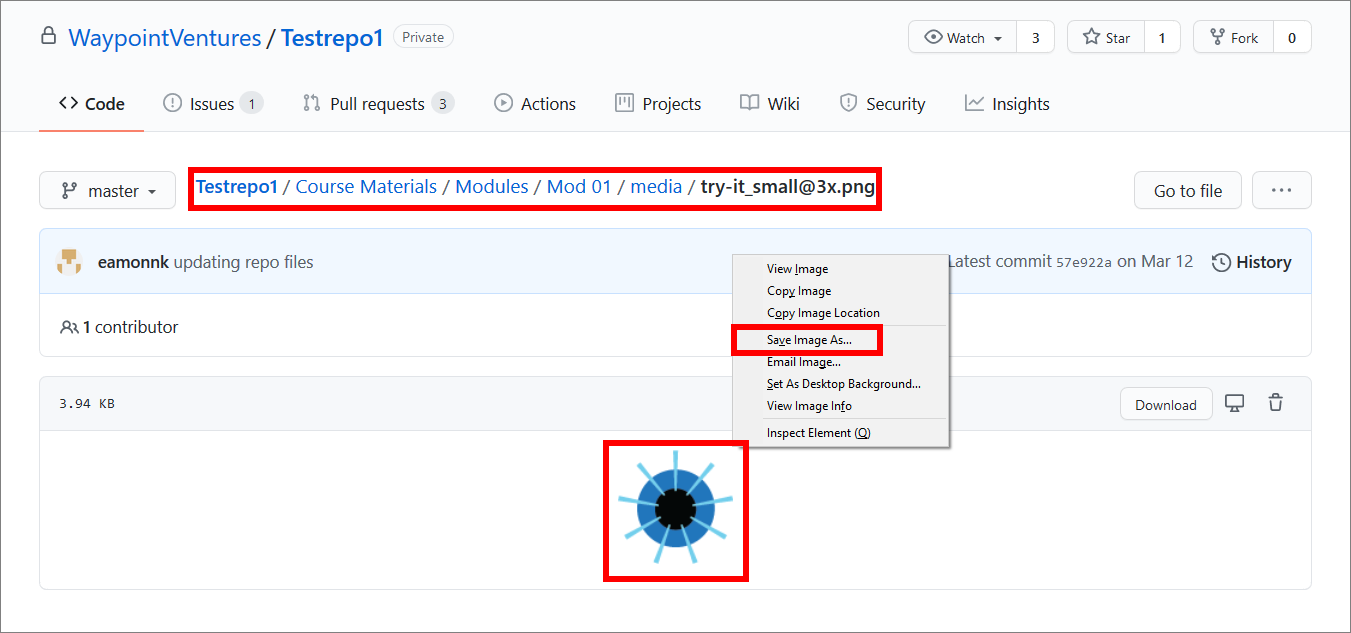
Note: You must only use images or graphics in PNG format. Using PNG files helps to maintain a standardized file format for images and graphics throughout a project, and keeps file sizes to a minimum.
Ask your project manager if there are approved sources of images and graphics available for you to use within the project you’re working on. You can save time by reusing images and graphics, and their corresponding alt image text.
-
Copy the PNG file you downloaded, and paste it into the appropriate image storage folder inside your local repository (repo).
For example, in the following image, the PNG file try-it_small@3x .png is pasted into an image storage folder named media, inside the local repo test-repo. Windows File explorer shows the media folder on the filepath test-repo\Course_files\Module-02\media.
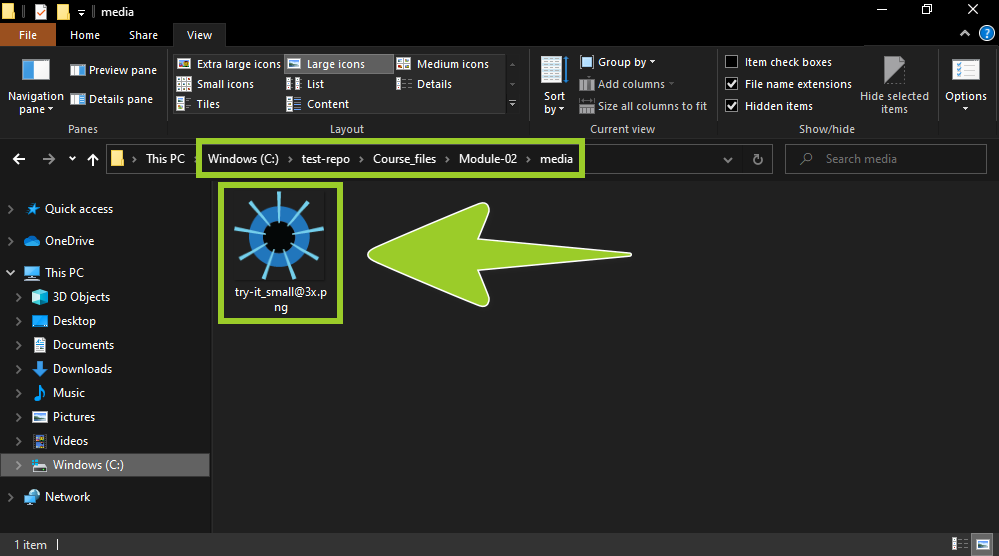
Note: Any PNG files you paste into your local repo can be sent (pushed) to GitHub or Azure DevOps, like markdown files, by following the guide Send (push) files.
The location of image storage folders can vary between projects. For example, the WayPoint Ventures’ repo Testrepo1 on GitHub contains a separate image storage folder, named media, for each module. All PNG files are be placed into a media folder that corresponds to a particular module. In Testrepo1, the media folders are on the filepath Testrepo1\Course Materials\Modules\Mod
X\media whereXrefers to the number of the module.Ask your project manager about the location of image storage folders for the particular project you are working on.
-
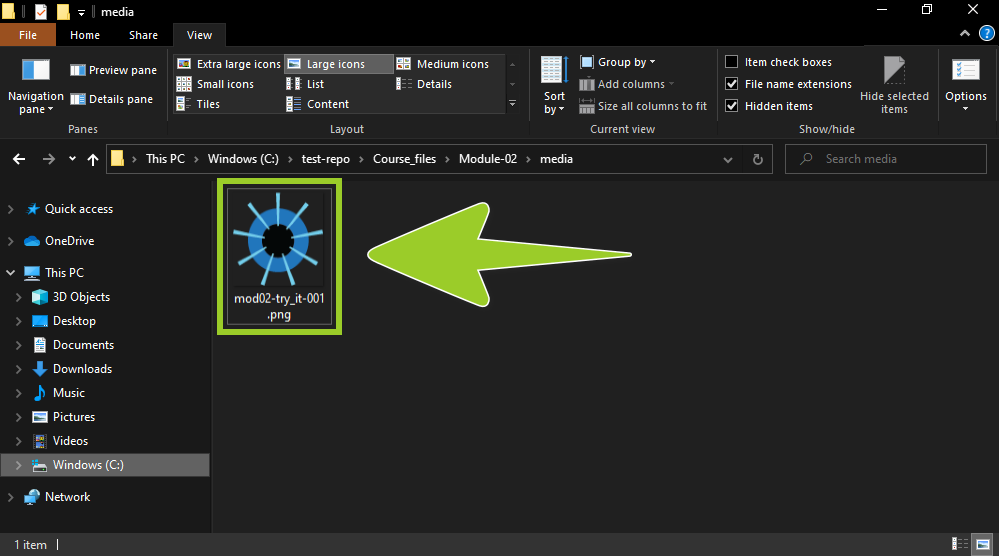
Rename the PNG file you pasted by using the following filename convention:
mod<module_number>-<brief_description>-<three_digit_number>.pngFor example, in the following image, the original PNG filename try-it_small@3x .png has been updated to mod02-try_it-001 .png.
Note: Other contributors may work with your PNG file. To ensure that your PNG file is not removed by mistake, use clear file naming conventions to help other contributors identify the purpose of your PNG file, and the module it belongs to.
-
In VSC, open your local repo folder, and use the VSC explorer to select a markdown file to add the PNG into.
For example, in the following image, the markdown file Mod02-Example_file .md is selected in the VSC explorer. The markdown file Mod02-Example_file .md is in the local repo test-repo, and on the filepath test-repo\Course_files\Module-02.
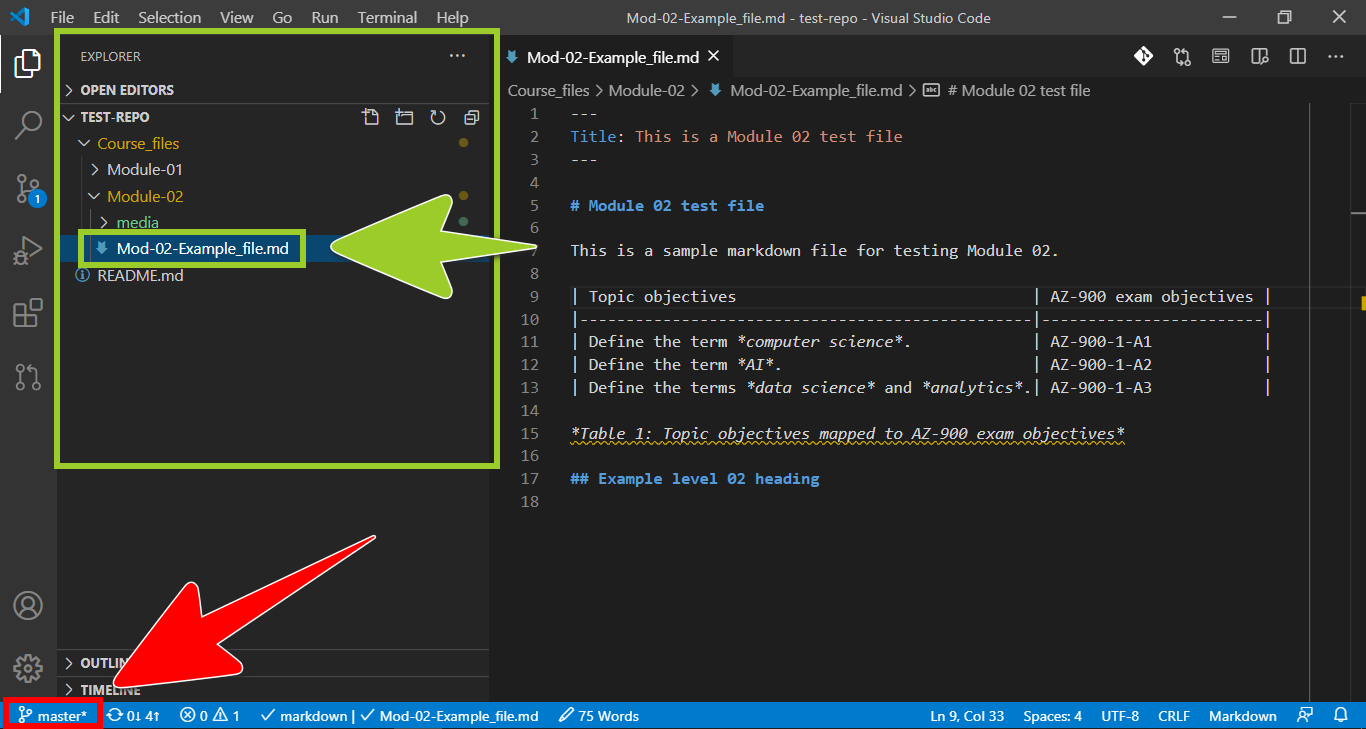
Note: The VSC status bar, at the bottom of the editor window, indicates the name of the branch that VSC is currently switched to. For example, in the previous image, the VSC status bar indicates that VSC is currently switched to the branch named master. To avoid overwriting your files, switch VSC to the correct branch by following the guide Switch branches.
-
If you need to maximize the VSC editor tab, select the VSC explorer icon from the left side bar.
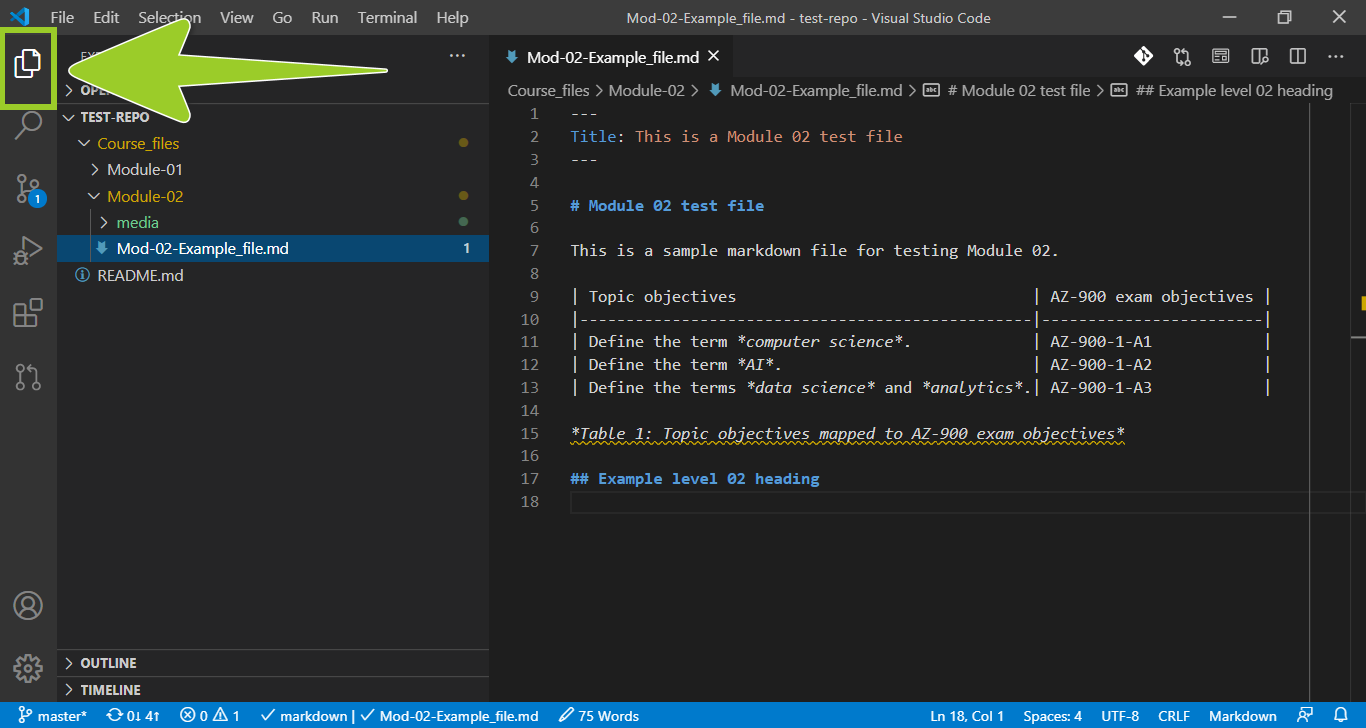
Note: Select the VSC explorer icon to toggle the VSC side bar on and off.
-
In the VSC editor tab, create a link to the PNG file by adding the following markdown syntax to a suitable place inside your markdown file.
You must modify the previous markdown syntax to suit your required image storage folder and image filename .png. For example, in the following image, to create a link to the PNG file mod02-try_it-001 .png, the modified markdown syntax
is added to the markdown file.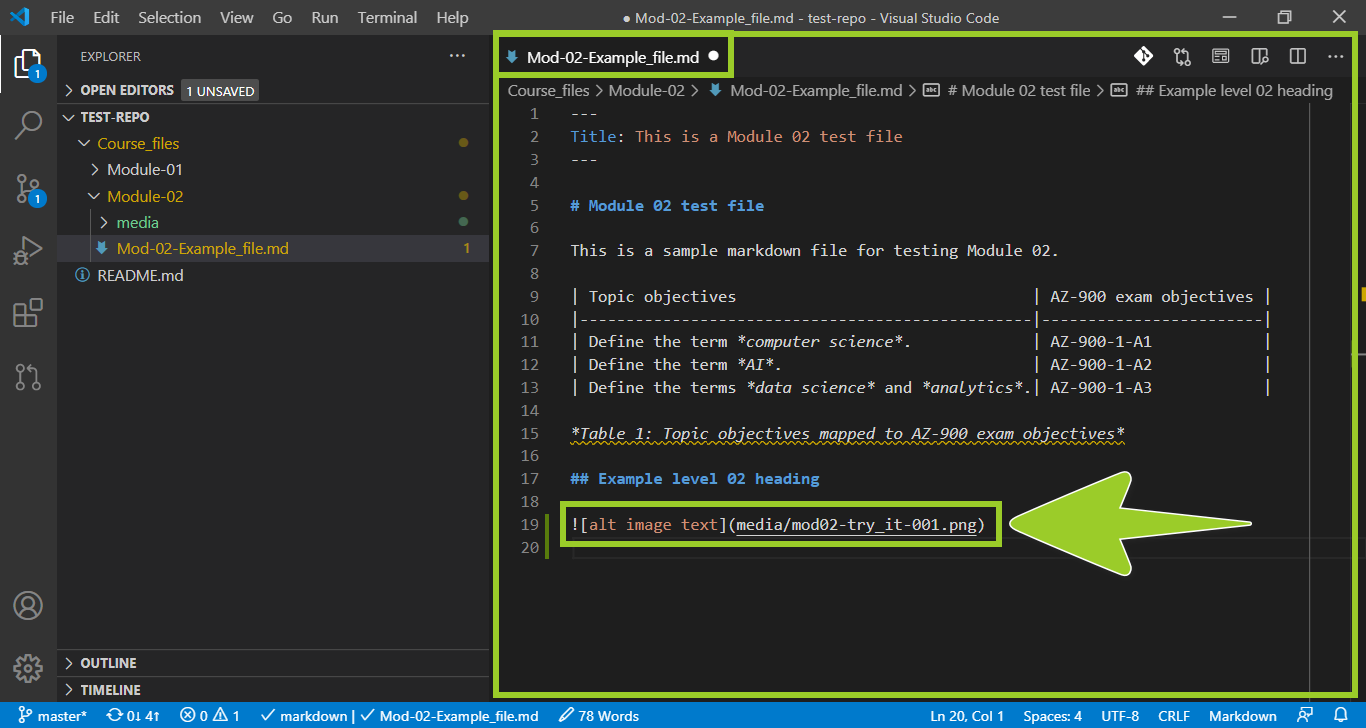
Note: Where appropriate, in the VSC editor tab, you must indent the links to PNG files in your markdown file. Indenting ensures that the images and graphics line up correctly with the other elements in your markdown file, like bulleted lists, and paragraph text.
Typically, in markdown, an empty line is required before a link to a PNG file, and after the link. Each link must also be placed on a new line. You must add caption text for some PNG files.
The correct markdown syntax for indenting, spacing, and captioning PNG file links is described in the guide Markdown syntax guide.
-
Update the alt image text for the PNG file you added.
For example, in the following image, the alt image text has been updated to ‘Try it’ icon indicating a practice-based course activity.
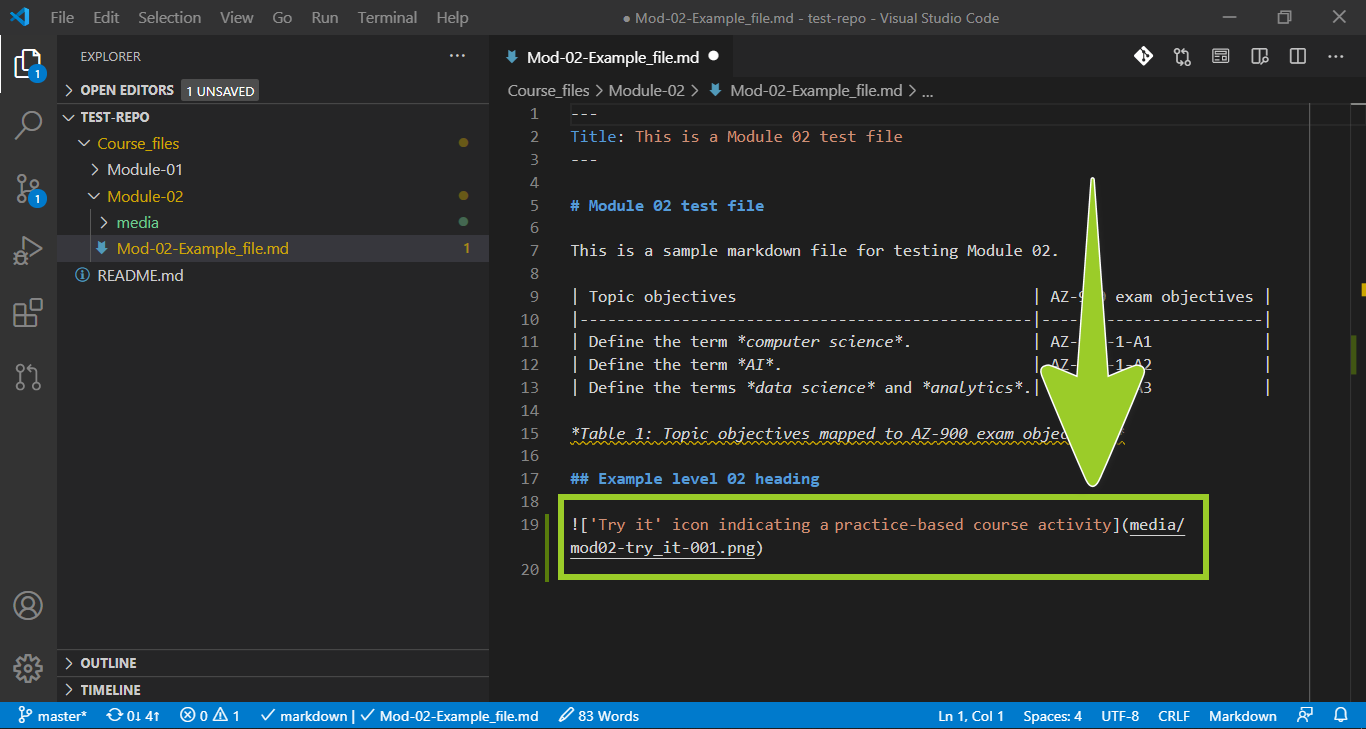
Note: The alt image text is a textual description of an image or graphic for use by people with visual impairments. Alt image text will be published in the final course documents, and adding alt image text is a legal requirement for accessibility purposes. You must add alt image text to all images and graphics in markdown.
-
Verify that your PNG file renders as intended by selecting the Open Preview to the Side icon (top right). Selecting the icon opens a rendered version of your markdown file in a VSC preview tab, alongside the VSC editor tab.
For example, in the following image, the VSC preview tab (on the right) contains a rendered version of the markdown file, with the linked PNG file. The VSC editor tab, on the left, contains the non-rendered “raw” markdown syntax.
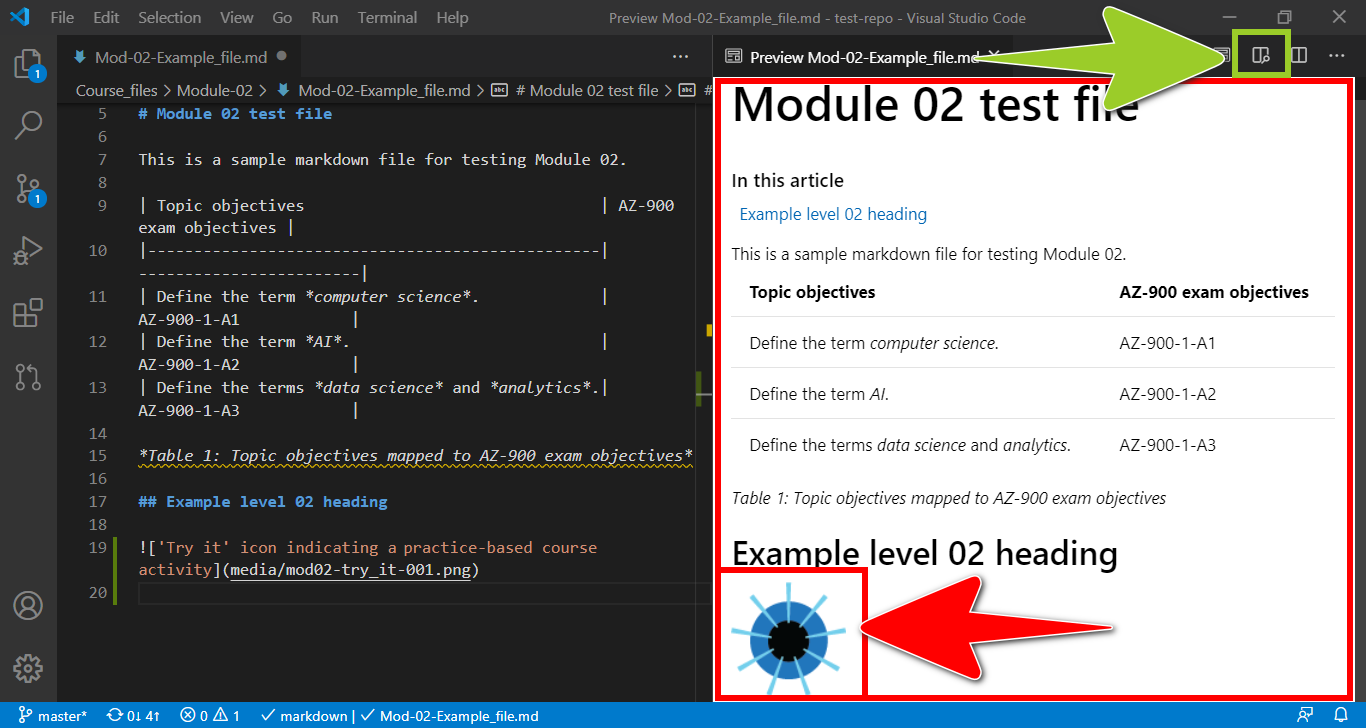
Note: Use the Open Preview to the Side icon, or shortcut keys CTRL + SHIFT + M, to toggle VSC Preview to the Side on and off. To toggle a “full-window” markdown preview on and off, use the shortcut keys CTRL + SHIFT + V.
Using VSC markdown previews can help you to identify and address content formatting issues, like inconsistent indenting, that can cause PNG files to display incorrectly. You should also fix any syntax errors that VSC highlights by following the guide Fix linter issues.
For information about VSC shortcut keys, refer to Key Bindings for Visual Studio Code.
-
When you have finished adding images or graphics into the markdown file, save, stage, commit, and push your markdown and PNG files to the project’s remote repo by following the guide Send (push) files.
-
After you have pushed your markdown and PNG files to the project’s remote repo, create a new pull request to merge the files by following the guide Create pull request.
You have added a new image or graphic into a markdown file using VSC successfully.
Update an image or graphic
This topic describes how to update an image or graphic.
Note: When you create a new version of an image or graphic, reuse the original PNG filename to avoid having to modify any links to the PNG file in the markdown files. Overwrite the original PNG file with your new PNG file using copy and paste. Reusing the same filename allows version control software, like Git, to track different versions of a PNG file in your repo.
Complete the following steps to update (overwrite) a PNG file.
- Outside your local repo, rename the new PNG file with the same filename as the PNG file you want to replace.
- Copy the new PNG file to your clipboard.
- Paste the new PNG file into the folder, in your local repo, that contains the PNG file you want to replace. If prompted, confirm that you want to overwrite the existing PNG file with the new PNG file.
- Optional - Where necessary, open any markdown files that contain links to the PNG file, and update the corresponding alt image text accordingly.
- Push the new PNG file to your project’s remote repo by following the guide Send (push) files.
- Optional - If you updated the alt image text inside any markdown files, you must also push the markdown files to your project’s remote repo by following the guide Send (push) files.
- After you have pushed your PNG (and markdown) file(s) to the project’s remote repo, create a new pull request to merge the file(s) by following the guide Create pull request.
You have updated an image or graphic successfully.
Appendices
Check the following supplementary Appendices for more details and context.