Add/ edit markdown in VSC
This guide describes how to edit, or add content to, a markdown file using the Visual Studio Code (VSC) editor.
Note: This guide assumes that the markdown file you are editing exists in your local repository (repo). Apply the steps in this guide to any suitable markdown (or PNG) file that you created or cloned from the project’s GitHub or Azure DevOps repo.
If your local repo doesn’t contain a markdown file for you to edit, create a new markdown file by following the guide Create new markdown file in VSC. After you create a new markdown file, add content to the new file by following the steps in this guide.
Some project’s may have author outlines available for you to use. An author outline is a markdown file that contains markdown elements, like tables or multilevel lists. You can copy the markdown elements from an author outline and paste them into your markdown file to create content quickly. The use of author outlines is described in the guide Use author outlines. Ask your project manager if there are author outlines available for the course you are working on, and where to find them.
Prerequisites
Before you proceed complete the following:
- Install Visual Studio Code
- Install Docs Authoring Pack
- Install Word Count extension
- Install Pull Requests extension
- Install Azure Repos extension
- Install Git client
- Set Git credentials
- Terminology and concepts
- General project workflow
- Download course files (clone repo)
- Project branching policies
- Create new branch in VSC
- Send (push) files
- Markdown syntax guide
Topics in this guide
Edit an existing markdown file using VSC
-
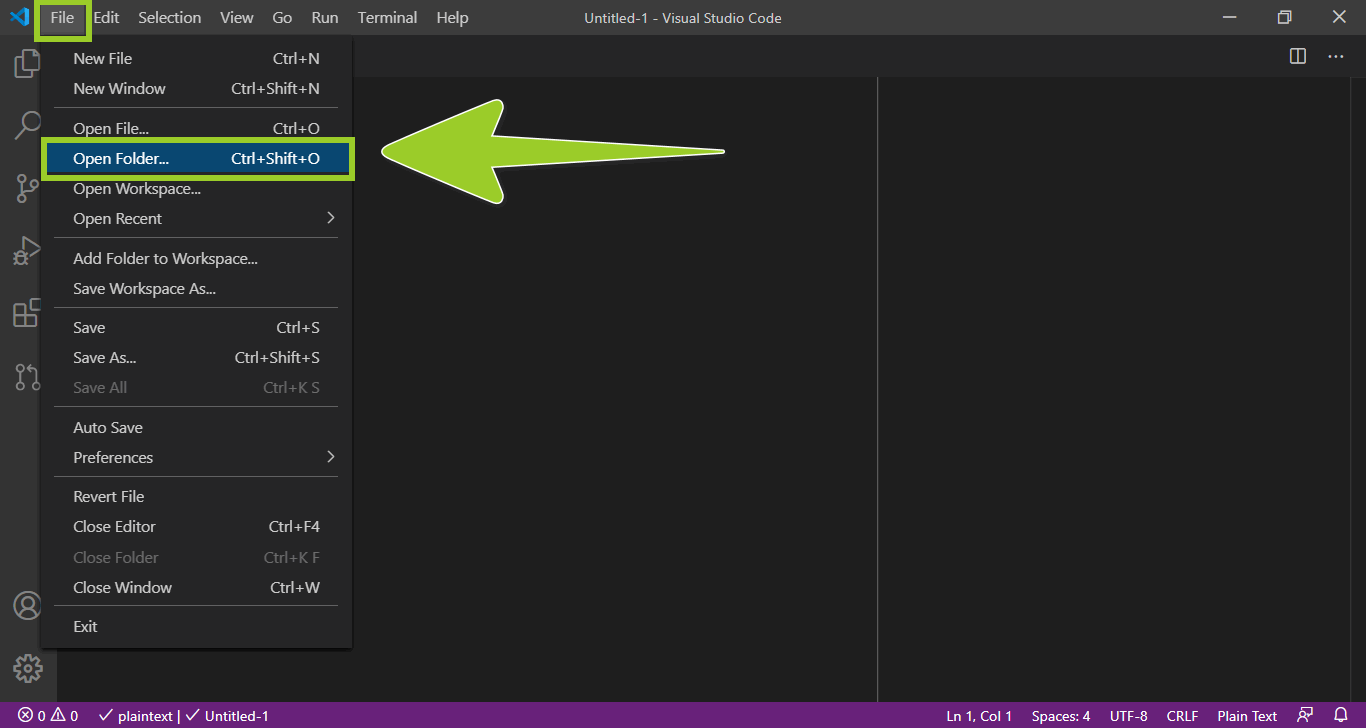
Open VSC, and choose File > Open folder from the top menu.
-
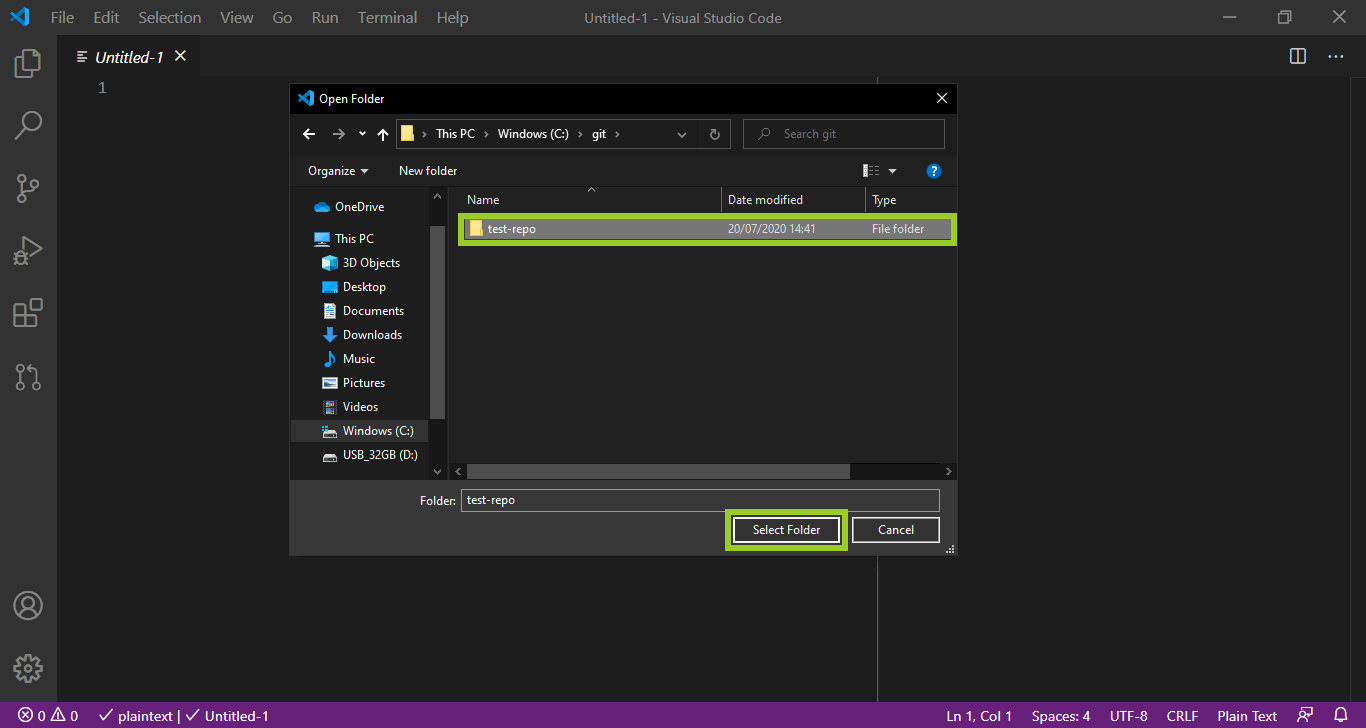
Use the VSC open folder file explorer to select the local repo folder on your computer, then choose Select folder.
For example, in the following image, the local repo folder named test-repo is selected.
-
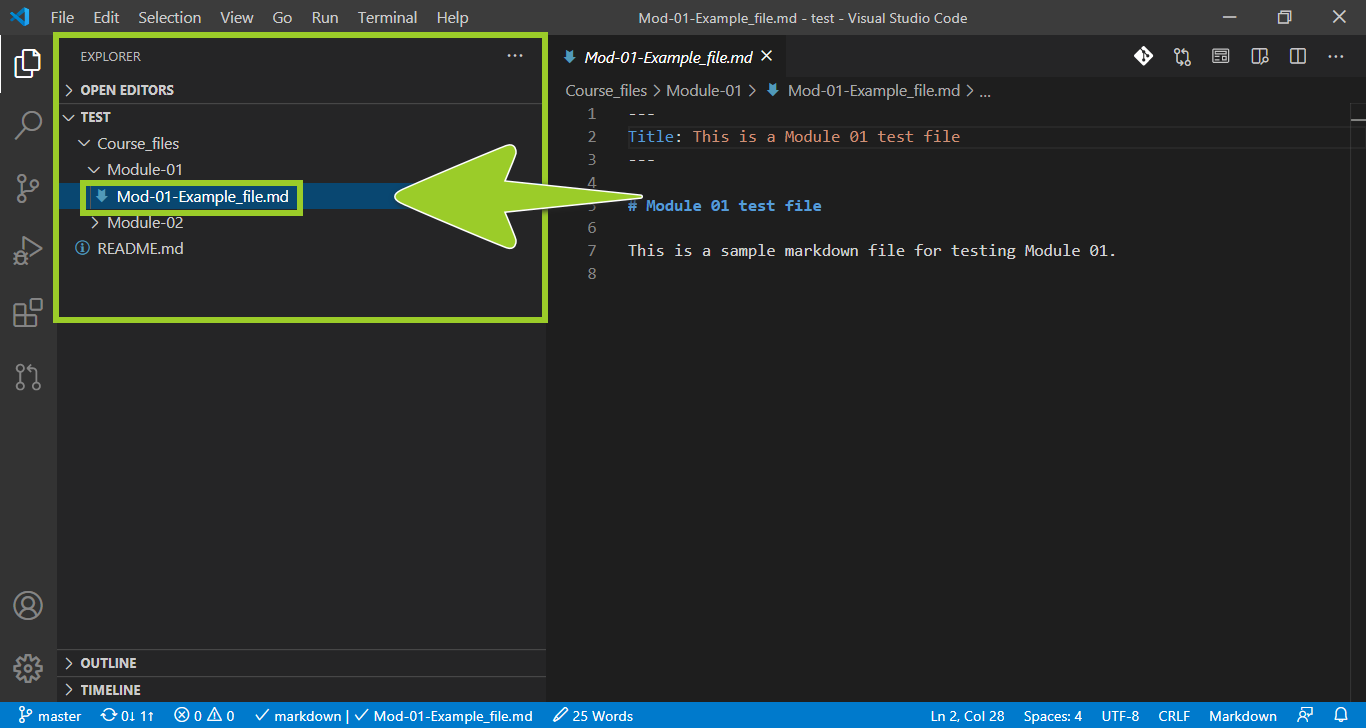
Use the VSC explorer (on the left) to go to the folder that contains the markdown file you want to edit.
For example, in the following image, the folder named Course_files\Module-01 is selected in the VSC explorer.

Note: The VSC status bar, at the bottom of the editor window, indicates the name of the branch that VSC is currently switched to. For example, in the previous image, the VSC status bar indicates that VSC is currently switched to the branch named master. To avoid overwriting your files, switch VSC to the correct branch by following the guide Switch branches.
-
From the VSC explorer, select the required markdown file for editing.
For example, in the following image, the markdown file named Mod-01-Example_file.md is selected in the VSC explorer.
Note: If you don’t have a markdown file to edit, create a new markdown file using the guide Create new markdown file in VSC. Then, proceed to the next step (Step 5) to add content to the new file.
-
Select the VSC explorer icon (on the left side bar) to maximize the VSC editor tab.
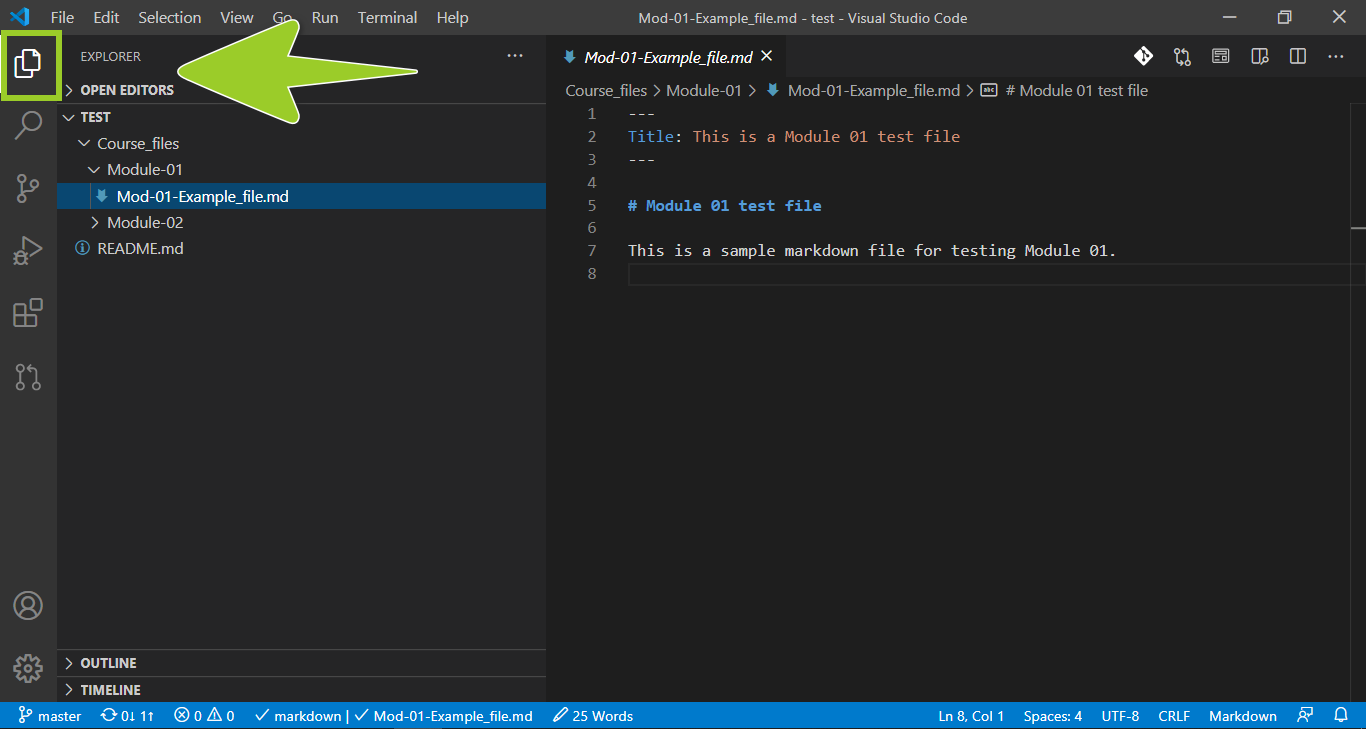
Note: Select the VSC explorer icon to toggle VSC side bar on and off or use the shortcut keys SHIFT + \. You can open more than one file at a time in VSC, and each file can be opened in a separate VSC editor tab.
For more information about VSC shortcut keys, refer to Key Bindings for Visual Studio Code.
-
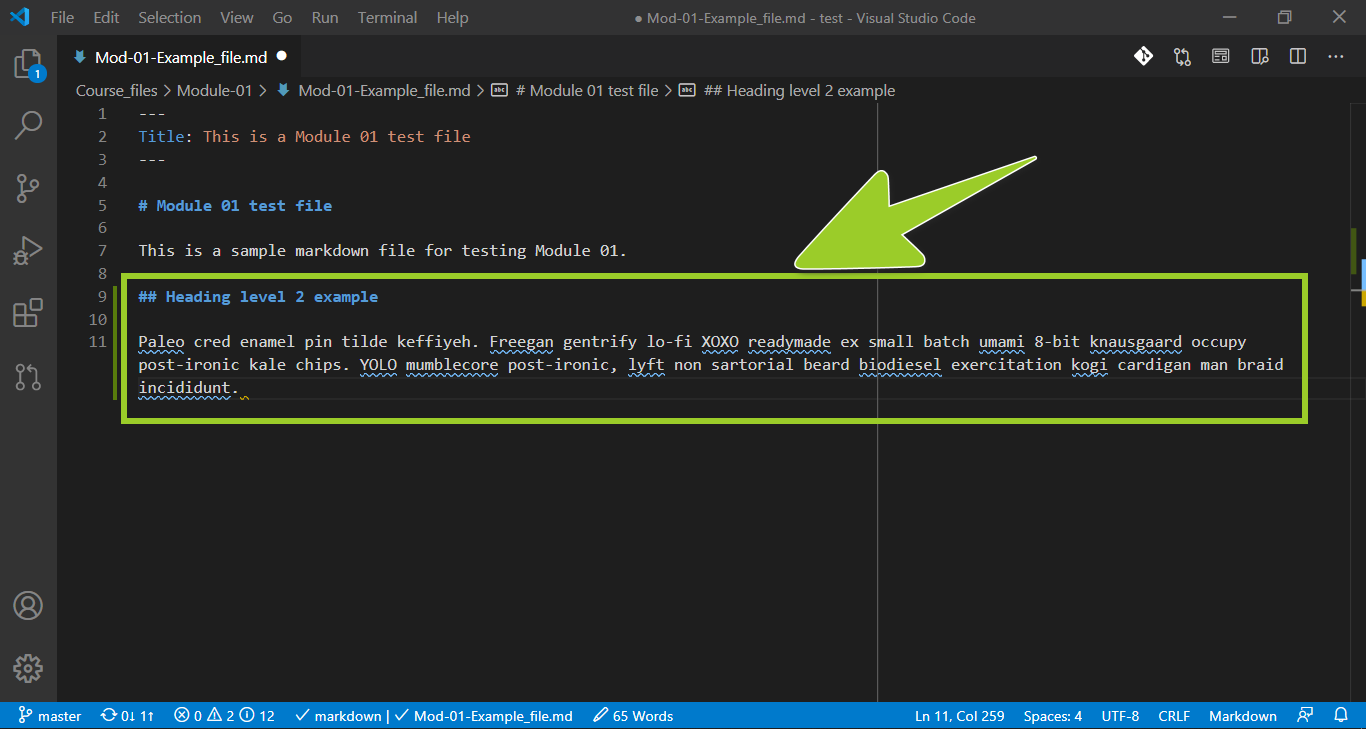
In the VSC editor tab, make your required changes by editing or adding content to the markdown file.
For example, in the following image, the level 2 sub-heading ### Heading level 2 example and accompanying paragraph, with placeholder text, have been added to the markdown file in a maximized VSC editor tab.
Note: Ensure that the file’s content conforms to the markdown syntax described in the guide Markdown syntax guide.
If you are using an author outline, copy the markdown elements provided within the author outline, like tables or multilevel lists, and paste them into your markdown file. Author outlines are described in the guide Use author outlines.
To add graphics and images to your file, follow the guide Add/ edit images in VSC
-
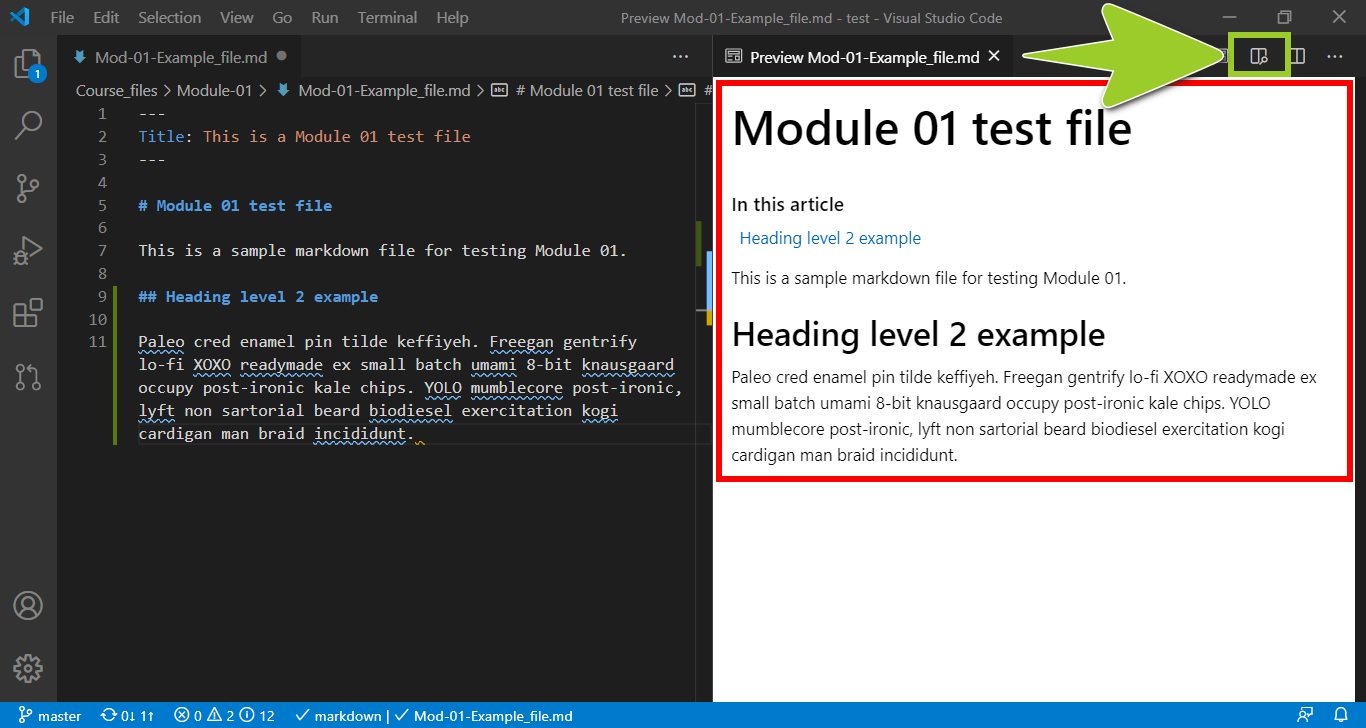
Select the Open Preview to the Side icon (top right) to open a rendered version of your markdown file in a VSC preview tab, alongside the VSC editor tab.
For example, in the following image, the VSC preview tab (on the right) contains the heading and text that were added into the markdown file in the previous Step 6. The VSC editor tab, on the left, contains the “raw” markdown syntax.
Note: Use the Open Preview to the Side icon, or shortcut keys CTRL + SHIFT + M, to toggle VSC Preview to the Side on and off. To toggle a “full-window” markdown preview on and off, use the shortcut key CTRL + SHIFT + V. Using VSC markdown previews can help you to identify and address content formatting issues. You should also fix any syntax errors that VSC highlights by following the guide Fix linter issues.
-
When you have finished updating the markdown file’s contents, save, stage, commit, and push your file to the project’s remote repo by following the guide Send (push) files.
-
After you have pushed your file to the project’s remote repo, create a new pull request to merge the file by following the guide Create pull request.
You have edited, or added content to, a markdown file using VSC successfully.
Appendices
Check the following supplementary Appendices for more details and context.