In this guide you will view the course files on GitHub using a web browser.
Using a browser provides a “quick and easy” way to view the course files without installing or configuring additional software tools. For example, as part of a content review, if you don’t need to add comments or make edits to the content, you can use this guide to view the course files.
Note: The procedure for downloading content from GitHub for editing with Visual Studio Code (VSC) is described on the page Download course files.
Prerequisites
Before you proceed complete the following:
Topics in this guide
Locate the course files on GitHub
The course files are stored in a GitHub repository (repo) at https://github.com/WaypointVentures/<project name>, where <project name> refers to the GitHub name for the course (project) you are working on. The GitHub repo contains different versions of the course files. Each set of files is stored in its own compartment within the repo called a branch. Ask your project manager for the link to the project’s GitHub repo.
As an example, this guide uses the 40574A Azure Fundamentals (“Az Funds”) GitHub repo from https://github.com/WaypointVentures/azfundedu. The steps in this guide will apply regardless of which course you are working on. To apply these steps to a course other than “Az Funds”, replace all references to “Az Funds” with the course name you require.
Note: A test repo is available from GitHub which mirrors the main (production) “Az Funds” GitHub repo. Use the test repo to try out Git actions before performing actions in the production repo. Actions performed in the test repo are inconsequential. If you modify or delete your copy of the test repo, create a new copy by using the git clone command in VSC (as described later the documentation). If you cannot access the test repo, contact your project manager to request access.
View the course files on GitHub
The following steps demonstrate how to view the GitHub repo’s contents with a web browser, to access the branch with the version of the course files you require.
-
Open a web browser. Go to the GitHub web site at https://www.github.com, and sign in to GitHub.
-
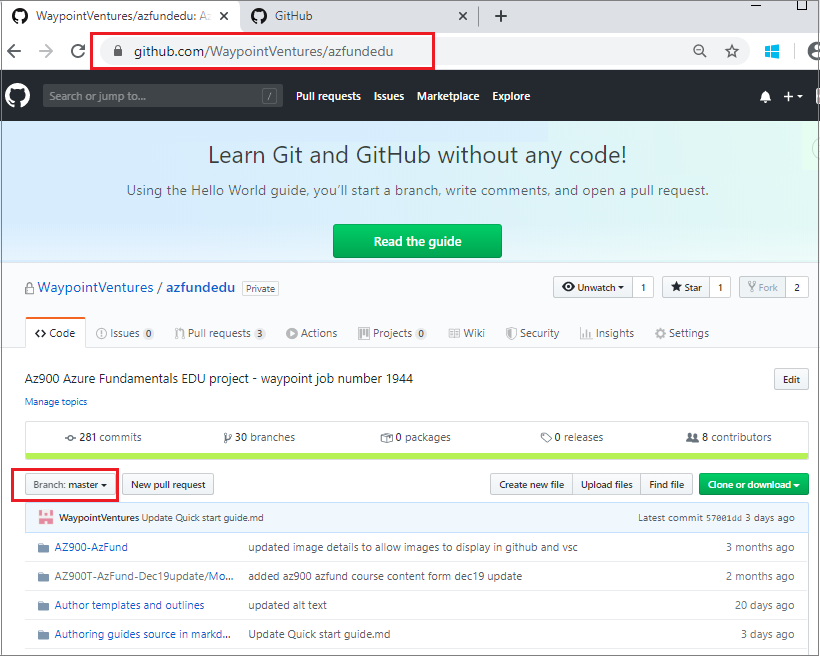
Go to the project’s GitHub repo web page. The branch that GitHub is currently set to will be shown in the Branch: <branch_name> menu, as indicated in the following image.
-
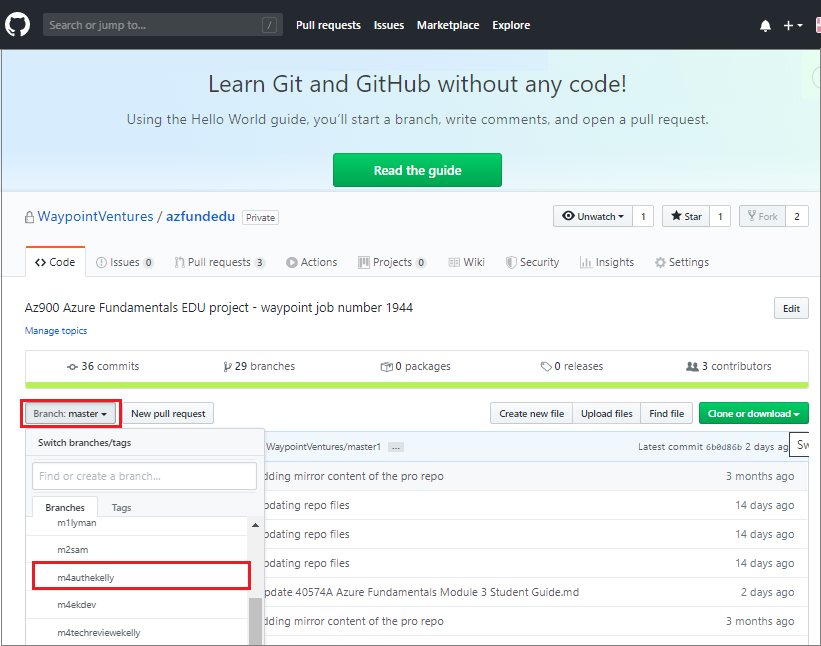
Use the Branch: <branch_name> menu to scroll through the list of branches. Choose the branch you want to view. In the following image, the branch m4authekelly is selected.
-
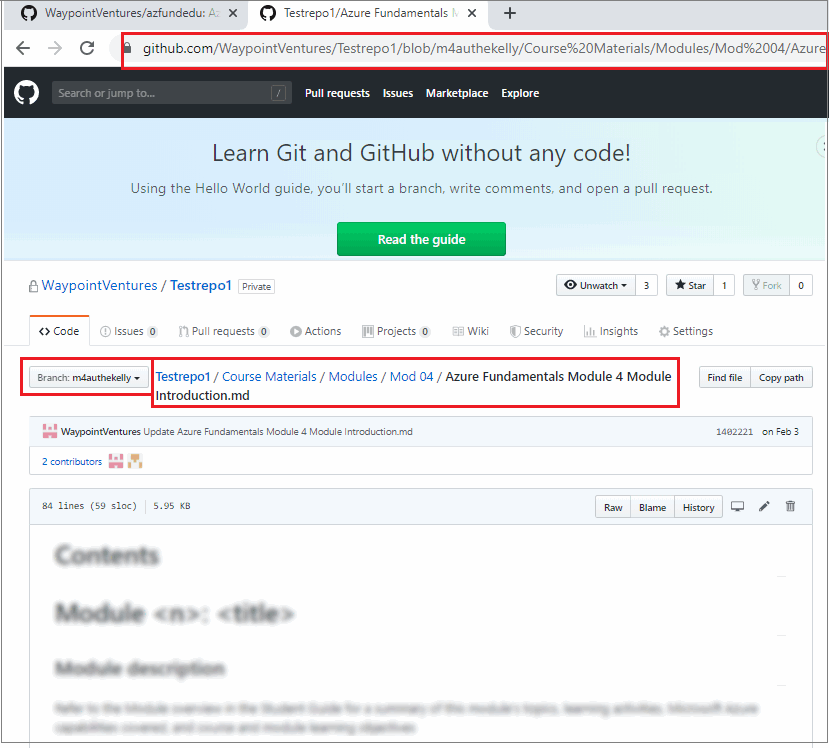
The GitHub repo uses a standard file and folder structure. Browse through the repo, and go to the location of the file you require. For example:
..\Course Materials\Modules\Mod 04\Azure Fundamentals Module 4 Module Introduction.md.Note: Use your web browser’s address bar to get the URL for a file on GitHub. The URL contains the branch name and the path to the file. You can share the URL with other contributors if you need to. The branch name is also indicated in the branch menu button, and the full file name path is shown alongside it.
You have view the course files on GitHub using a web browser successfully.
Note: You can view and edit files in the GitHub repo directly from within your web browser. However, if you wish to make changes to files in the GitHub repo you must use the procedures described in the WayPoint documentation.
Appendices
Check the following supplementary Appendices for more details and context.