Install Azure Repos extension : Azure DevOps repositories only
This guide describes how to download and install Microsoft’s Azure Repos extension for Visual Studio Code (VSC). The extension connects VSC to Azure DevOps for managing changes made to the course files from within VSC.
Note: Only complete this guide if the course you are working on uses an Azure DevOps repository. The extension described in this guide is not required for courses that use a GitHub repository. If you are unsure, check with your project manager.
More information about the extension is available from the Visual Studio Marketplace webpage Azure Repos.
Important update
Microsoft removed the Azure Repos VSC extension from Visual Studio Marketplace on Nov 6 2020, refer to https://github.com/microsoft/azure-repos-vscode/blob/master/DEPRECATED.md.
Despite this, some Microsoft projects use Team Foundation with Azure DevOps for version control, instead of Git and GitHub. If you work with these projects, you might need to install the Azure Repos VSC extension. Ask your project manager if the project you’re working on requires the Azure Repos extension.
You can no longer install the extension from Visual Studio Marketplace (as described in this guide). Instead, complete the following steps to obtain and install the extension.
-
In a web browser, go to https://marketplace.visualstudio.com/items?itemName=ms-vsts.team.
-
Choose the Version History tab.
-
Select Download, beside version 1.161.1, and save the file
ms-vsts.team-1.161.1.vsixto your computer. -
Open VSC, and then select Terminal > New Terminal or use CRTL + SHIFT + ‘.
-
In the terminal, navigate to where you saved
ms-vsts.team-1.161.1.vsix. -
Enter the following command to install the extension:
code --install-extension ms-vsts.team-1.161.1.vsix
Note: You can ignore warnings in VSC about using a depreciated (“sunsetted”) extension.
For help, refer to the Visual Studio Code documentation article Install from a VSIX.
Prerequisites
Before you proceed complete the following:
Topics in this guide
Download and install Microsoft’s Azure Repos extension
Complete the following steps to download and install Microsoft’s Azure Repos extension for VSC.
-
Launch VSC.
-
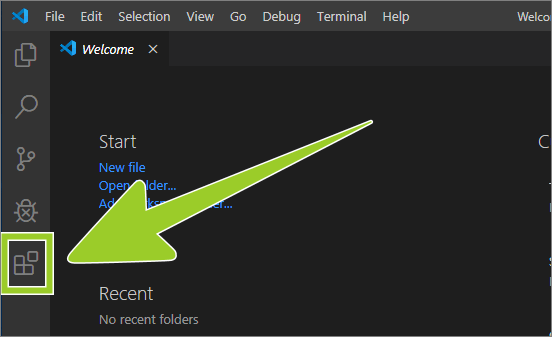
Choose the Extensions icon from the left sidebar menu.
-
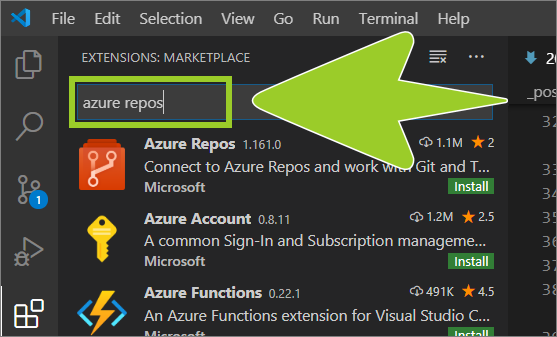
Type azure repos into the extensions search text entry field.
-
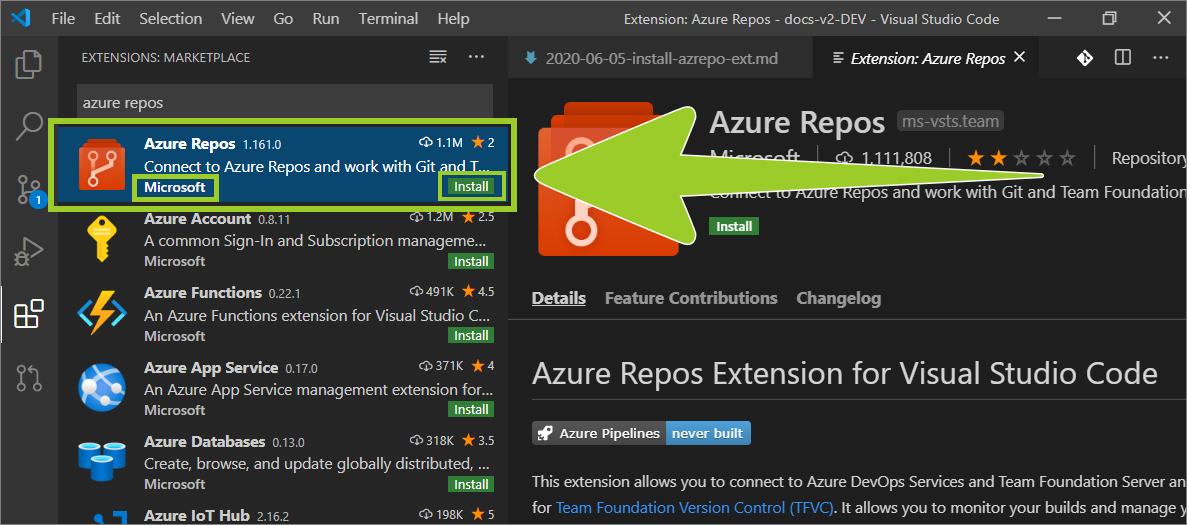
The Azure Repos extension should appear near the top of the list of search results.
Verify that the publisher name is Microsoft, and select the green install button inside the Microsoft Azure Repos extension information panel (lower right side).
-
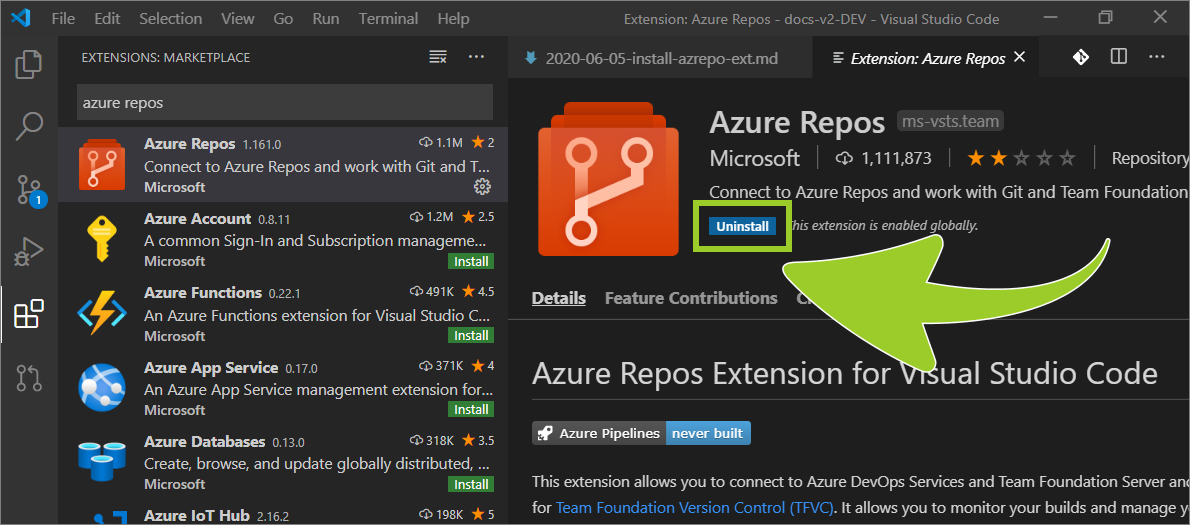
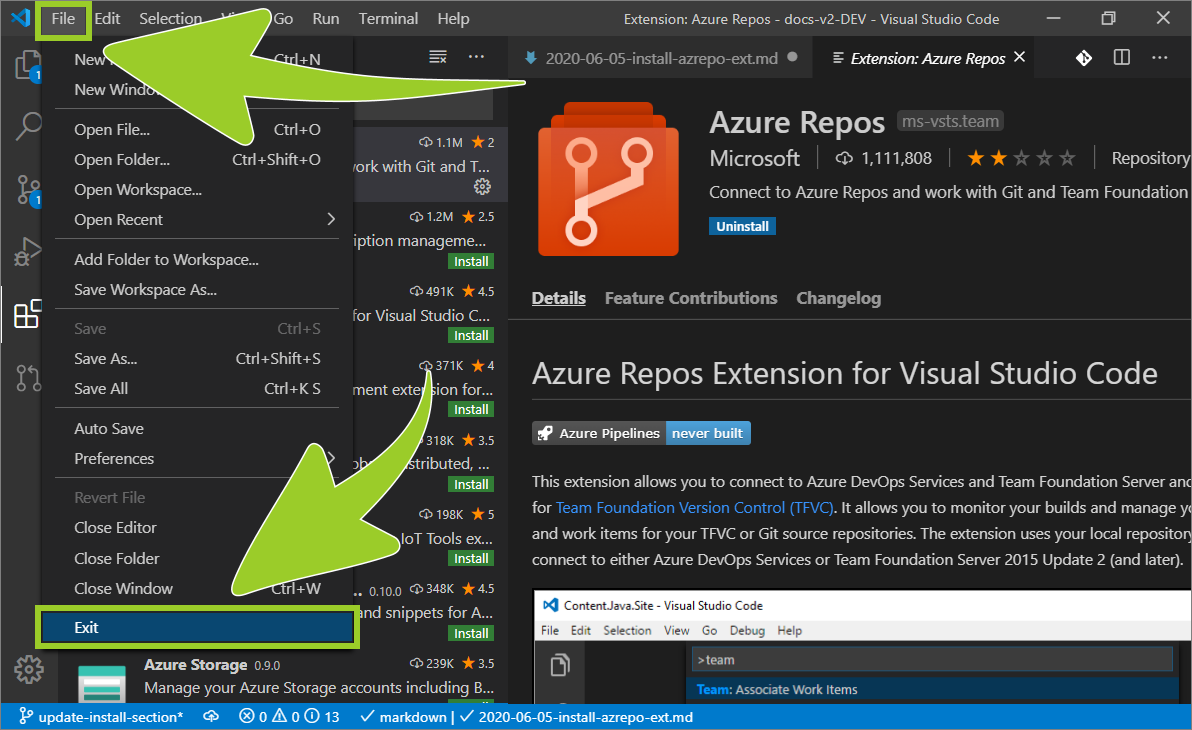
When the Microsoft Azure Repos extension has installed successfully the installation status icon text, inside the extension details pane, will change from Install (with a green coloured icon) to Uninstall (a blue coloured icon).
-
To complete the installation, restart VSC by choosing File > Exit (from the top VSC menu), then re-opening VSC.
You have downloaded and installed the Microsoft Azure Repos extension for VSC successfully.
Appendices
Check the following supplementary Appendices for more details and context.