This guide describes using a web browser to edit, or add content into, a markdown file on GitHub.
Note: This guide assumes that the markdown file you are adding content to, or editing, exists on GitHub already. As an example, this guide uses a markdown file from the WayPoint Ventures’ test repository (Testrepo1) on GitHub at https://github.com/WaypointVentures/Testrepo1/. Modify the following instructions to suit your preferred markdown file and GitHub repository (repo).
Prerequisites
Before you proceed complete the following:
- Install Visual Studio Code
- Install Docs Authoring Pack
- Install Word Count extension
- Install Pull Requests extension
- Install Azure Repos extension
- Install Git client
- Set Git credentials
- Terminology and concepts
- General project workflow
- Download course files (clone repo)
- Project branching policies
- Create new branch in VSC
- Send (push) files
- Markdown syntax guide
Topics in this guide
Edit a markdown file on GitHub in a web browser
Complete the following steps use a web browser to edit, or add content into, a markdown file on GitHub.
-
Open a web browser, then go to the URL for the project’s GitHub repo, and sign in to GitHub.
For example, go to the WayPoint Ventures’ test repository (Testrepo1) on GitHub at https://github.com/WaypointVentures/Testrepo1/.
-
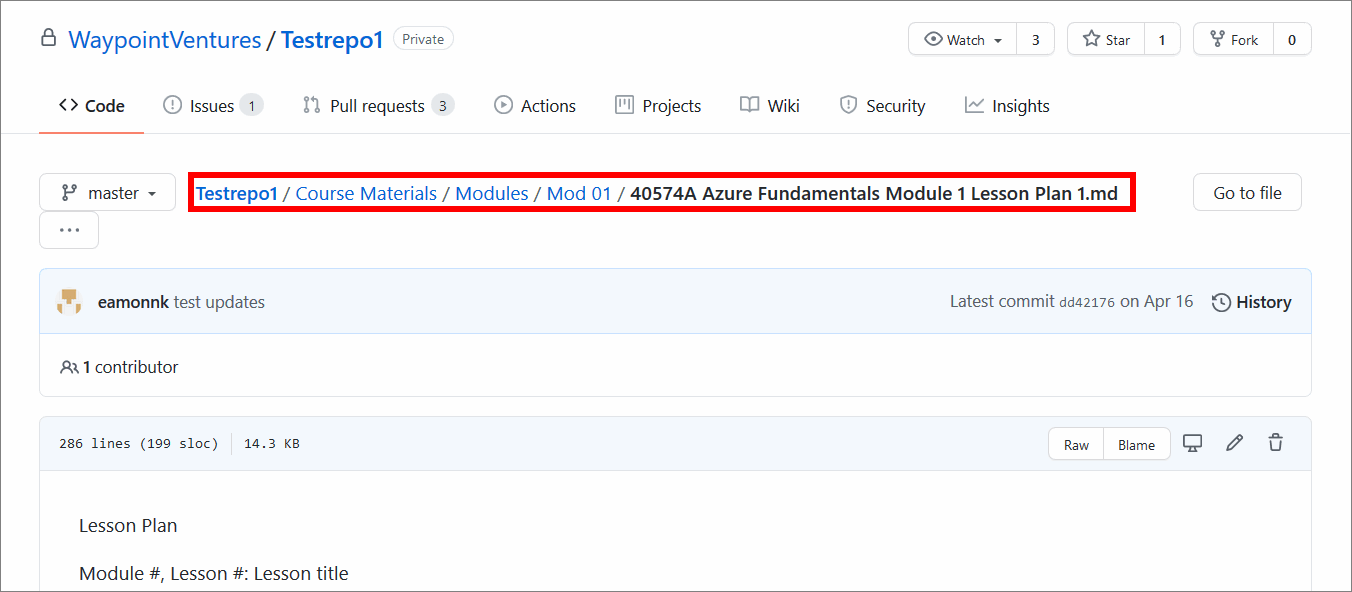
On GitHub, go to the folder for the markdown file you want to edit.
For example, in the WayPoint Ventures’ test repository on GitHub, on the folder path Testrepo1/Course Materials/Modules/Mod 01/, select the markdown file 40574A Azure Fundamentals Module 1 Lesson Plan 1.md.
-
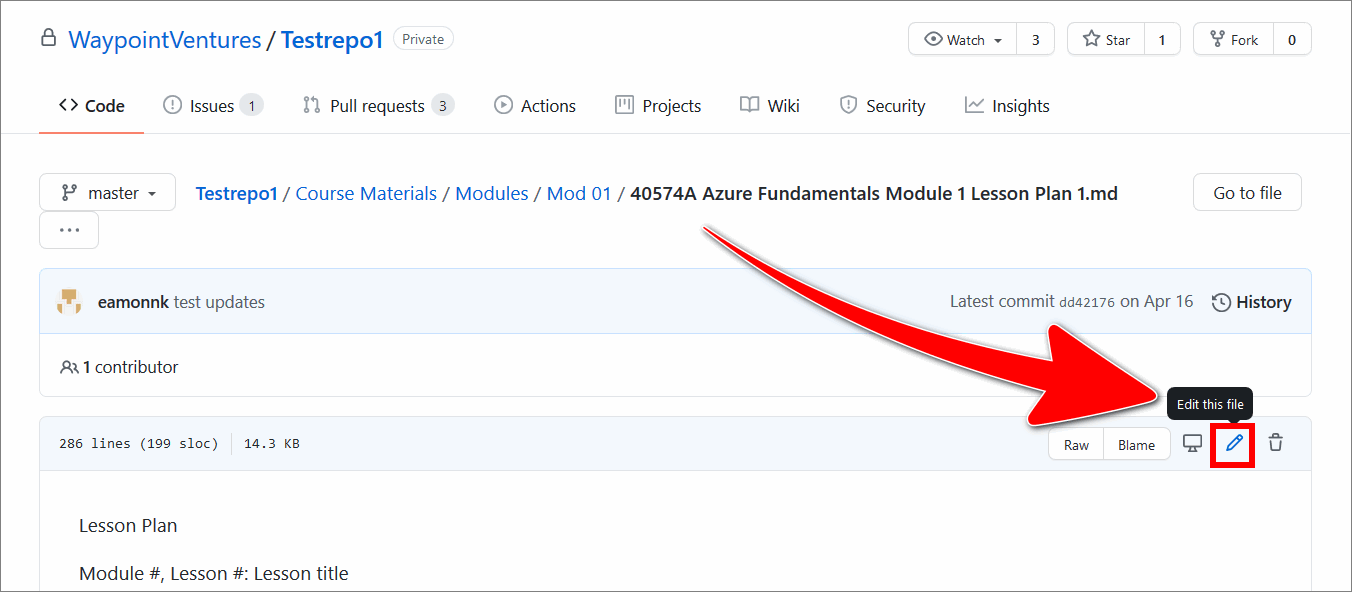
Select the pencil icon, on the right side, to open the file in the GitHub editor.
-
In the Edit file tab, use the scroll bar (on the right side) to locate the part of the markdown file you want to edit.
For example, in the Edit file tab, scroll down to the last heading
### Topic \<n\>: \<Topic title\>, Try-it.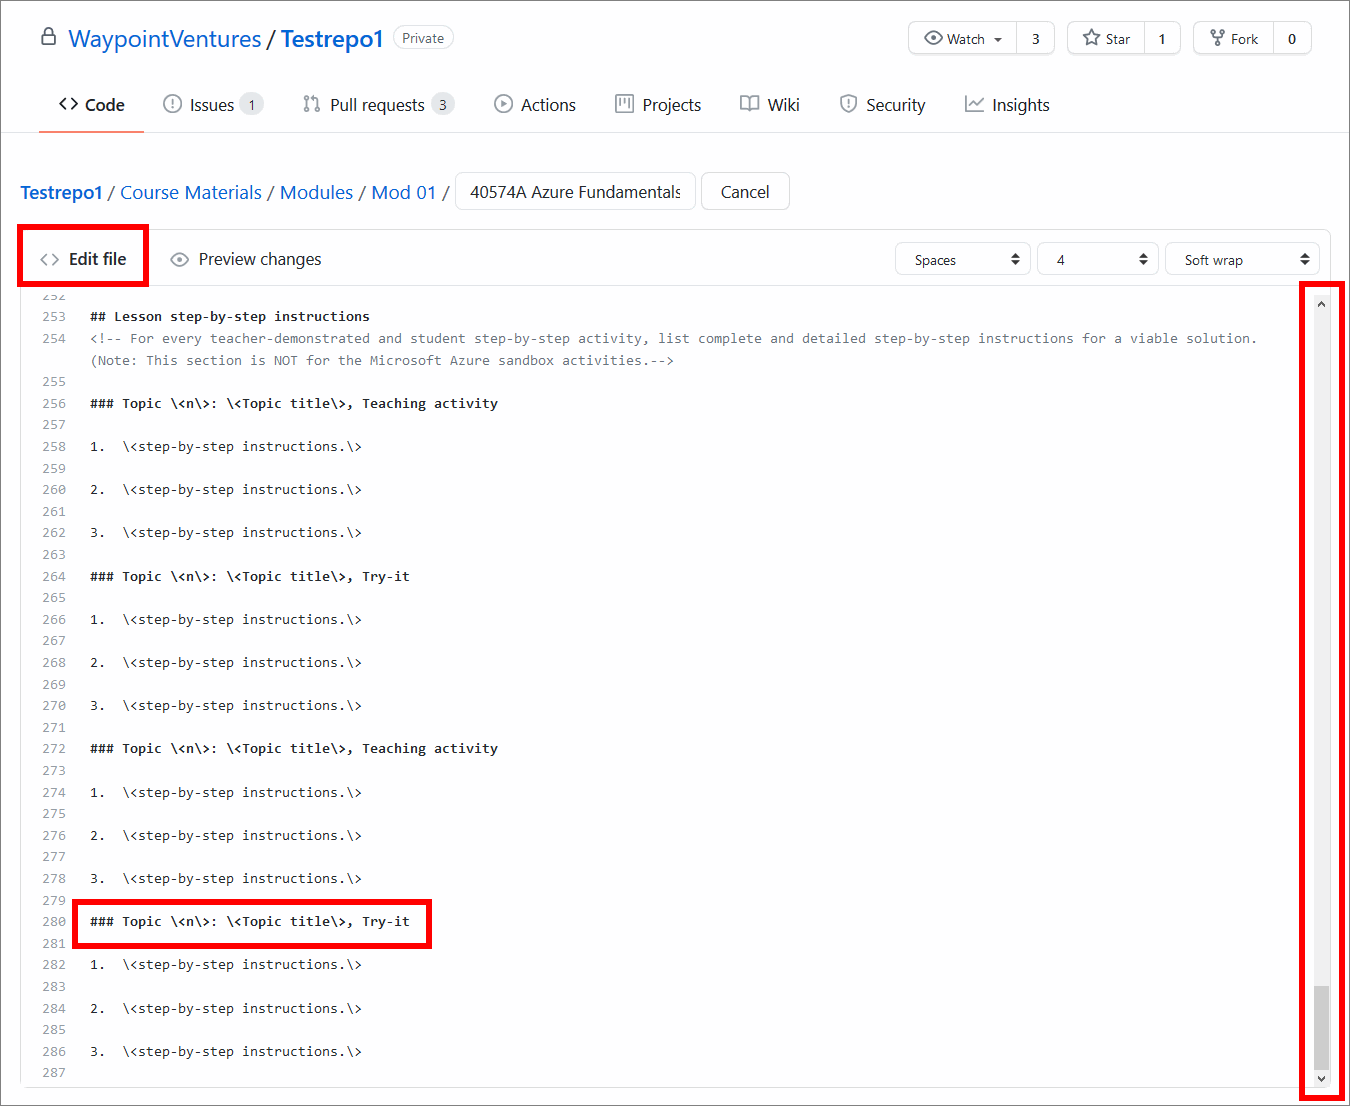
-
Apply the required edits or add your content to the markdown file.
For example, type the following comment into the last line of the markdown file 40574A Azure Fundamentals Module 1 Lesson Plan 1.md on GitHub.
<!-- This is a test comment -->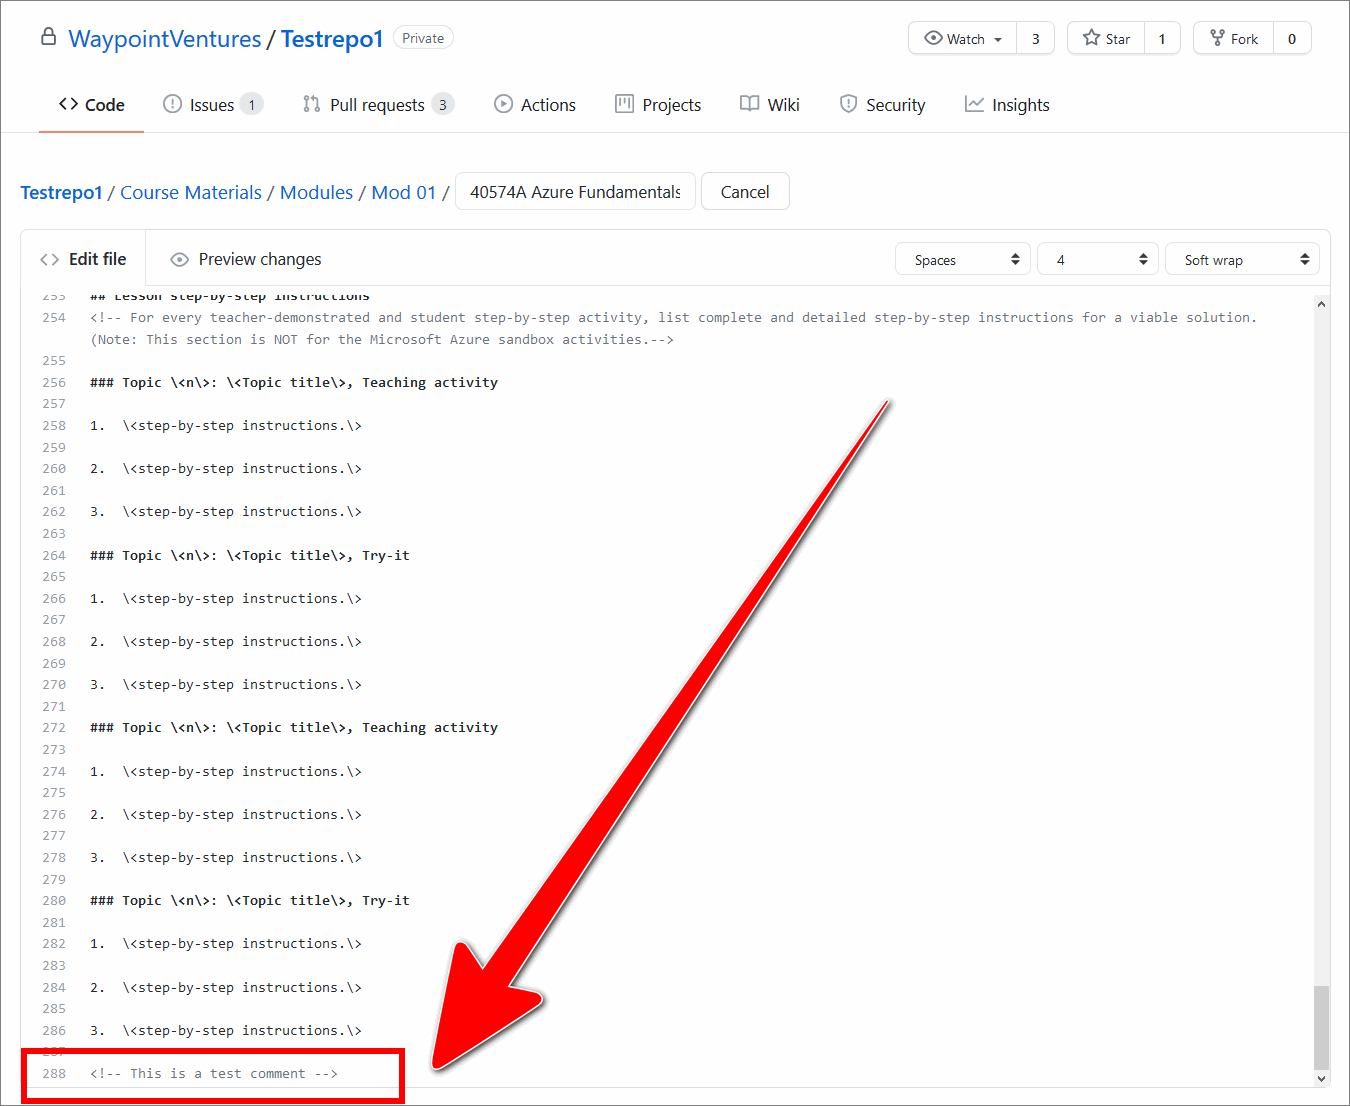
Note: Ensure that your edits conform to the markdown syntax described in the guide Markdown syntax guide.
-
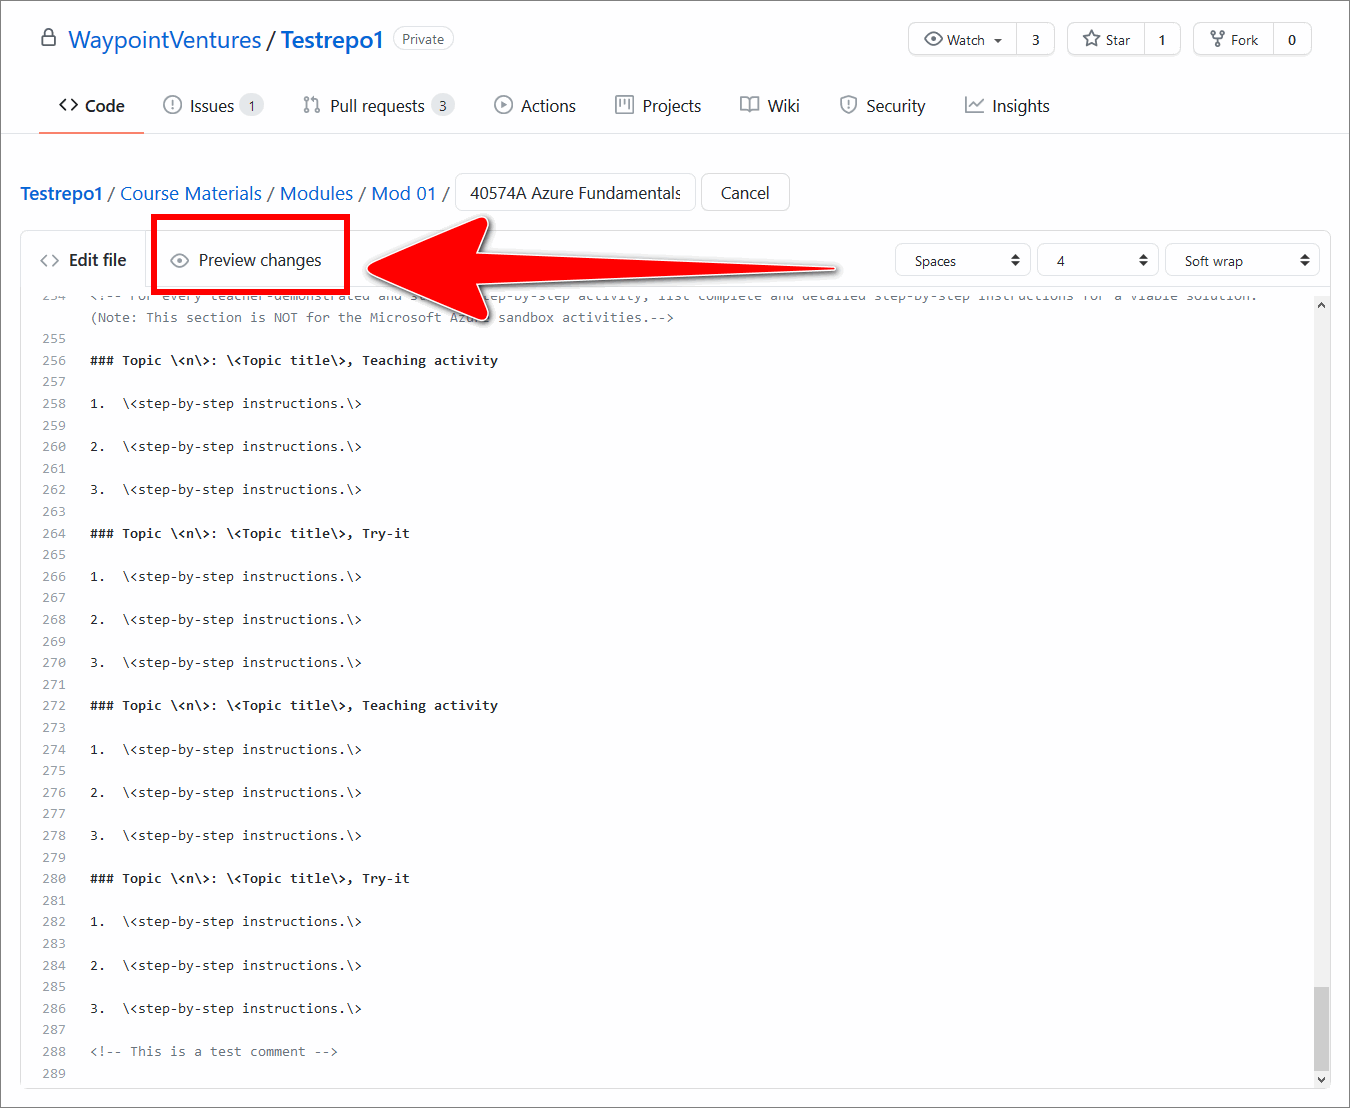
To preview how the changes you made will be rendered in markdown, return to the the top of the GitHub editor page, and choose the Preview changes tab.
Note: Previewing your changes is optional, but considered good practice as it helps you to ensure that the edits you make will render as intended in markdown.
For example, in the following image, the Preview changes tab is shown in the GitHub editor for the markdown file 40574A Azure Fundamentals Module 1 Lesson Plan 1.md.
-
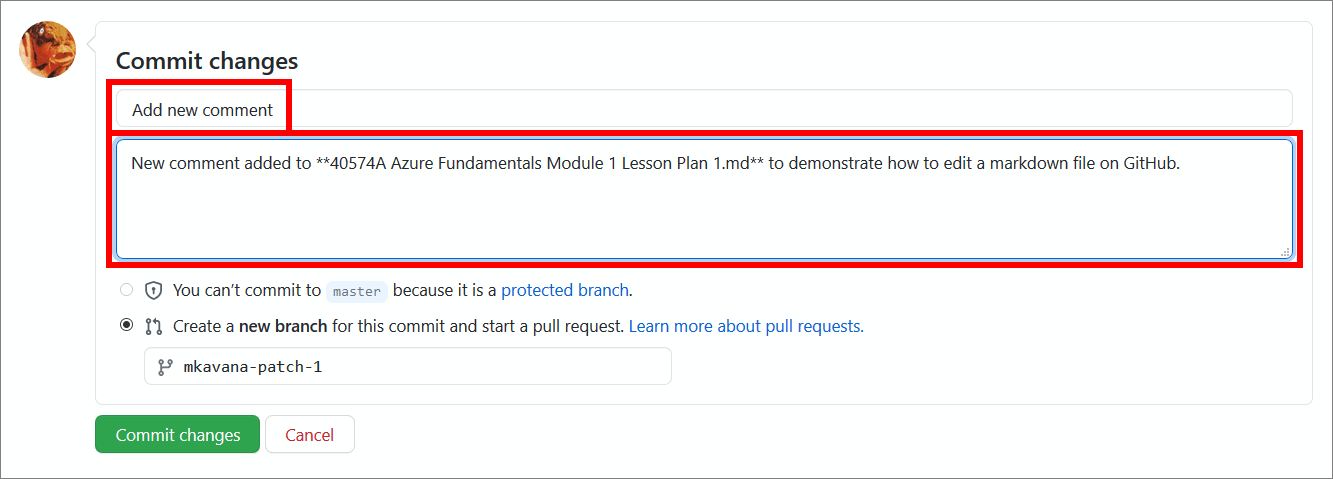
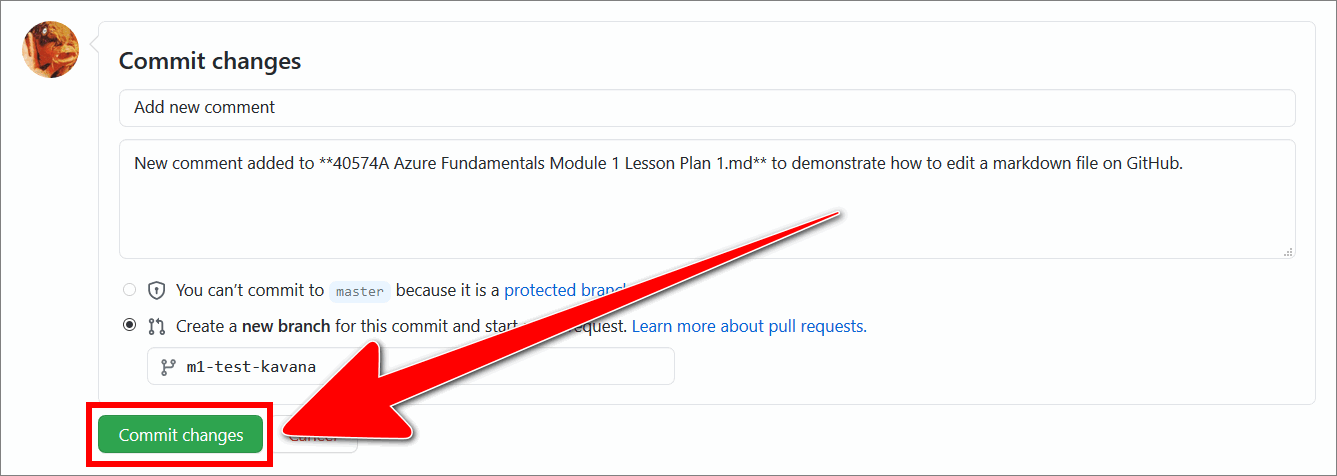
When you have applied the necessary edits, scroll down to the Commit changes section and complete the following:
Item Description Add a commit message Add a commit message in the commit message text entry field to provide other contributors with a summary description of the changes you applied to the file. Add a description Add an extended description in the extended description text entry field to provide other contributors with a detailed description of the changes you made. Providing an extended description is optional, but good practice. For example, in the following image, text has been added to the Commit changes section that describes the comment added to the example markdown file in the previous Step 5.
-
Use the checkbox to select the option to Create a new branch for this commit and start a pull request.
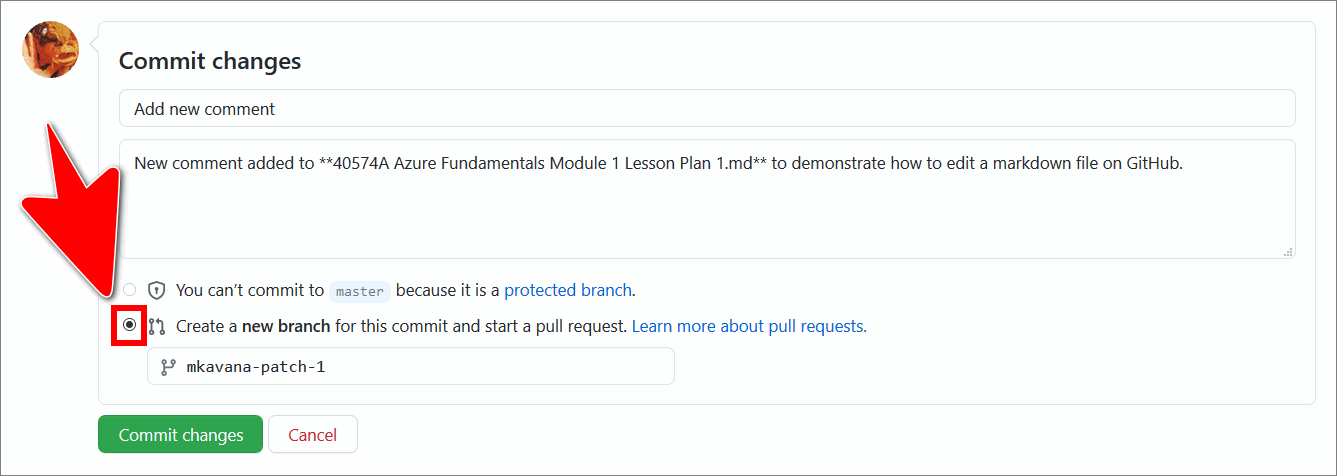
Note: It is possible to commit your changes to an existing branch, without opening a new pull request. Committing changes directly to an existing branch is not recommended as it makes tracking changes and fixing problems more difficult. Always select the option to Create a new branch…, unless you must commit to an existing branch directly (for example, during a Technical Review).
-
Modify the name of your new branch.
Note: Apply the branch naming convention
m <module number> task short-code <surname>to your new branch. Your branch name should describe your branch’s content and make the branch’s purpose, and owner, clear to other contributors. To learn about branch naming conventions, use the left side menu on this website to choose a guide from the Workflow and processes section that corresponds to your role (like author or technical reviewer).For example, in the following image, the branch name has been modified to
m1-test-kavana.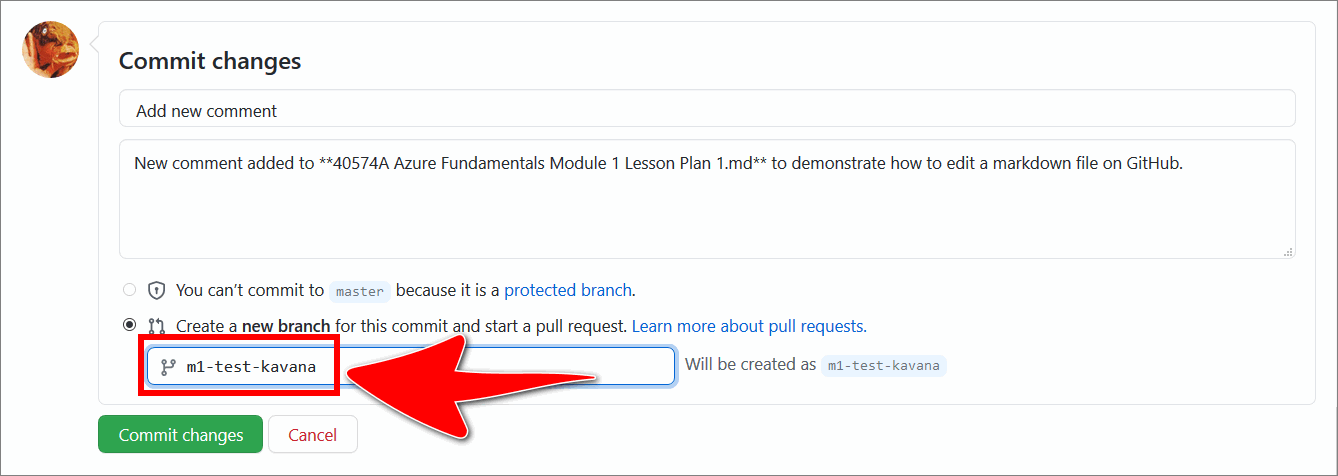
-
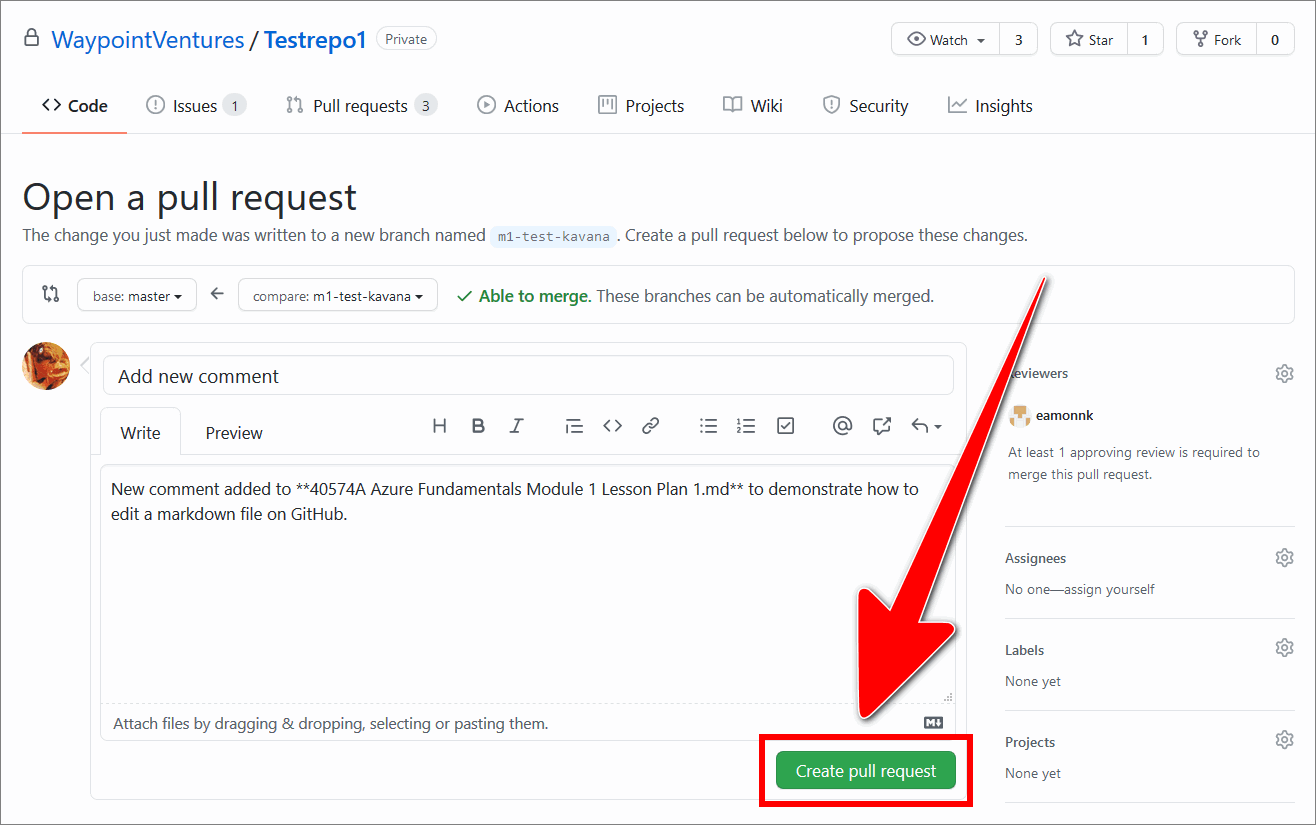
Select the Commit changes button.
-
On the GitHub Open a pull request page, verify that the Able to merge message is displayed at the top of the page.
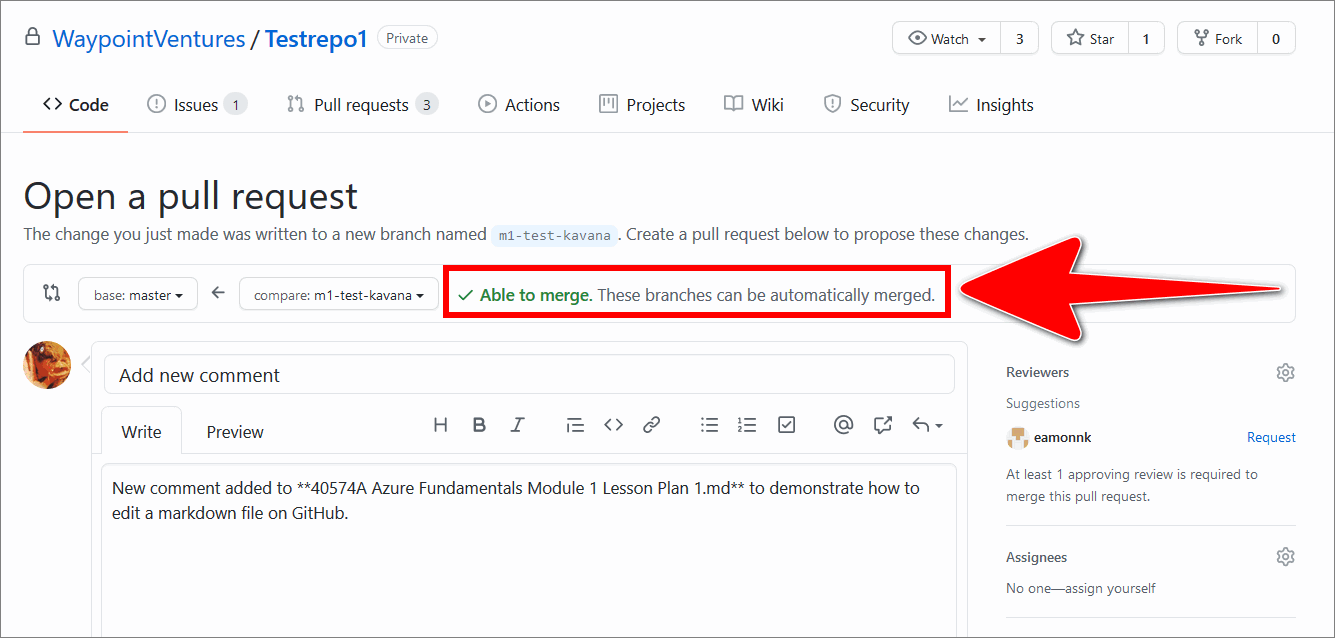
Note: If the Able to merge message is not displayed at the top of the Open a pull request page, address any issues with the file before you submit your pull request.
-
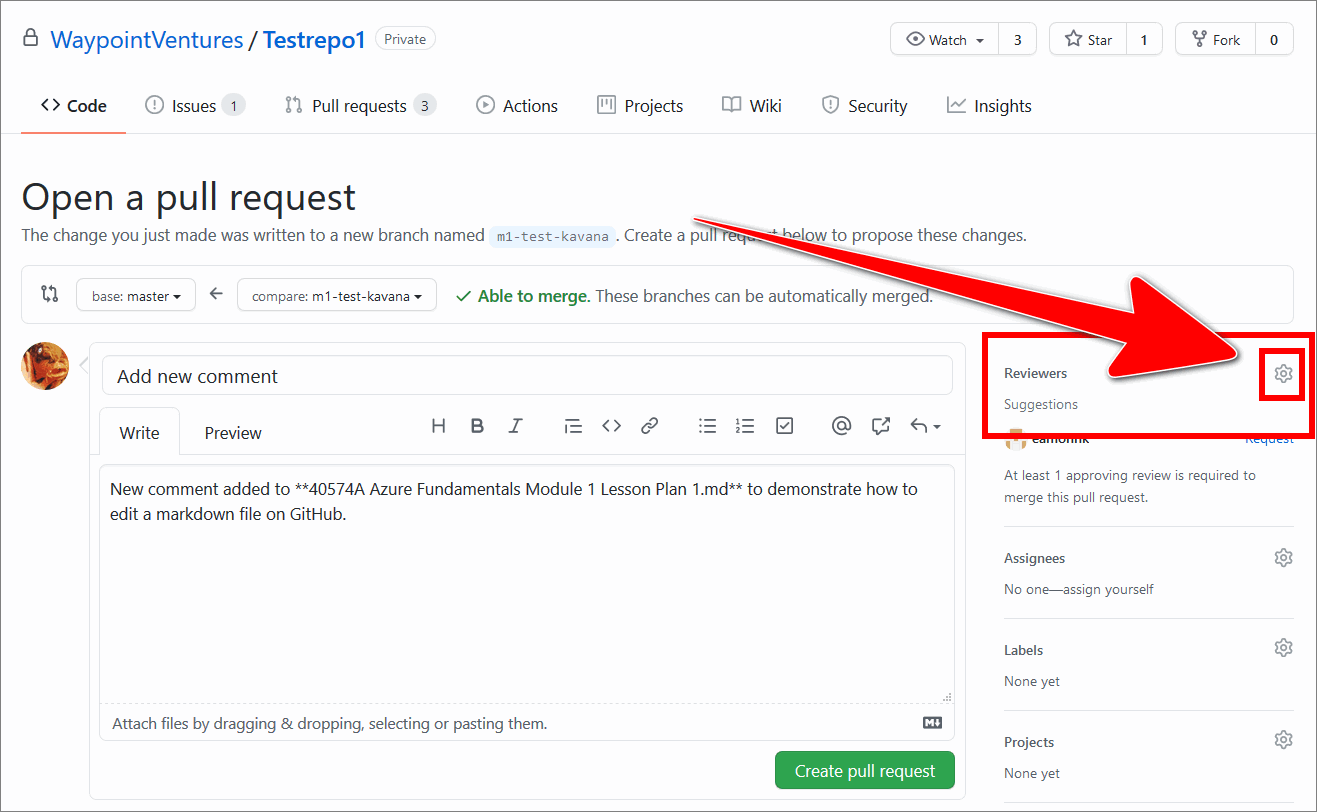
From the right side menu of the GitHub page Open a pull request, in the Reviewers section, select the gear icon.
-
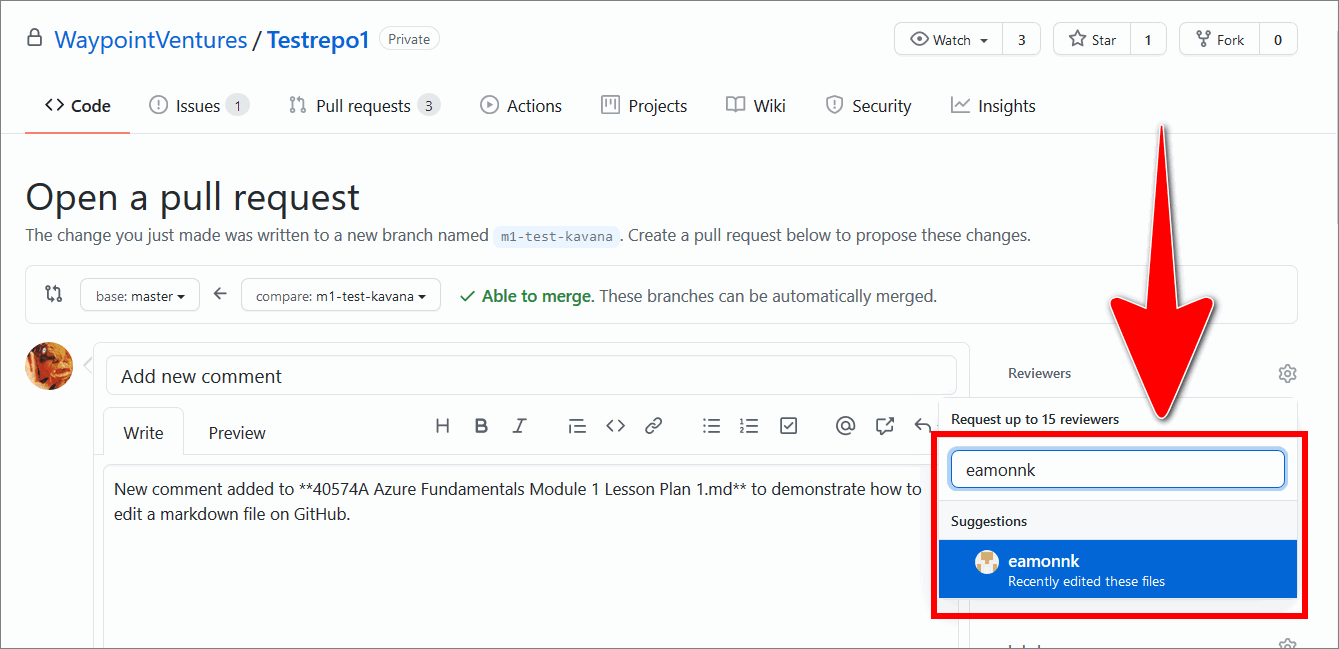
In the text entry field, enter a reviewer’s GitHub username. Then, choose the reviewer’s GitHub username from the list of suggestions to add the user to the pull request as a GitHub reviewer.
For example, the following image shows adding the GitHub user eamonnk to the pull request (PR).
-
Select the Create pull request button.
-
Verify that the status of PR you created is Open and pending review.
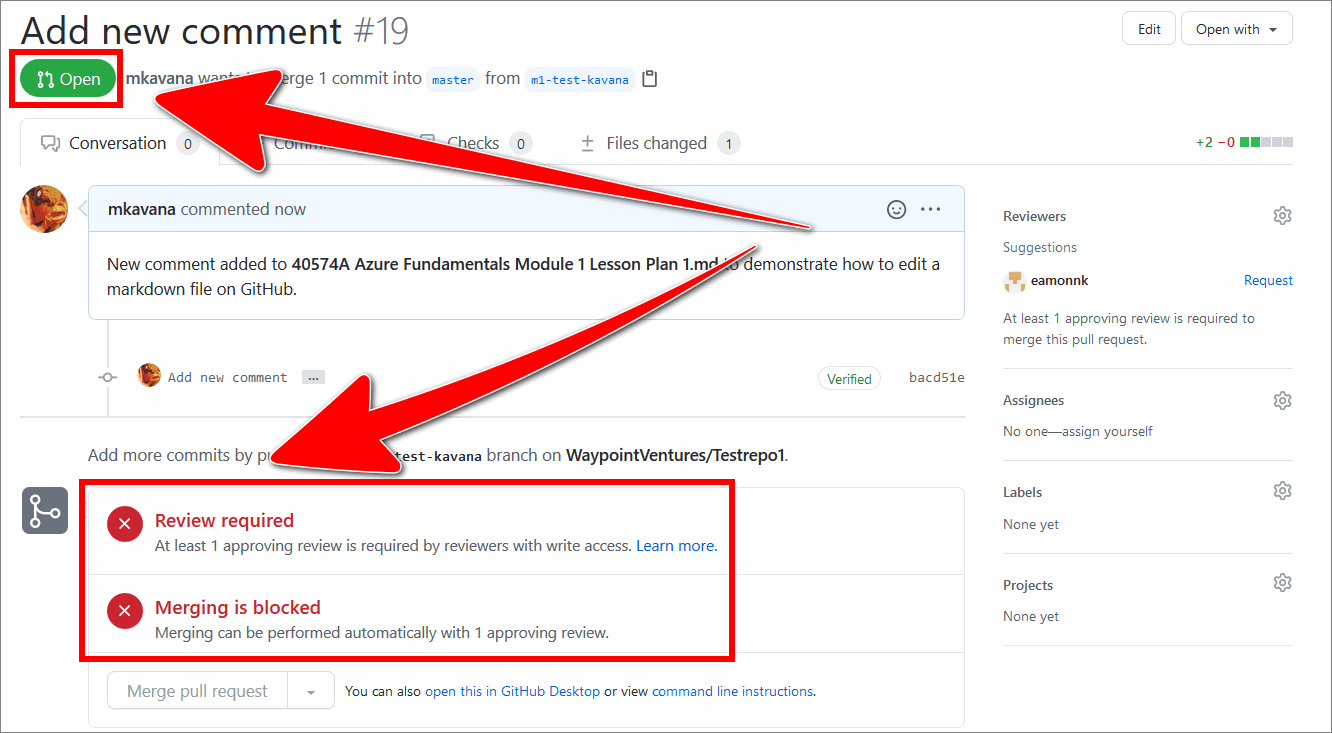
Note: Depending on the branch policy set by the GitHub administrator for your project, merging to the master branch might be blocked (as indicated in the previous image). Ask your project manager about the GitHub branch policy that appplies to the project you are working on.
-
GitHub will send you a notification when your changes have been reviewed and merged (usually by email).
When your changes are merged on GitHub, you can delete your unused branch by following the guide Delete branch.
You have used a web browser to edit, or add content into, a markdown file on GitHub successfully.
Appendices
Check the following supplementary Appendices for more details and context.