Send (push) files : Stage, commit and push to remote repo
This guide describes sending (or pushing) the course files you created or modified from your computer to GitHub/ AzDevOps, using the Visual Studio Code (VSC) editor.
Note: This guide uses the Git terminology described in the previous guide Terminology and concepts.
Prerequisites
Before you proceed complete the following:
- Install Visual Studio Code
- Install Docs Authoring Pack
- Install Word Count extension
- Install Pull Requests extension
- Install Azure Repos extension
- Install Git client
- Set Git credentials
- Terminology and concepts
- General project workflow
- Download course files (clone repo)
- Project branching policies
- Create new branch in VSC
Topics in this guide
Stage, commit, and push your files to GitHub/ AzDevOps
Complete the following steps to stage, commit and push your files to GitHub/ AzDevOps.
-
If you made changes to a file, save the file in VSC using Ctrl+S or File > Save.
Your modified file is now saved locally. You must now stage and commit the modified file to your local repo, then push it to GitHub/ AzDevOps.
-
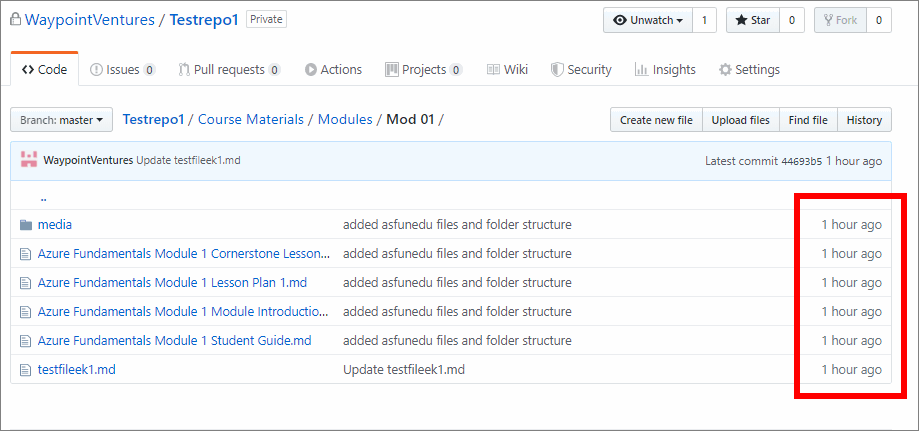
Sign into GitHub/ AzDevOps and verify that your file changes are not present on GitHub/ AzDevOps already by checking when the last commit occurred on GitHub/ AzDevOps.
Note: You don’t need to complete this step every time. Repeat this step until the push process and associated Git commands become familiar to you.
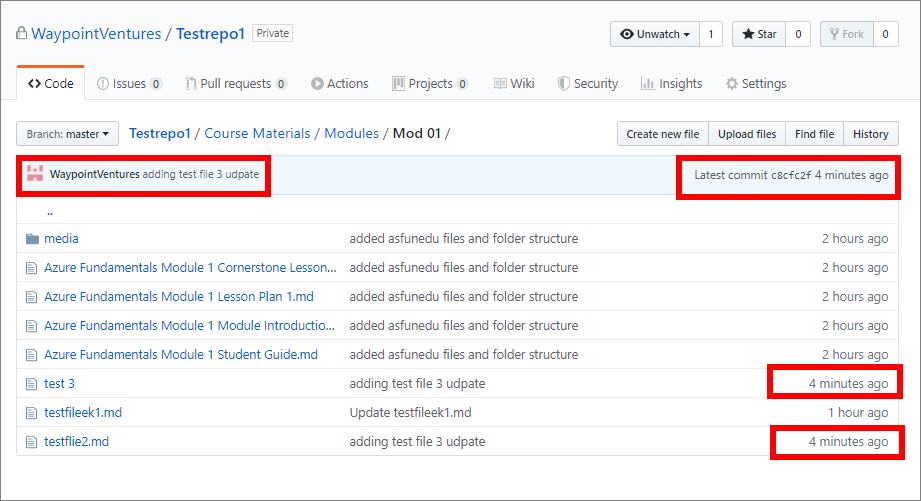
For example, in the following image, the last commit occurred on GitHub 1 hour ago to the files in the folder Mod 01.
-
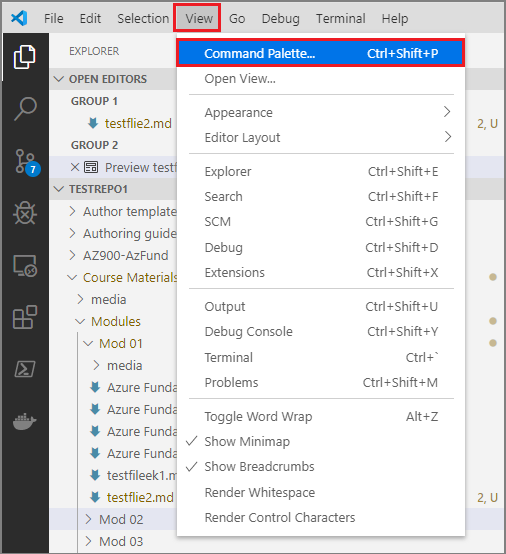
Start VSC, then open your local repo folder, and go to View > Command Pallette….
-
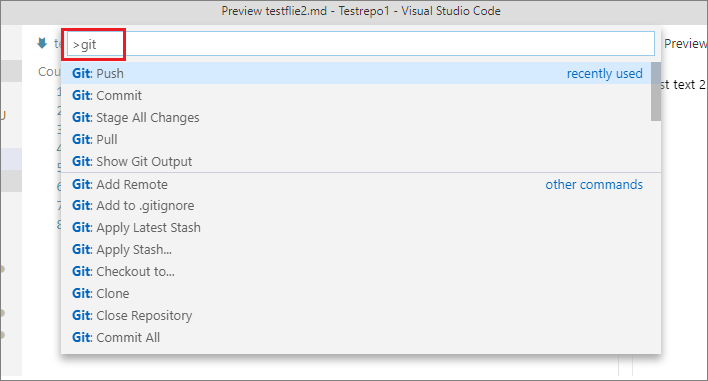
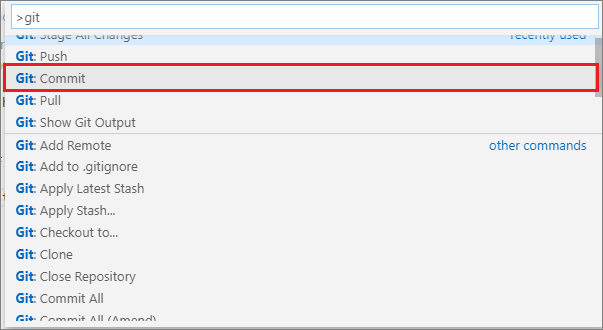
In the VSC Command Palette pane, type git to see a list of available Git commands.
-
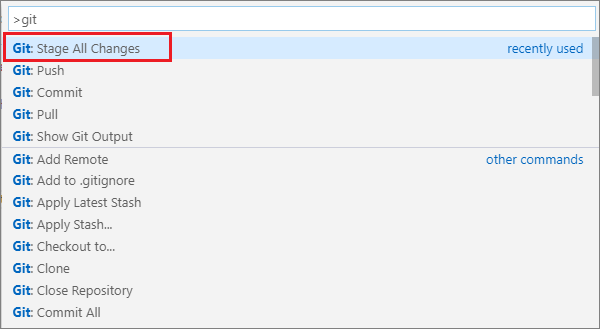
Select the command Git: Stage All Changes to stage your files.
-
If you receive a prompt to Choose a repository, select your local repo.

-
In VSC, under Open Editors, hover your cursor over the name of the file that you staged. The hover-over text should indicate the file’s status as Index added (this property was absent previously, before you staged your changes).

-
In the VSC Command Palette, type git and select the command git: Commit. This command commits the staged file changes to your local repo.
-
If you receive another prompt to Choose a repository, select your local repo.

-
When prompted, enter a message for the commit.
Your commit message must provide a concise description of the file changes you made. Your message should help other contributors understand the changes that you made. Your message will be visible to others, alongside the file, in the GitHub/ AzDevOps repo’s historical timeline.

-
When the Git commit command is finished, the Index added status associated with the file will be gone.
-
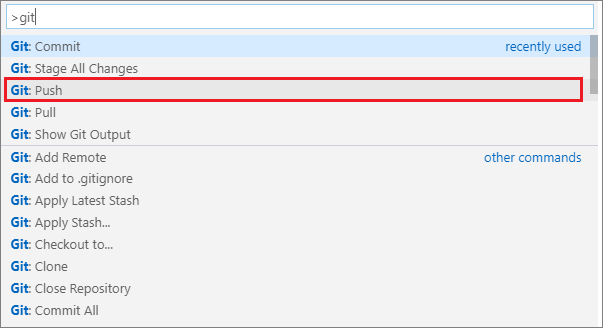
In VSC, open the Command Palette, then type git and select the command git: Push. This will send or push the file changes you committed up to GitHub/ AzDevOps.
-
If you receive a prompt to Choose a repository again, select your local repo.

Note: In VSC, the icon associated with a file in the current repo indicates the file’s Git status. A plus sign icon indicates that a file is ready for staging. An arrows icon indicates that a file is committed and ready to be pushed to GitHub/ AzDevOps.
-
When the Git push command is complete, sign in to GitHub/ AzDevOps and verify that your file changes are present on GitHub/ AzDevOps.
For example, in the following image, GitHub indicates that the files in the folder Mod 01 were updated 4 minutes ago.
You’ve pushed new/ modified course files from your computer to GitHub/ AzDevOps using VSC successfully.
Note: To resolve Git push-related errors in VSC, refer to Address Git push-related errors in VSC.
Address Git push-related errors in VSC
The following are common errors that can occur in VSC when you push files to GitHub/ AzDevOps. You must address these errors to run the git push command successfully.
Error: your file changes do not appear on GitHub/ AzDevOps
If your file changes are not present on GitHub/ AzDevOps, check that you staged, committed and pushed your file changes correctly. Repeat the Git commands from the previous Stage, commit, and push your files to GitHub/ AzDevOps, if necessary.
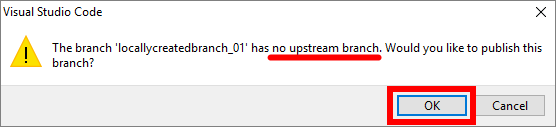
Error: no upstream branch
If you receive a message stating that your branch has no upstream branch, your branch is local only and does not exist on GitHub/ AzDevOps yet. This message is asking you to confirm that you want to publish your local branch to GitHub/ AzDevOps. If you choose OK, your local branch will be made available on GitHub/ AzDevOps.
Error: can’t push refs to remote
If you receive an error message stating that VSC Can’t push refs to remote. Try running pull first…. Run the git pull command from the VSC Terminal, as described in the previous guide Update branch (pull) in VSC. The git pull command gets the latest files from GitHub/ AzDevOps, and merges them with the files in your local repo. When the git pull command is completed successfully, run the git push command again.

Error: permission denied
You might receive an error message stating that VSC is …..unable to x … with file z … permission denied… (or similar). This error is most likely caused by having a file from your local repo open in an editor window in VSC. Close the file in VSC, then stage, commit and push your file changes to GitHub/ AzDevOps again.
Appendices
Check the following supplementary Appendices for more details and context.