This guide describes the general Technical Review process for a typical AzDevOps project.
Note: The technical review process described in this guide is generalized and is not intended to capture the process entirely. The process can vary between projects and you should ask your project manager about the specific review processes that apply to the course you are working on.
Prerequisites
Before you proceed complete the following:
Topics in this guide
- How a technical review is initiated
- Steps required to conduct a technical review
- Key points about the technical review process
Video
The following video covers the contents of this guide. Watch the video (optional), read this guide or both. If you cannot access the video, contact your project manager.
How a technical review is initiated
A content author, or subject mater export (SME), initiates a technical review by sending an email to the technical reviewer to request a review.
Note: An author requests a review whenever they’ve developed a predetermined unit of content for review, like a module, lesson, topic or other component. Ask your project manager about the units of content for review that apply to the project you’re working on.
The author’s email requesting a review provides the technical reviewer with the following details:
- Module number: The module number that the file for review belongs to.
- Task type: The type of review required (i.e. technical review).
- Source branch name: The name of the branch that the file for review is on. This is also referred to as the compare or originating branch.
- Target branch: The name of the branch that the corrected/ changed file will be merged into, after the review is completed. This is also referred to as the base branch, and is typically the master branch.
Note: A content author develops content on their own authoring branch, with a separate authoring branch for each module. Authoring branches use the naming convention
m <module number> auth <author's surname>, where:
- The prefix
mis for “module”.<module number>refers to the module number that the file to be reviewed belongs to.authis a short code for “content authoring” i.e. the stage in the process the file is at.- The author’s
<surname>is added as a suffix to distinguish the author’s work from other contributors.Example authoring branch name
The following explains how the example authoring branch name
m6authleeis constructed.
mis an abbreviation for “module”.6is the number of the module that the file belongs to.authis a short code for “content authoring”.leeis a reference to the author’s surname.Putting the previous items together results in the authoring branch name
m6authlee.
Steps required to conduct a technical review
As part of a typical project, a Technical Reviewer completes the following steps to conduct a technical review.
-
When you receive an email from a content author requesting a review, note the name of the authoring branch to be reviewed.
For example, if the surname of the person authoring module 5 is Smith, the authoring branch name will be similar to m5-auth-smith. If you’re unsure, contact the author to confirm the authoring branch name.
Note: To view details about authoring branch naming conventions, refer to How a technical review is initiated.
-
Access the first file to be reviewed on Azure DevOps by following the guide View course files in web browser.
-
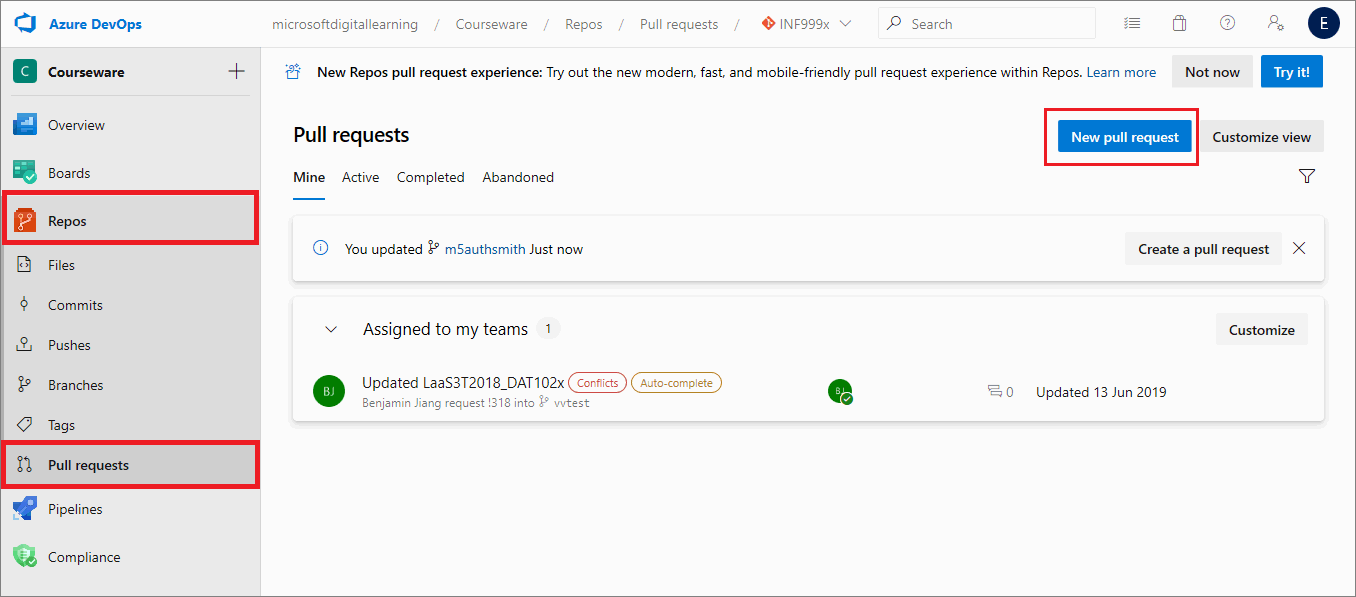
On Azure DevOps, select Repos, then choose Pull requests, and select New pull request.
-
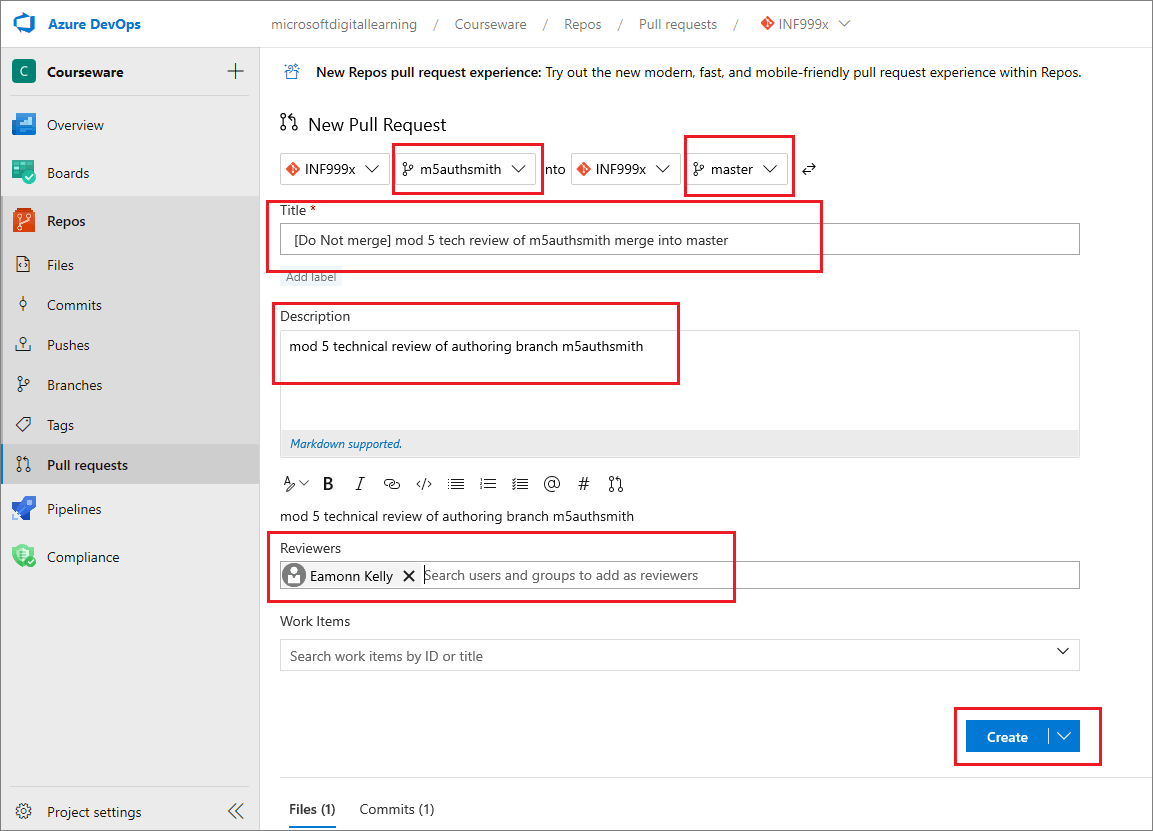
On the New pull request page, add the following information, and when you’ve finished, choose Create.
- Source and Destination branches: Set to merge the authoring branch into master branch. For example, in the following image, the pull request (PR) is set to merge the authoring branch m5authsmith into master.
- Title: The PR’s title should describe the PRs purpose. For example, [Do Not merge] mod 5 tech review of m5authsmith merge into master. To describe the PRs purpose, add the following information into the PR title text field:
- prefix [Do not merge]
- number of the module that the file you’re reviewing belongs to
- type of review you’re conducting (i.e. technical review)
- name of the (authoring) branch to merge from
- name of branch to merge into (i.e. master)
- Description: Enter a brief description of the PR. For example, mod 5 tech review of authoring branch m5authsmith
- Reviewers : Select the author’s AzDevOps username, and add the AzDevOps usernames of any other reviewers or relevant stakeholders.
Note: Using the prefix [Do not merge] in the PR title indicates that the PR must not to be merged into master. Instead, the PR is kept open (i.e. not merged) to allow the author to apply changes to the authoring branch during the technical review. You will close the PR, without merging, when all changes/ corrections have been applied to the authoring branch, and the updated content has passed technical review.
-
Review the contents of the file for technical accuracy in accordance with WayPoint Ventures’ technical review guidelines.
-
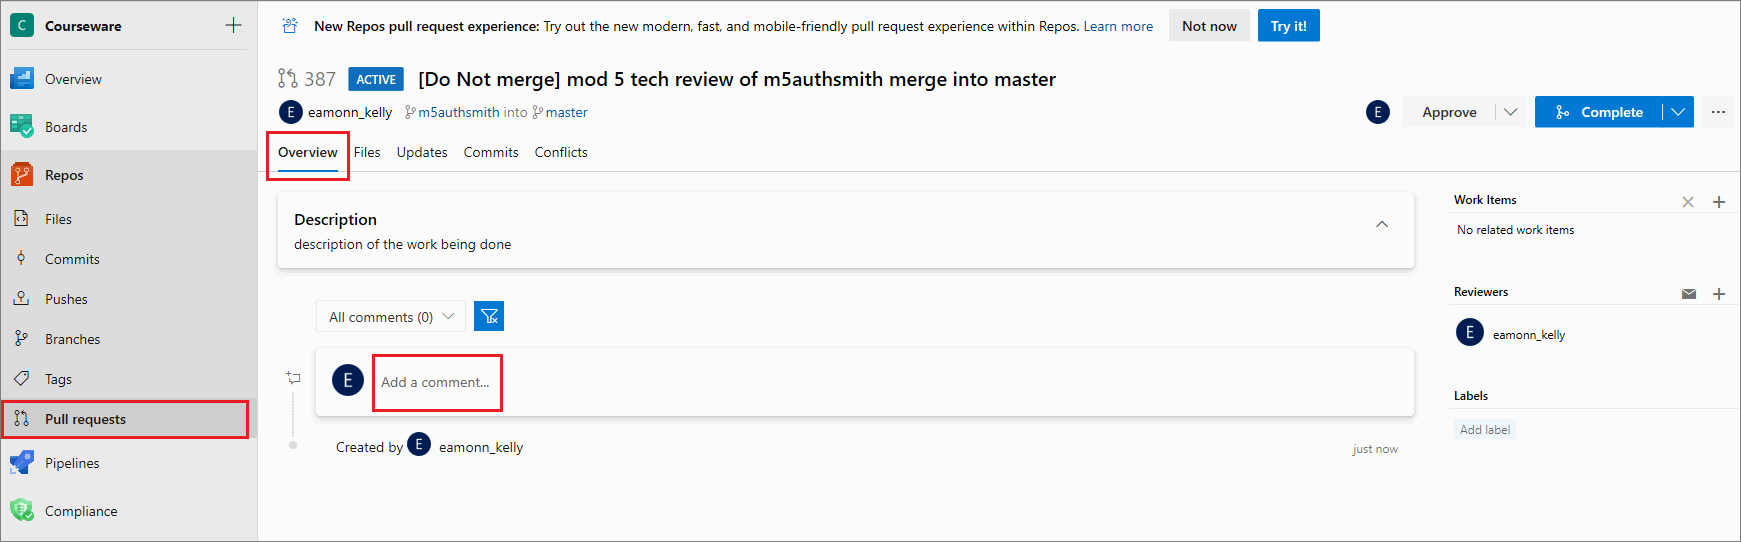
To propose a change/ correction, select Repos, then choose Pull requests, and select the PR you created in step 3.
-
In the Pull request, go to the Overview tab, choose Add a comment…, enter a description of your proposed change, and select Comment.
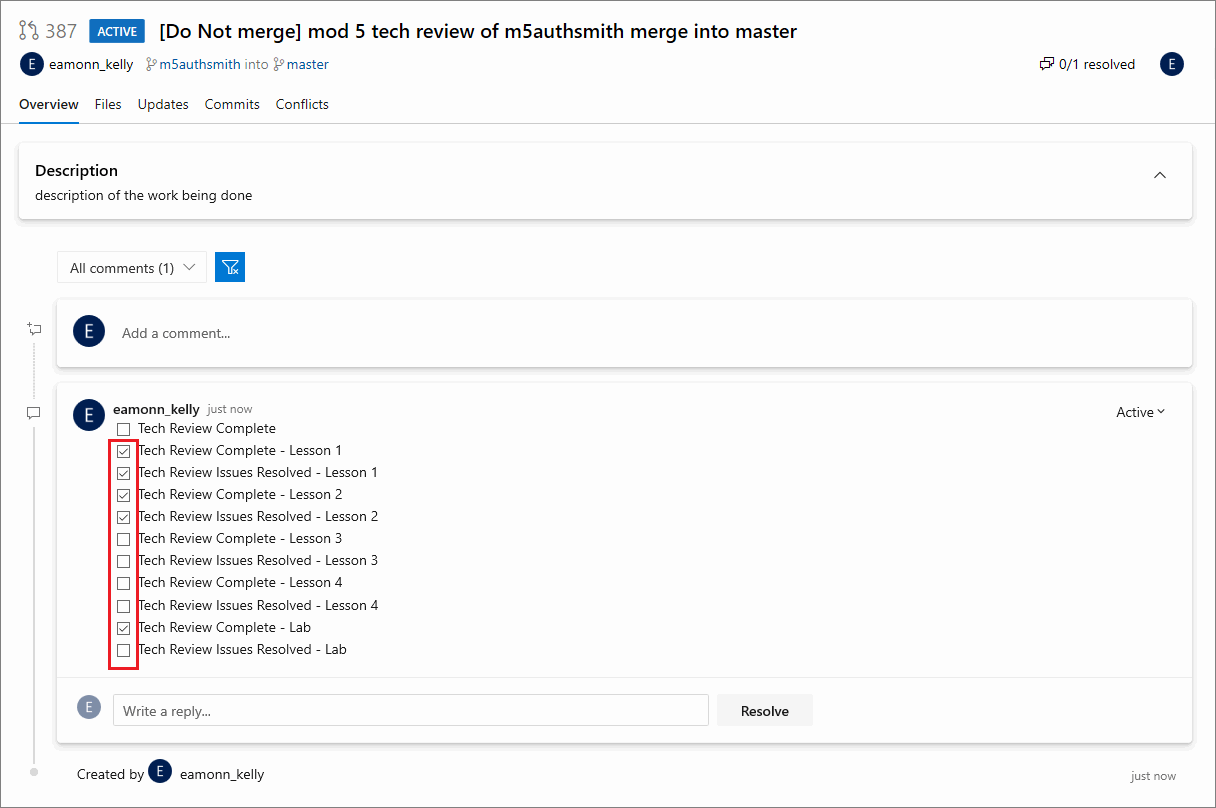
Note: [Optional] Track the progress of your review by adding a checklist of the items you’re reviewing. Consult the design documentation and the content author to determine a list of items for review, like the number of lessons or topics for review. Each topic, lesson or component can be added as a checklist item. Create a markdown checklist by copying the following markdown and pasting it into a comment, then choose Comment.
The following is an example of a markdown checklist for a module with four lessons, and one lab. Adapt the checklist to suit your particular requirements.
- [ ] Tech Review Complete
 - [ ] Tech Review Complete - Lesson 1
 - [ ] Tech Review Issues Resolved - Lesson 1
 - [ ] Tech Review Complete - Lesson 2
 - [ ] Tech Review Issues Resolved - Lesson 2
 - [ ] Tech Review Complete - Lesson 3
 - [ ] Tech Review Issues Resolved - Lesson 3
 - [ ] Tech Review Complete - Lesson 4
 - [ ] Tech Review Issues Resolved - Lesson 4
 - [ ] Tech Review Complete - Lab
 - [ ] Tech Review Issues Resolved - Lab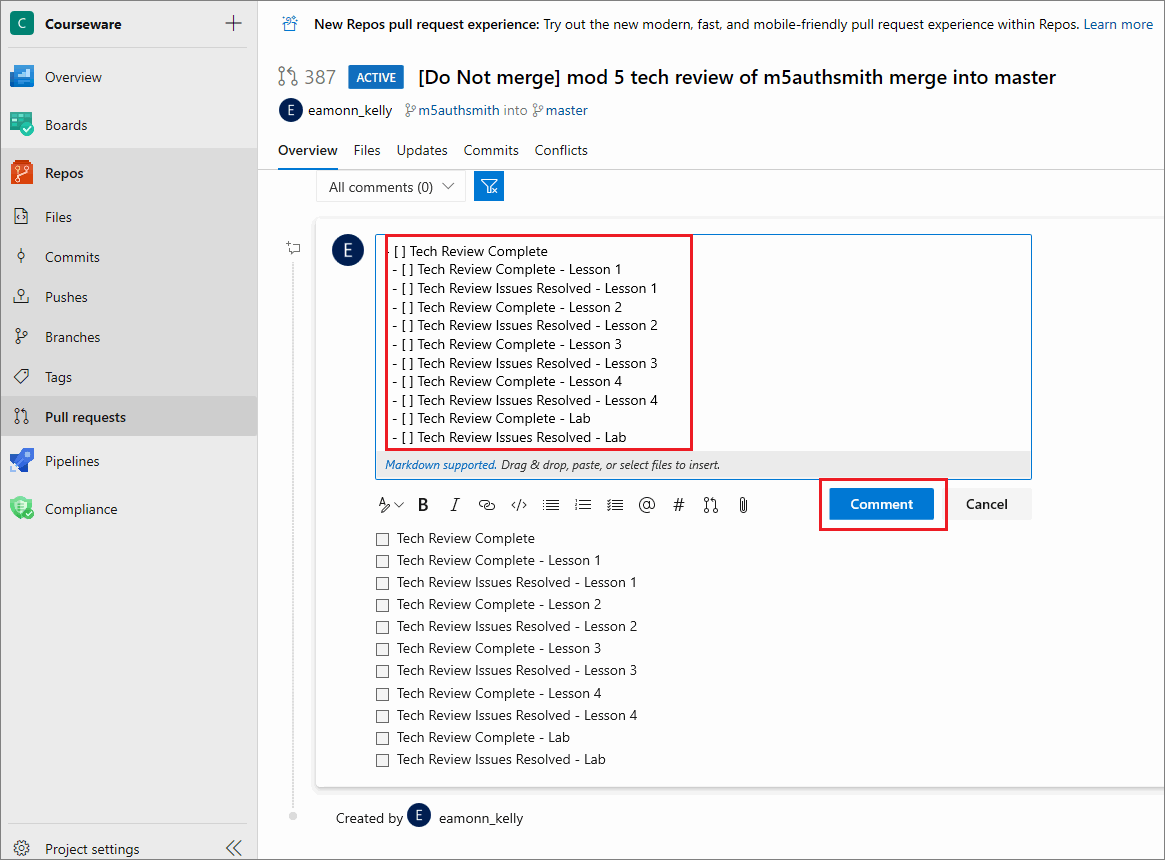
When you’ve reviewed an item from the checklist, select the appropriate checkbox to mark the item as completed. Alternatively, edit the comment by placing an x in the checkbox to indicate a check mark.
A checklist is optional but recommended, as checklists help reviewers, authors, and other stakeholders track the review’s progress.
-
Notify the author when you’ve added a comment or about any required corrections/ changes to the file’s contents.
-
Work with the content author to determine which of your proposed corrections to apply to the file’s contents. Allow the content author sufficient time to:
- apply, save, stage and commit the necessary file changes on their originating authoring branch (in VSC).
- push their corrected/ changed content to the project’s Azure DevOps repo.
- notify you that the corrected/ changed content is available from the project’s Azure DevOps repo.
-
As the author makes changes that address the review comments, review the author’s changes, and Resolve the review items.
Note: If you’re using a checklist to track the review’s progress, whenever the author applies a changes that results in a checklist item passing technical review, update the corresponding checkbox item (in the PR Comments on AzDevOps) to indicate that the item has been addressed and passed.
-
Repeat step 6 to 10 until all of the comments (or checklist items) are addressed, and the content passes technical review.
-
When the content passes technical review, ask the author to abandon (close) the PR on AzDeOps (without merging).
To abandon the PR, open the PR in AzDevOps, select Complete, and choose Abandon.
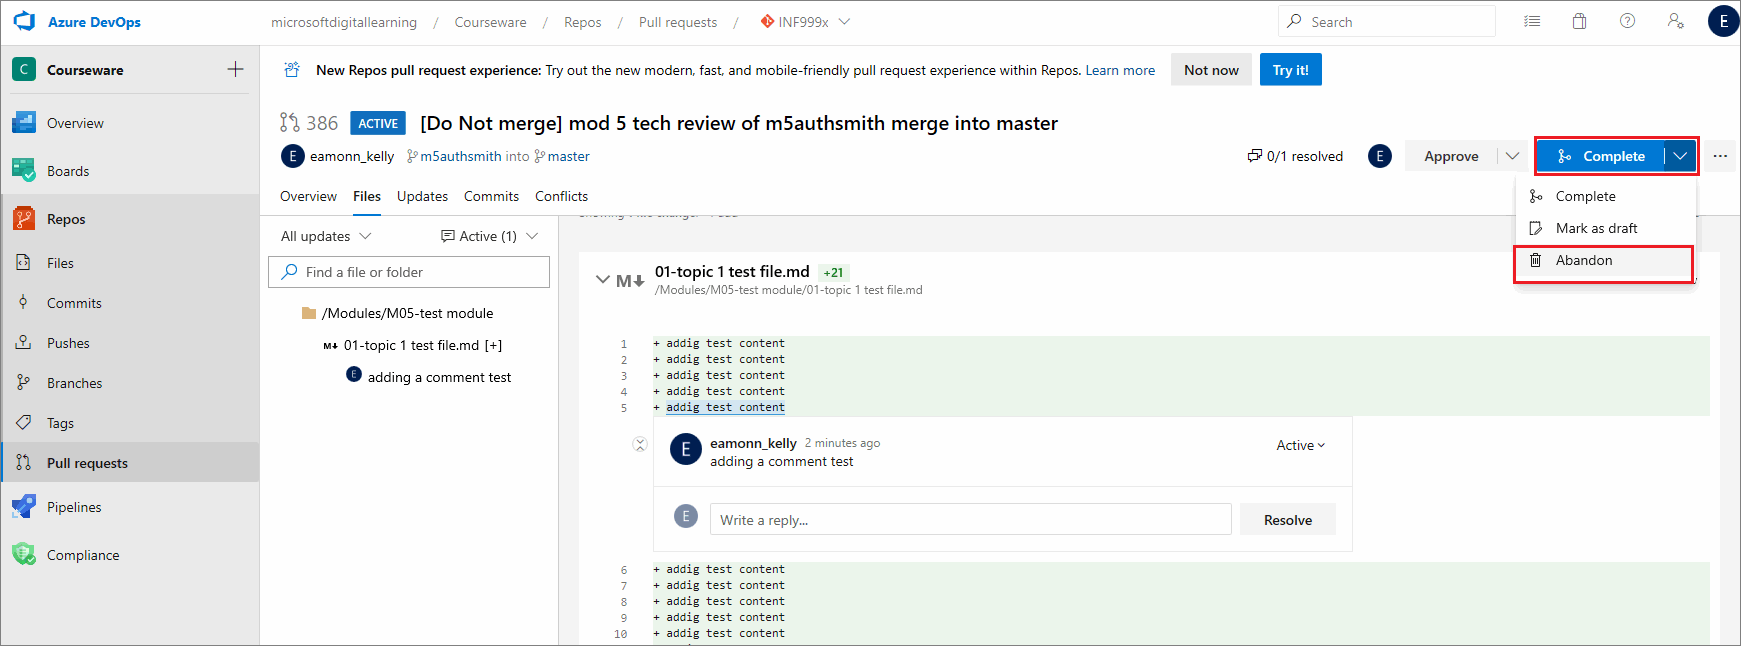
Note: Do not to merge the PR into master, and do not delete the authoring branch.
When the PR state changes to ABANDONED, the PR is no longer listed as active on the Pull requests page.

-
The author should notify the Instructional Design (ID) reviewer that authoring branch’s contents has passed technical review, and is ready for ID review.
You have conducted a technical review successfully.
Key points about the technical review process
The following are key points about the technical review process.
Author (AU)
- AU develops content on a dedicated authoring branch.
- AU sends an email to the Technical Reviewer to request a technical review.
Technical Reviewer (TR)
- TR does not create a new branch to conduct a technical review.
- TR opens a new pull request (PR).
- TR configures the PR to merge from the originating authoring branch into master.
- TR keeps PR open (not merged) for the duration of the technical review.
- TR reviews the content on the authoring branch.
- TR provides AU with review feedback by adding comments to the open PR.
AU
- AU responds to TR’s feedback by adding comments to the open PR.
- AU applies file changes/ corrections to content on the authoring branch.
- AU closes the PR without merging, when all changes/ corrections are applied, and the content passes technical review.
- AU notifies ID reviewer when the authoring branch’s content has passed technical review, and is ready for ID review.
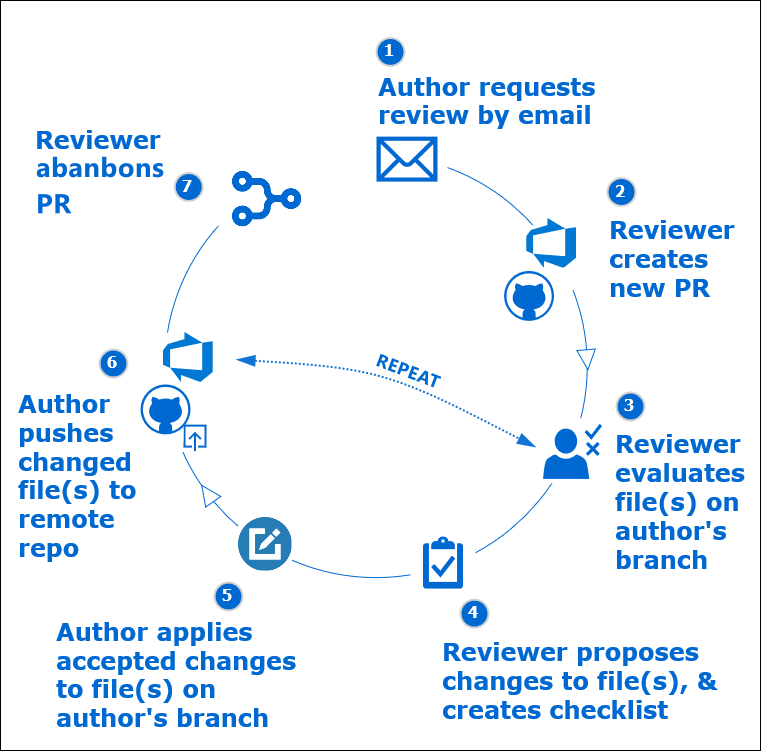
The following diagram provides an overview of the key points in the general technical review process for a typical project.
Appendices
Check the following supplementary Appendices for more details and context.