This guide lists key the considerations for evaluating an AzDevOps Pull Request (PR), and describes how to work in an AzDevOps PR to evaluate proposed file changes/ additions.
Prerequisites
Before you proceed complete the following:
- Install Visual Studio Code
- Install Docs Authoring Pack
- Install Word Count extension
- Install Pull Requests extension
- Install Azure Repos extension
- Install Git client
- Set Git credentials
- Terminology and concepts
- General project workflow
- Download course files (clone repo)
- Project branching policies
- Create new branch in VSC
- Send (push) files
- Markdown syntax guide
- Add/ edit markdown in VSC
- Add/ edit images in VSC
- Fix linter issues
- Pull requests overview
- Create pull request
Topics in this guide
- Key considerations for evaluating an AzDevOps PR
- Open a file in an AzDevOps PR
- Add and resolve AzDevOps PR review comments
- Open an image file in an AzDevOps PR and add comments
- Mark a file as reviewed in an AzDevOps PR
Video
The following video covers the contents of this guide. Watch the video (optional), read this guide or both. If you cannot access the video, contact your project manager.
Key considerations for evaluating an AzDevOps PR
This topic describes key considerations for evaluating an AzDevOps PR.
An AzDevOps PR contains file changes/ additions proposed by another contributor. Typically, when a contributor creates an AzDevOps PR, they also nominate a reviewer on AzDevOps. The AzDevOps reviewer must then evaluate the contributor’s proposed changes, within the PR, to determine their acceptability.
Note: Unlike GitHub, reviewers cannot modify files in an AzDevOps PR from a web browser directly. All file modifications must be applied to the originating branch. It might be quickest to modify a file from a PR in Visual Studio Code (VSC), and then stage, commit, and push the modified file “up” to AzDevOps.
If you’re unsure, check with your project manager.
The following list of key considerations can help AzDevOps reviewers evaluate an AzDevOps PR.
- On AzDevOps, changes made to files on one branch can be compared and contrasted with (unchanged) files on the originating branch using the Differences (or diff) feature.
- The diff feature on AzDevOps shows how the contents of a file were modified, line-by-line. Within a “diffed” file, red colored line items indicate deletions, and green colored line items indicate additions.
- There’s no way to select and merge individual changes from an AzDevOps PR. All or none of the changes must be accepted and merged, or rejected.
- Comments can be added to a PR to facilitate a discussion of the changes proposed within an AzDevOps PR between the person proposing the changes, the AzDevOps reviewer, and any other contributor added to the PR. For example, between an Author, a Content Editor, and an AzDevOps reviewer.
- AzDevOps reviewers can use comments to provide the PR owner with feedback on their proposed file changes. The PR owner can work on their originating branch to apply the reviewer’s suggestions to the files in the open PR. When the reviewer and PR owner are satisfied with the corrections/ edits, the contents of the PR can be merged.
- Alternatively, an AzDevOps reviewer can apply their corrections/ edits to a new branch, and then open a new PR to merge the files that contain the reviewer’s edits.
Note: For general information about when a PR is created, and by whom, choose a guide that corresponds to your role from the navigation menu on the left side of this website. The PR evaluation and review processes can vary between projects. If you’re unsure, ask your project manager about the PR evaluation and review processes that apply to the project you’re working on.
Open a file in an AzDevOps PR
Complete the following steps to open a file in an AzDevOps PR (markdown or image file).
-
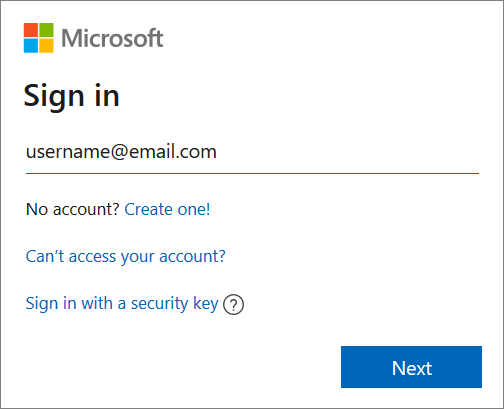
Open a web browser, go to the AzDevOps website at https://dev.azure.com, and sign in.
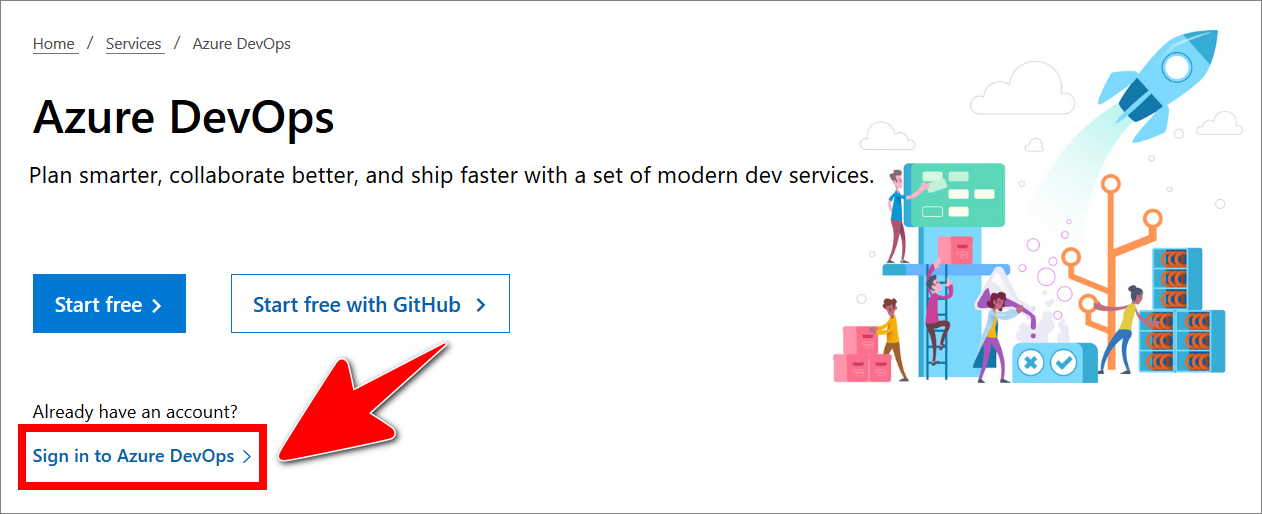
.
-
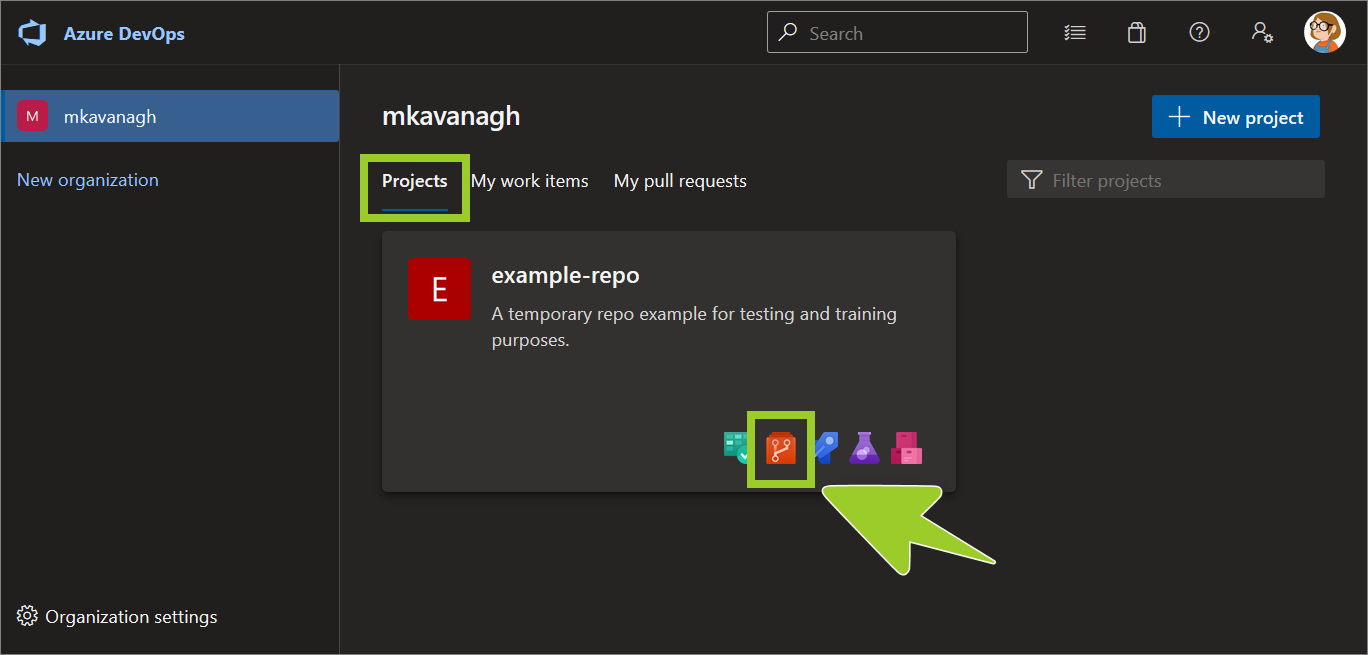
On the Projects tab, locate the project repo you require, and select the Repos icon.
For example, in the following image, the Repos icon for the project example-repo is selected.
-
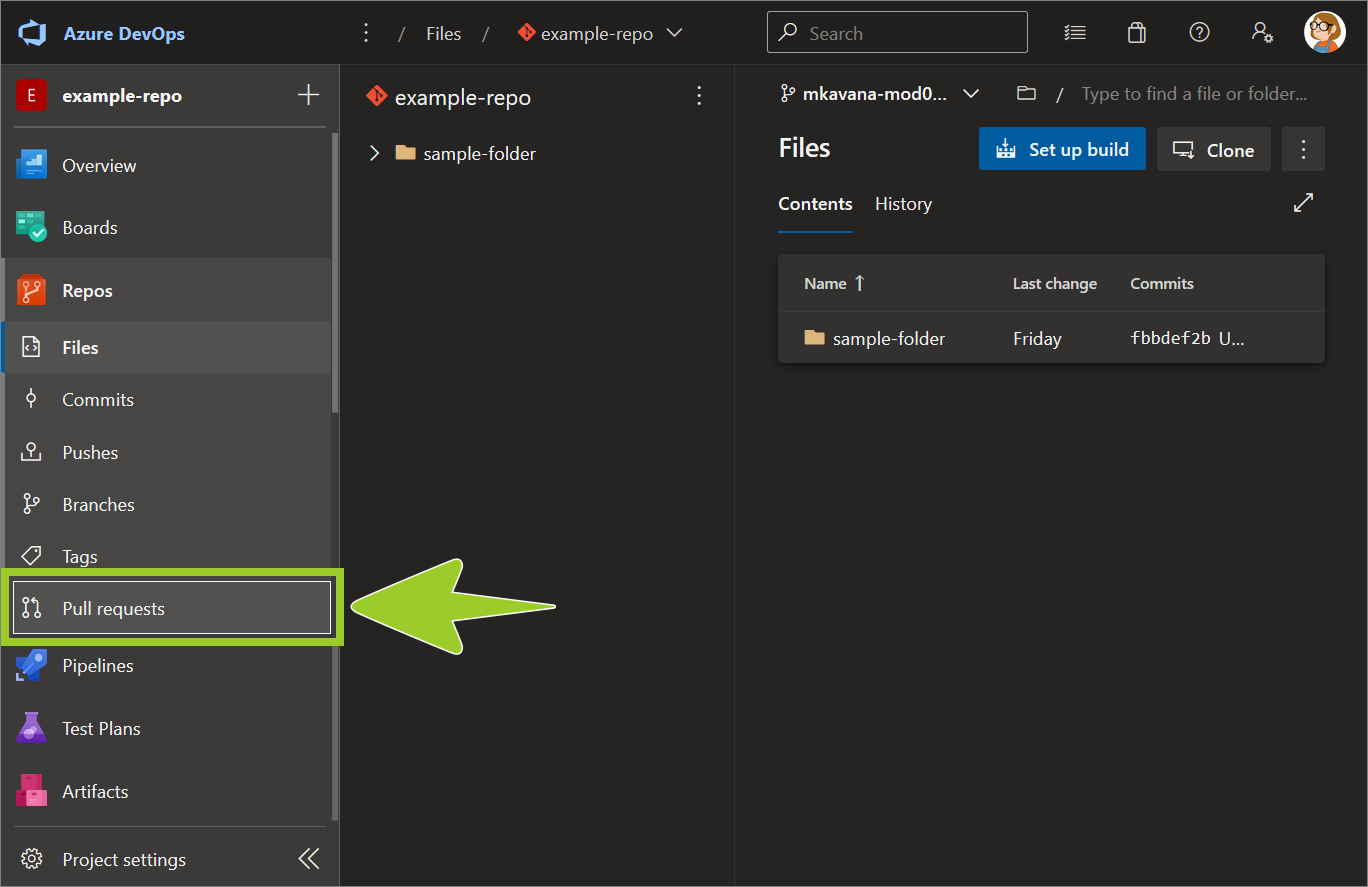
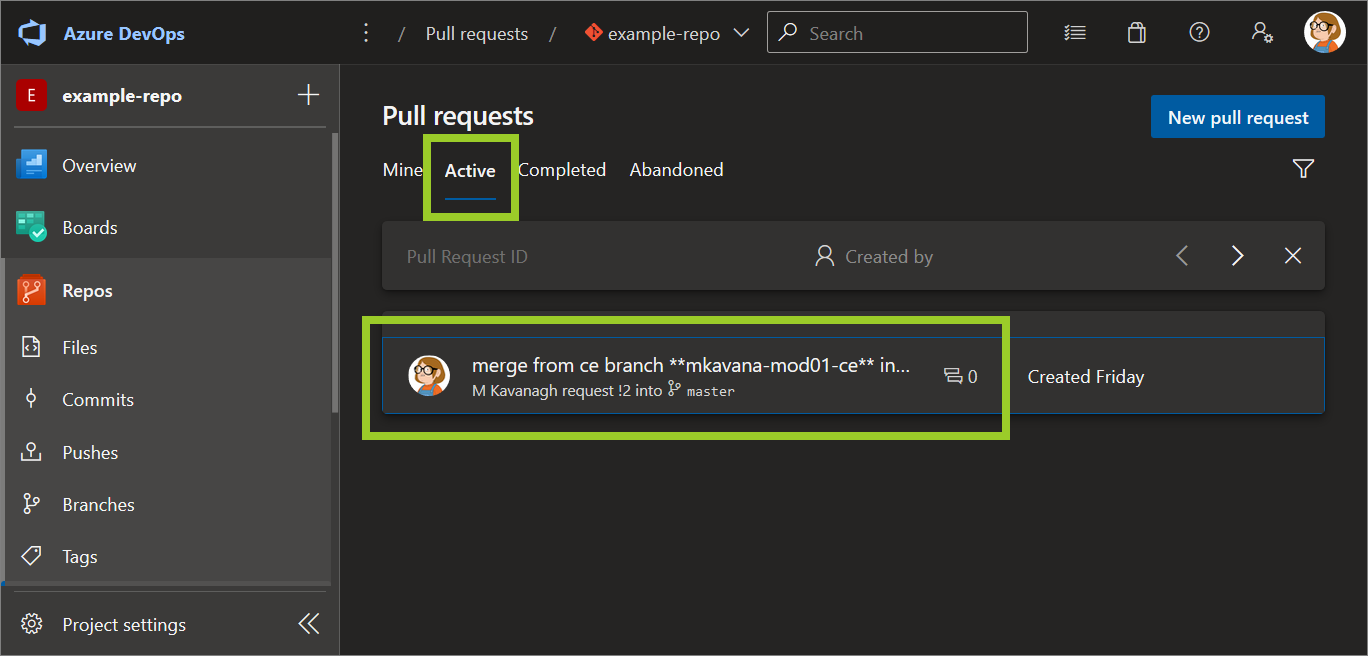
Select Pull requests from the left side menu.
-
In the Pull requests pane, on the right side, choose the Active tab for a list of open PRs. Then, select the PR with the file you want to open.
For example, in the following image, the PR merge from ce branch **mkavana-mod01-ce** into **master** is selected from the list of open PRs in the Active tab.
-
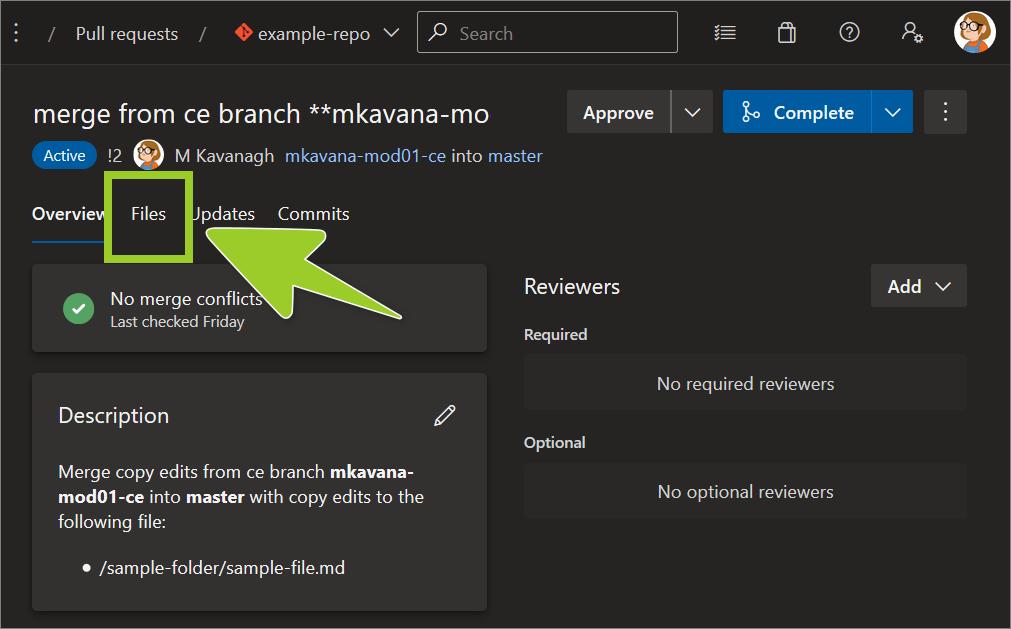
Choose the Files tab to access a list of the files the PR contains.
-
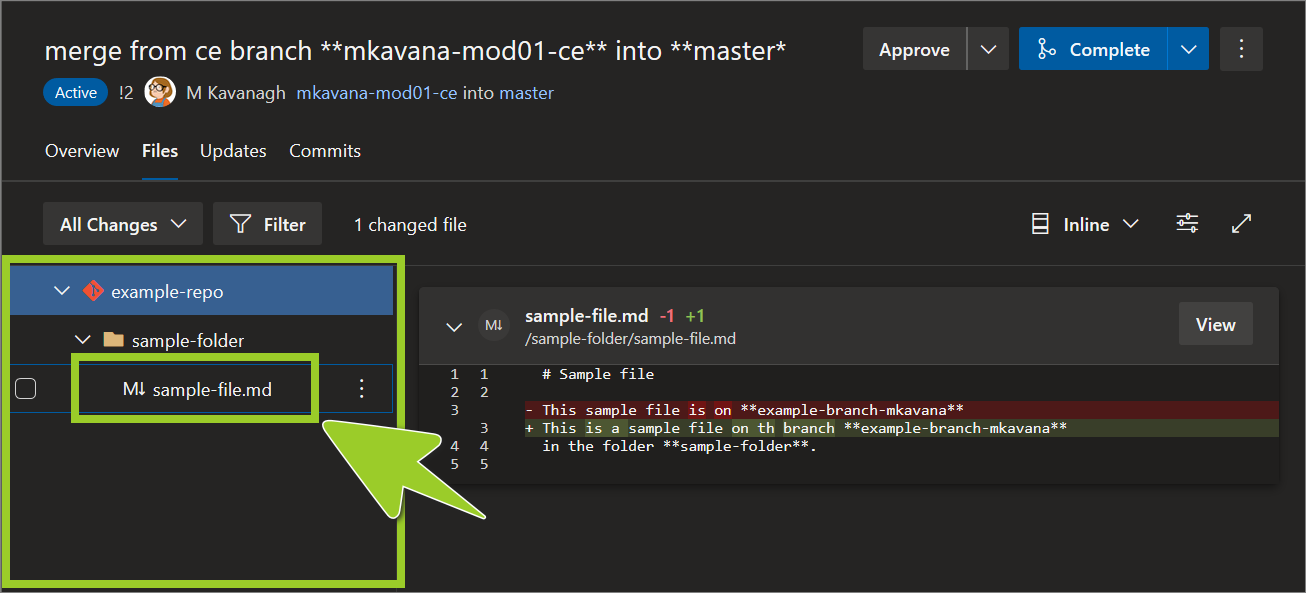
Select a file from the File navigation pane on the left side.
Note: If the PR has many files, the files are listed in the File navigation pane.
For example, in the following image, the file sample-file .md is selected from the File navigation pane.
-
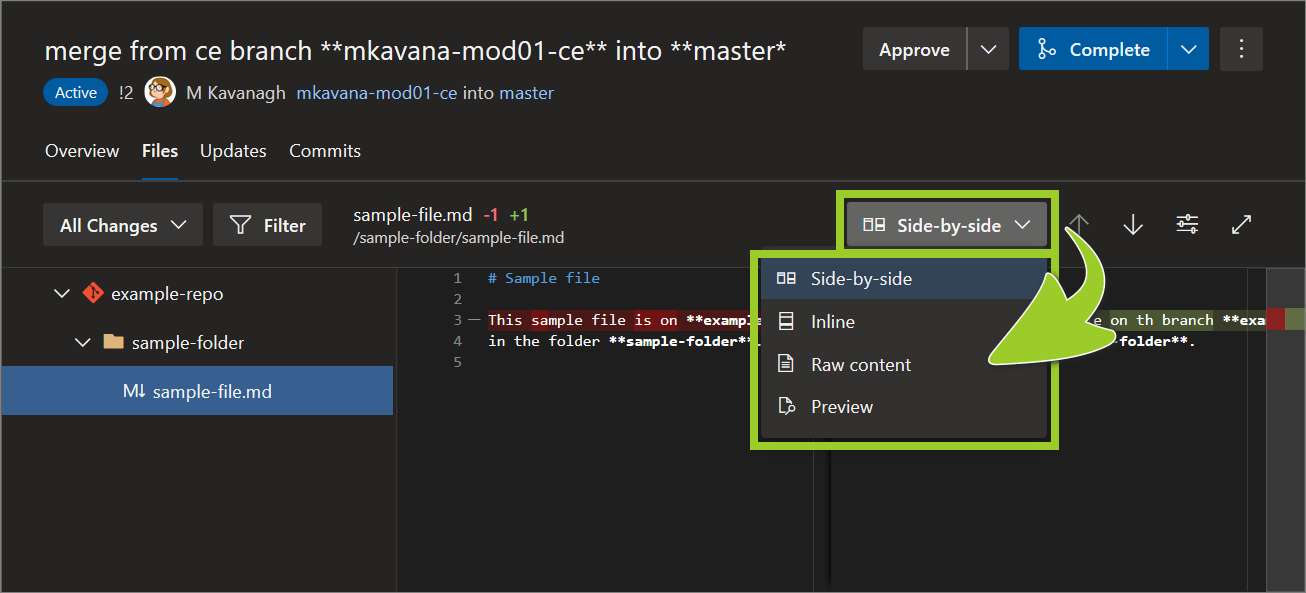
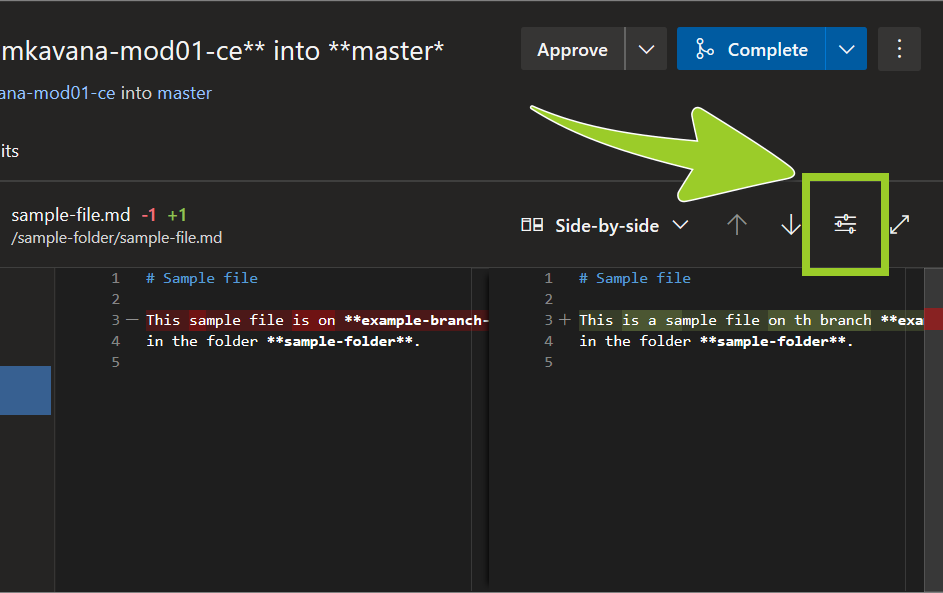
Set the dropdown option for comparing file changes to Inline diff or Side-by-side diff.
Note: To modify the AzDevOps Editor preferences, choose the Settings icon.
-
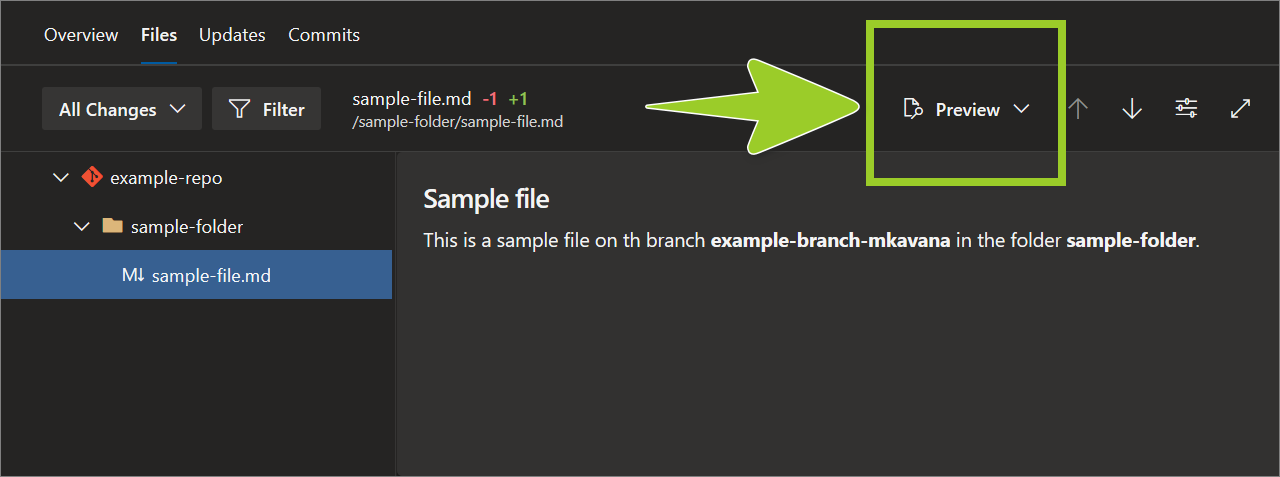
For a rendered preview of the file’s content, set the dropdown option for comparing file changes to Preview.
For example, in the following image, the dropdown option is set the dropdown to Preview the contents of the file sample-file .md.
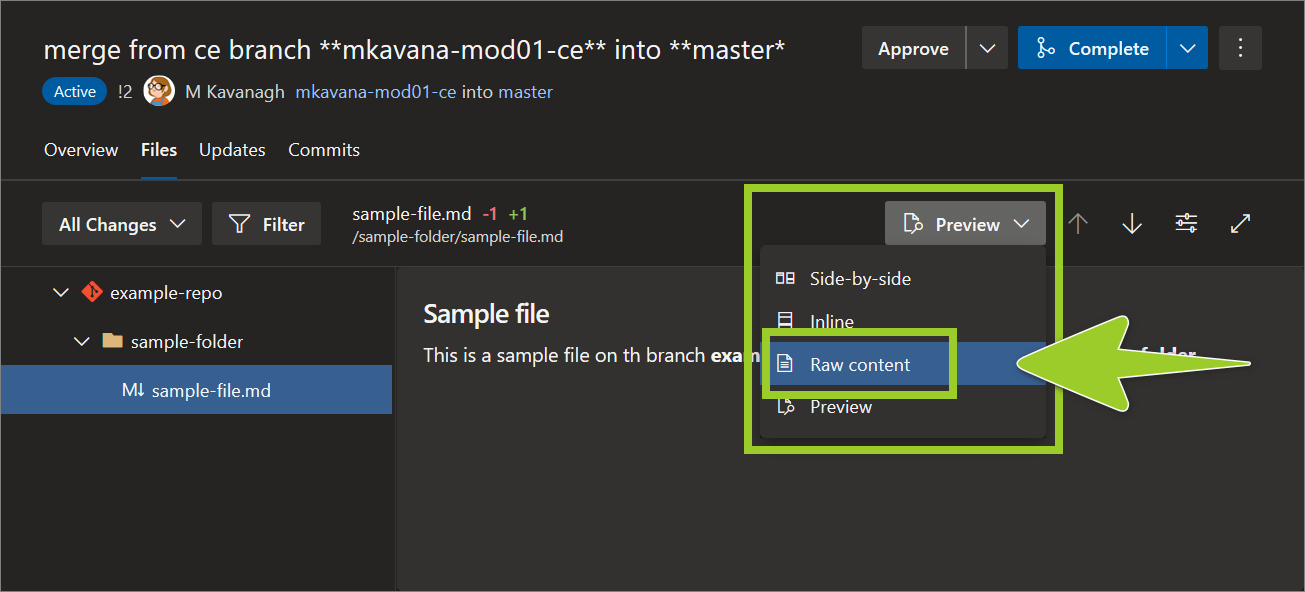
-
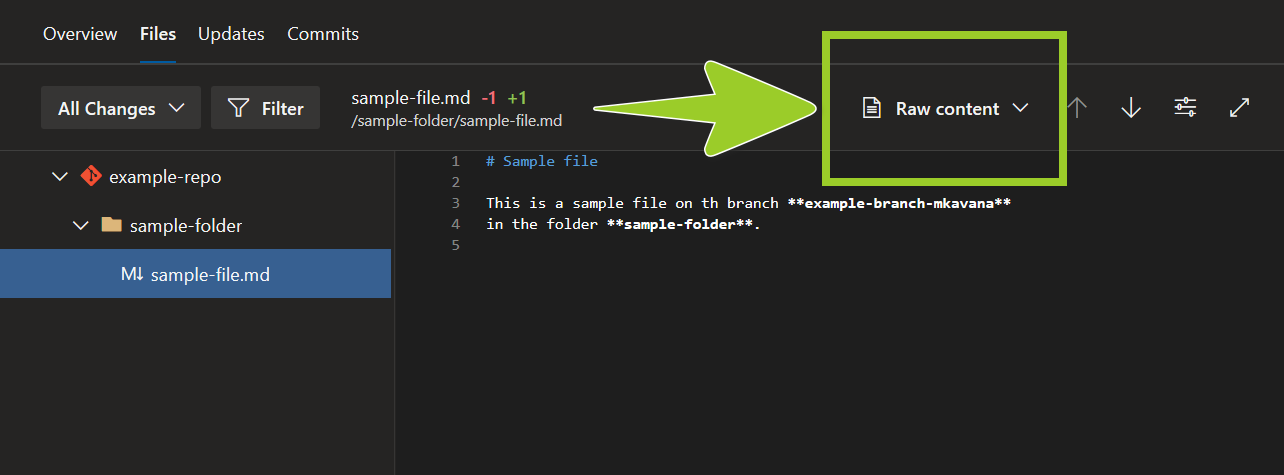
To return to the “raw” markdown content, set the dropdown option Raw content.
For example, in the following image, the dropdown option is set the dropdown to Raw content.
You’ve opened a file in an AzDevOps PR successfully.
Add and resolve AzDevOps PR review comments
You can add review comments to the files in a PR, to initiate a discussion about a proposed file change.
Complete the following steps to add and resolve review comments in a file within an AzDevOps PR.
-
Open a file in an AzDevOps PR by referring to Open a file in an AzDevOps PR.
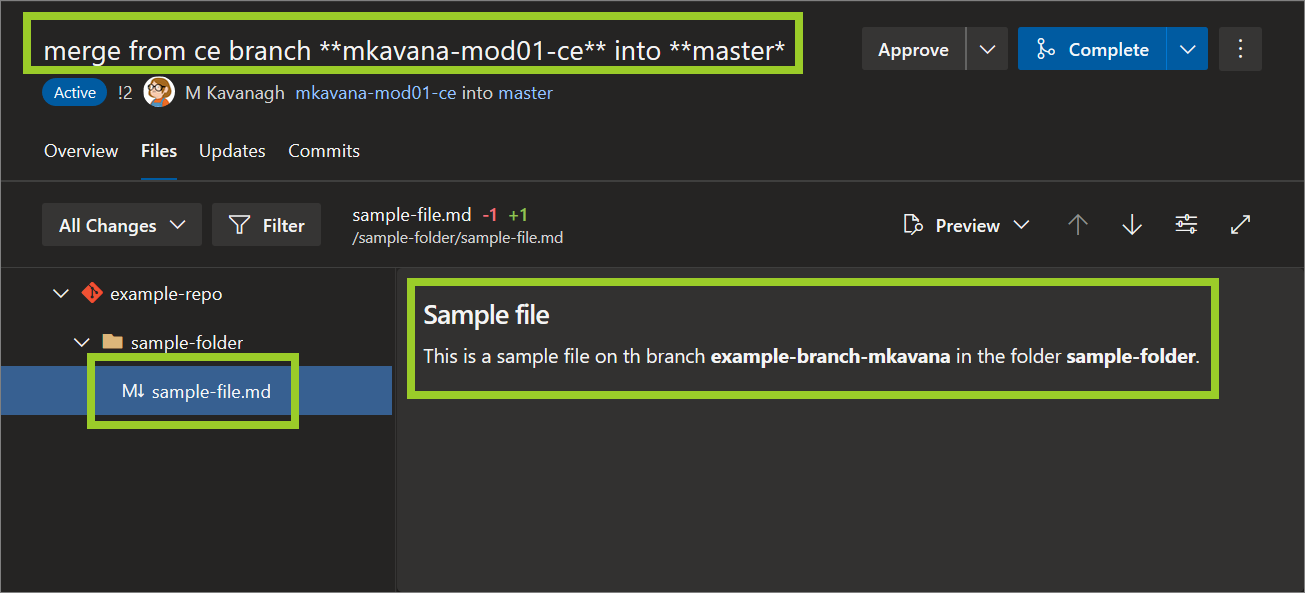
For example, in the following image, the file sample-file .md is open in the PR merge from ce branch **mkavana-mod01-ce** into **master**.
-
With the file open, set the dropdown option for comparing file changes to Raw content.
For example, in the following image, the dropdown option is set the dropdown to Raw content.
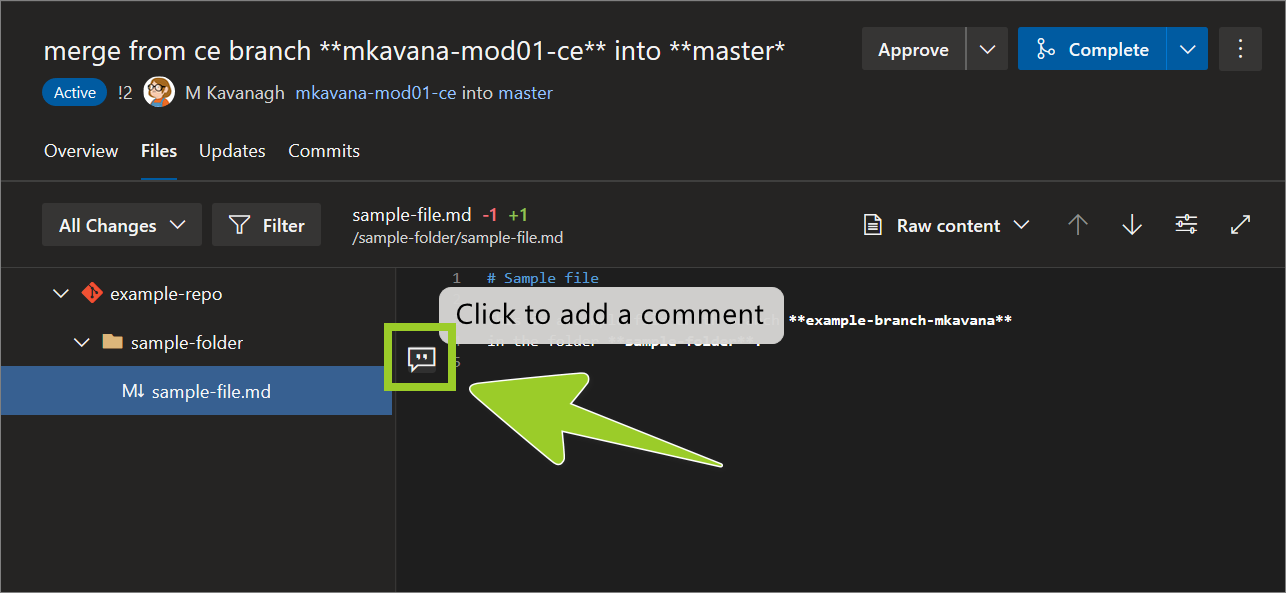
-
Hover over the number of the line you want to add a comment to, and then select the add comment icon (speech bubble symbol).
For example, in the following image, the add comment icon is selected on line number 5.
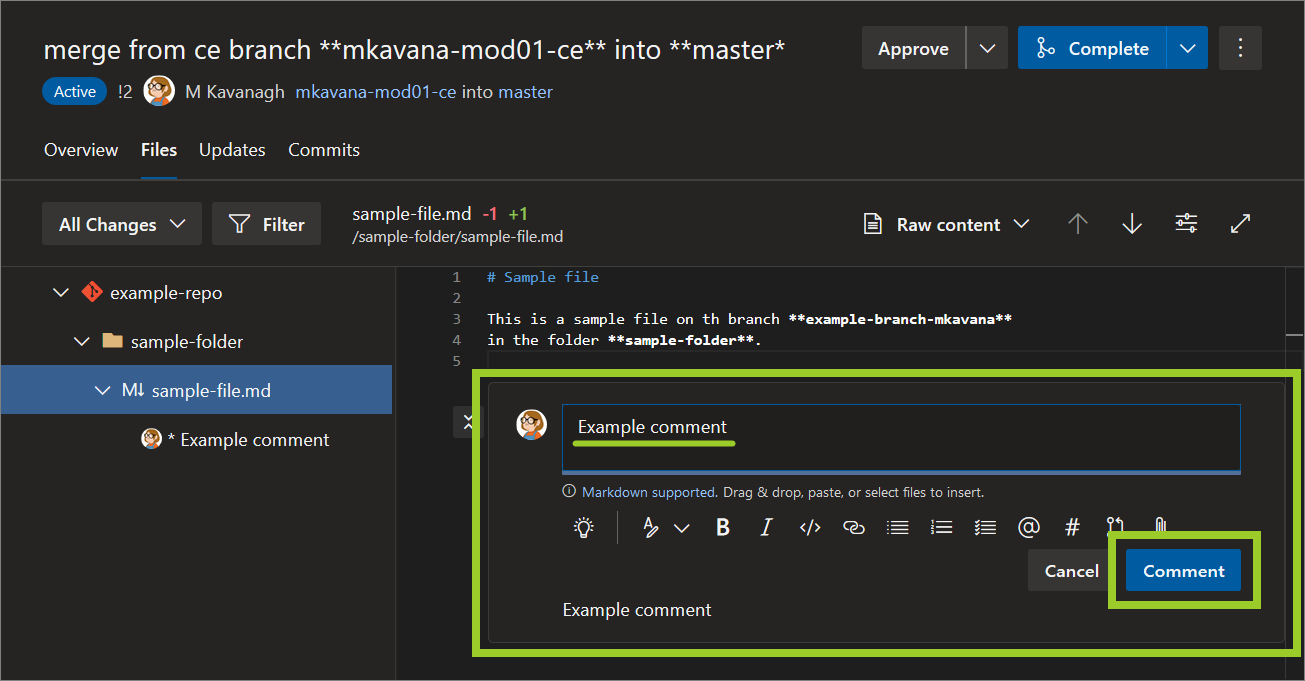
-
Enter your comment text, and choose Comment.
For example, in the following image, the comment text Example comment is entered.
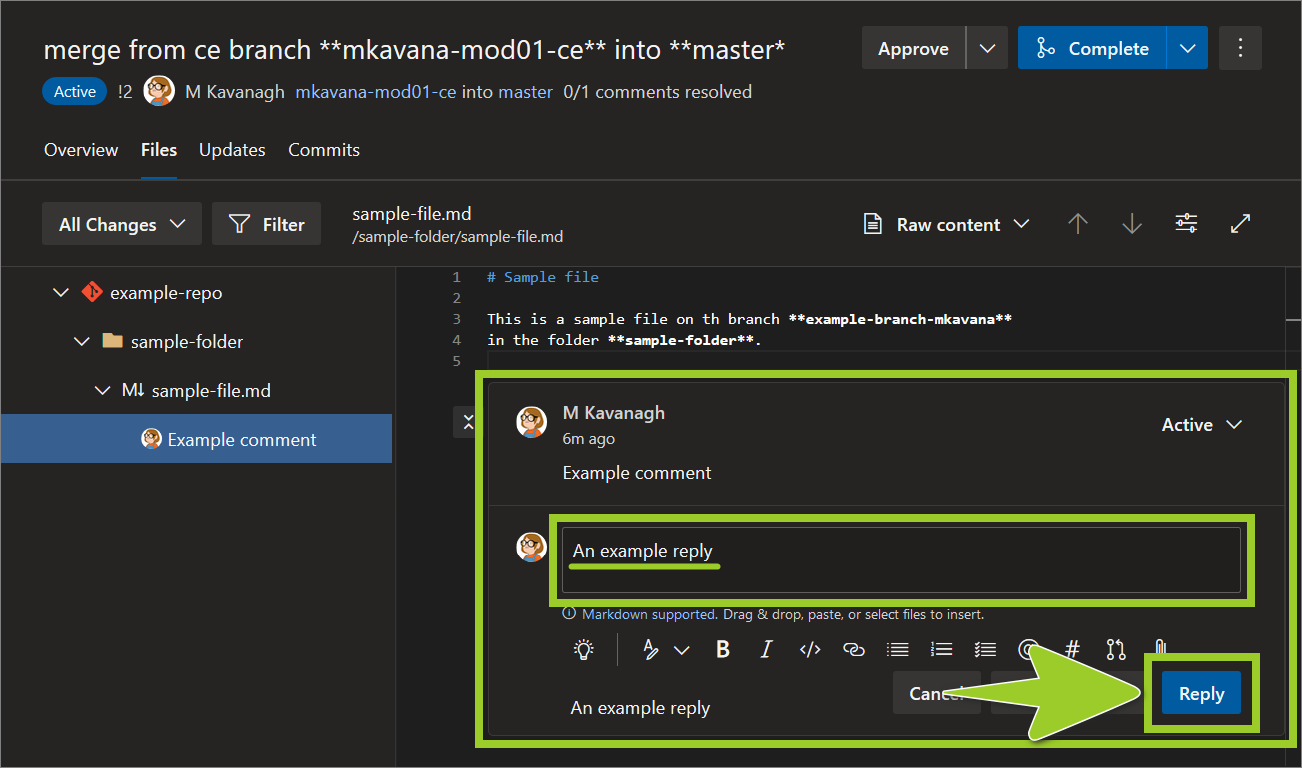
-
To reply to a comment, select the comment you want to reply to, enter your reply text, and then choose Reply.
Note: Comments and replies facilitate discussion between stakeholders about a proposed file change. Generally, only comment on a proposed file change that you want clarified, or disagree with. Comments are not required for file changes you consent to.
For example, in the following image, the reply text An example reply is entered.
-
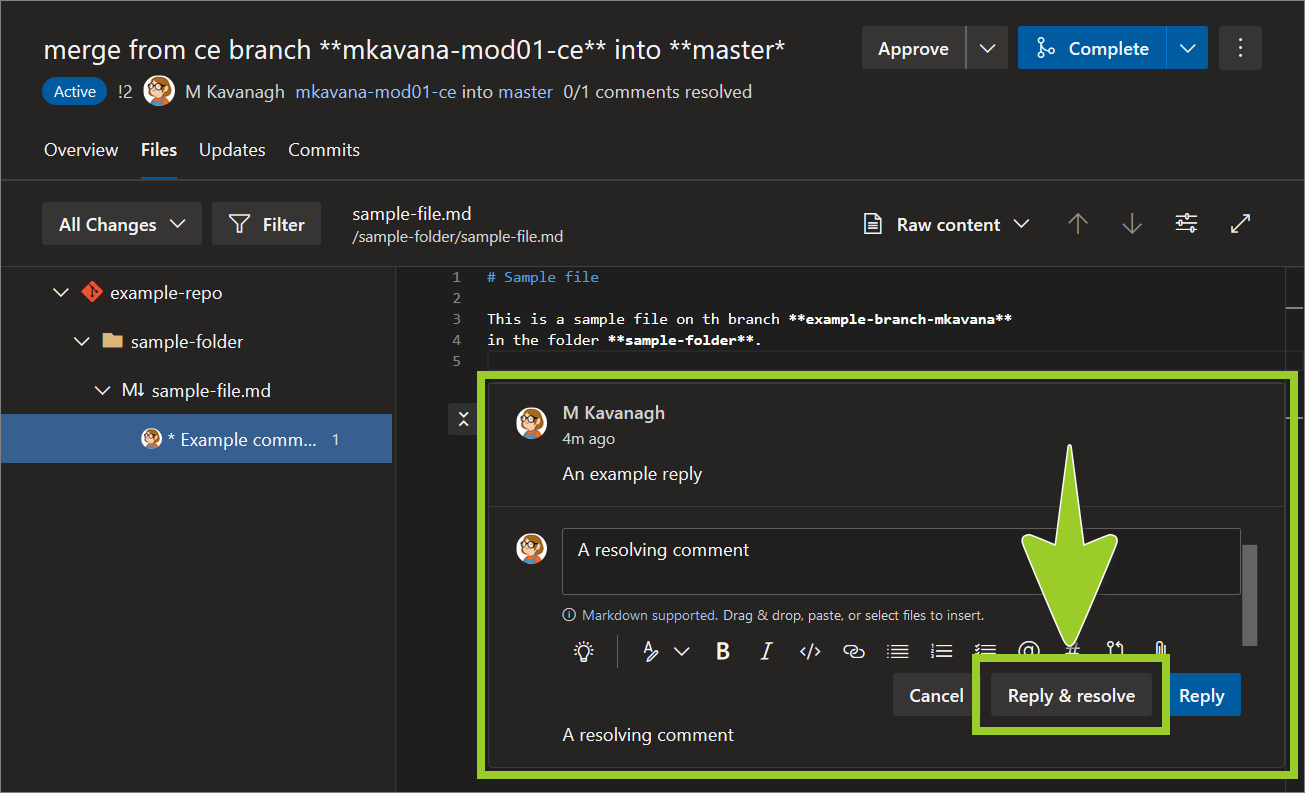
Close or end a discussion by selecting Reply and resolve.
For example, in the following image, the comment A resolving comment and Reply and resolve option is select.
-
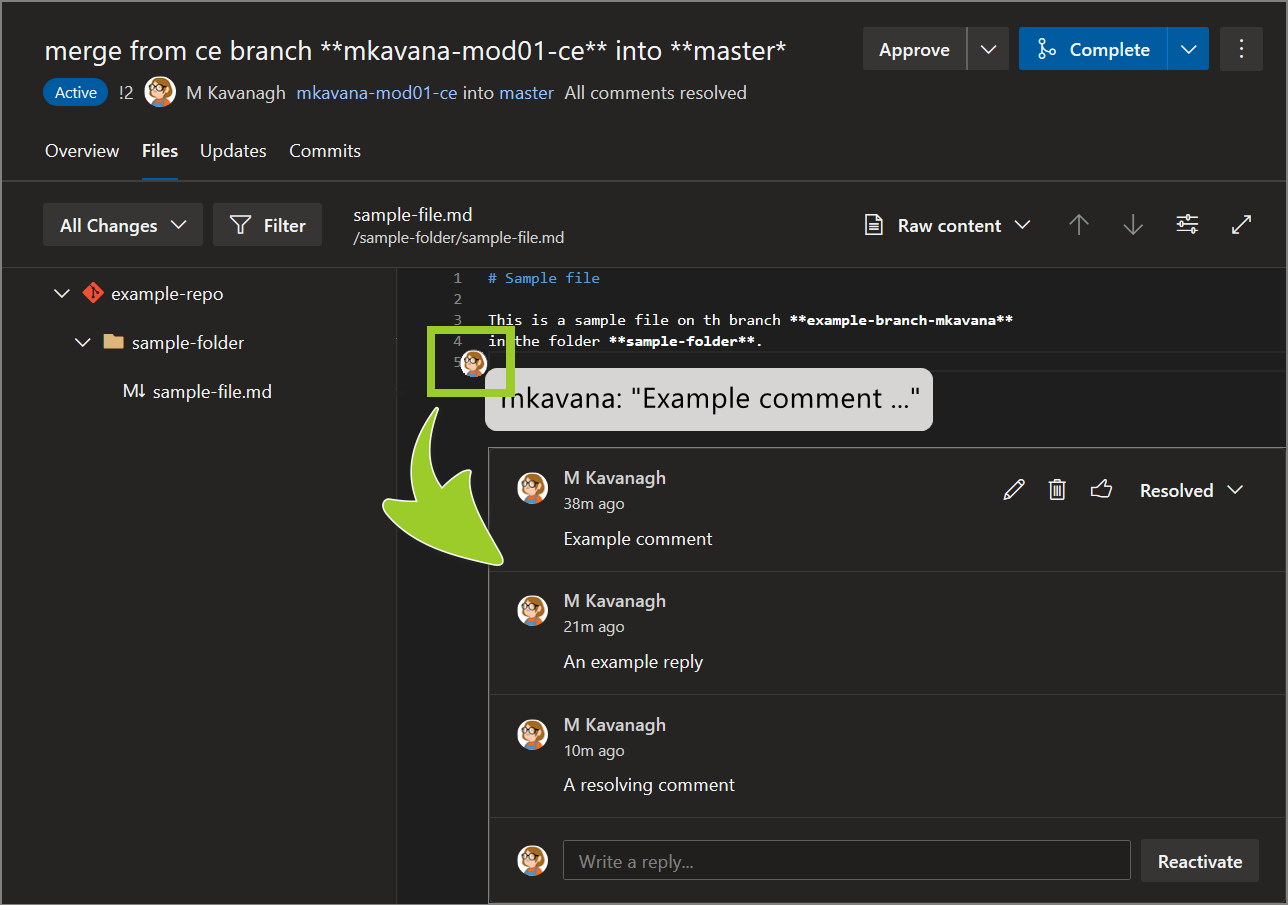
Expand a previously resolved comment within a file by choosing the user’s avatar, beside the comment.
For example, in the following image, the avatar for the user M Kavanagh is selected to expand the resolved comment A resolving comment.
-
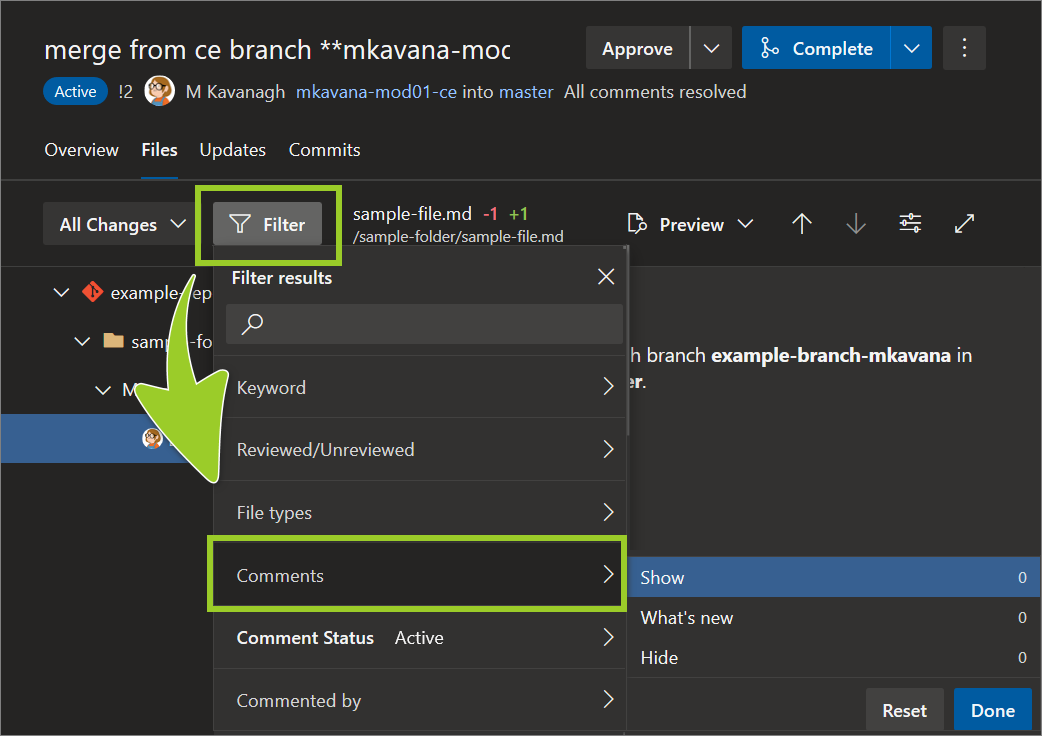
To manage comments, select Filter, then choose Comments, and set the type of comment you want to access.
Note: To designate a file as Reviewed, refer to Mark a file as reviewed in an AzDevOps PR.
You’ve added and resolved AzDevOps PR review comments successfully.
Open an image file in an AzDevOps PR and add comments
Complete the following steps to open an image file in an AzDevOps PR, and add comments.
-
Open an image file in an AzDevOps PR by referring to Open a file in an AzDevOps PR.
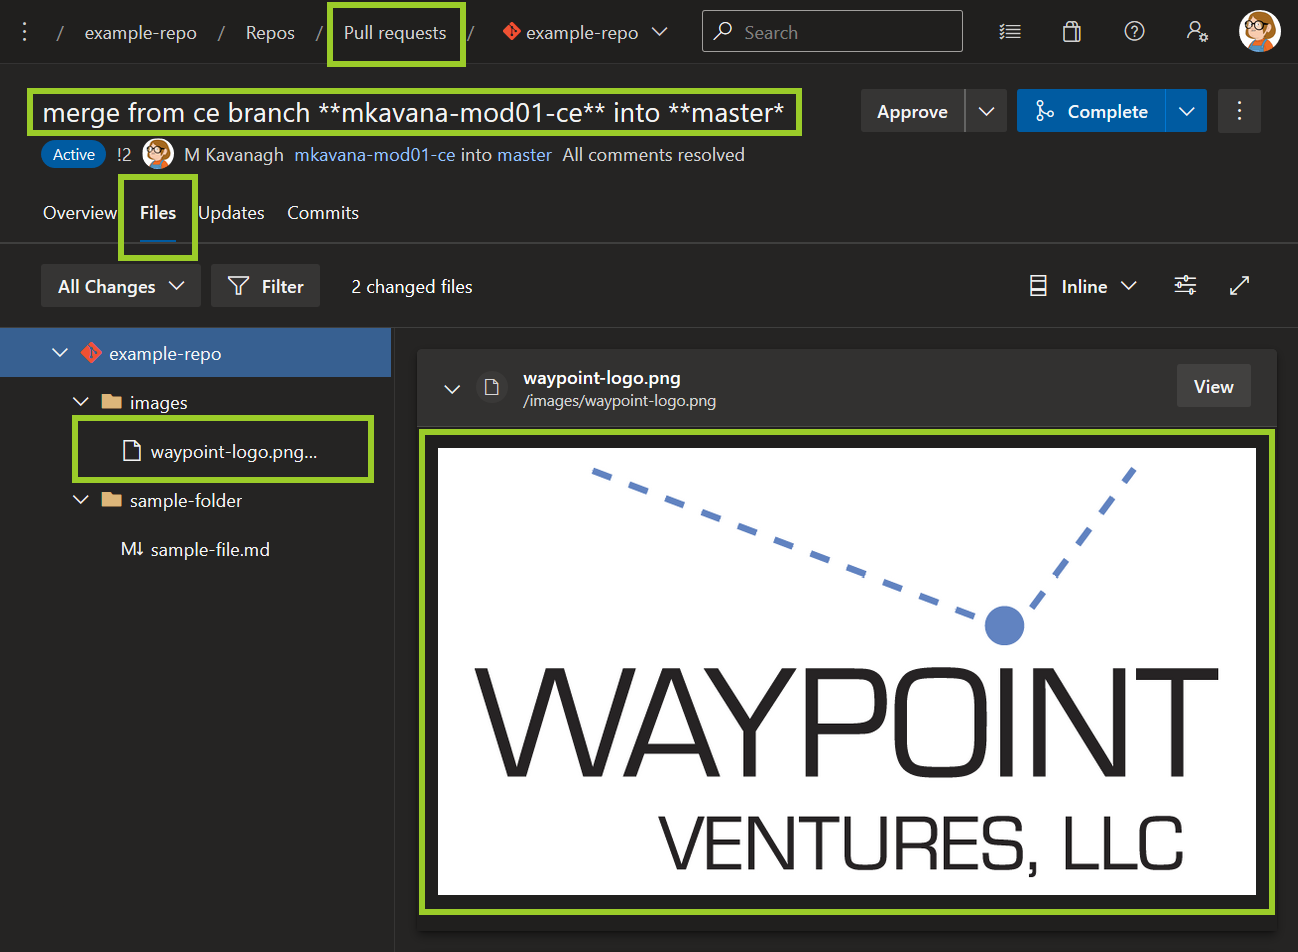
From within the PR, choose Files, and then select an image file. AzDevOps will display a preview of the image.
For example, in the following image, the PNG image file waypoint-logo .png is selected from the Files menu of the PR merge from ce branch **mkavana-mod01-ce** into **master**.
-
In the Files pane, select the vertical ellipsis (
⋮) icon beside the image file you want to add a comment to.For example, in the following image, the vertical ellipsis (
⋮) icon is selected beside the PNG image file waypoint-logo .png.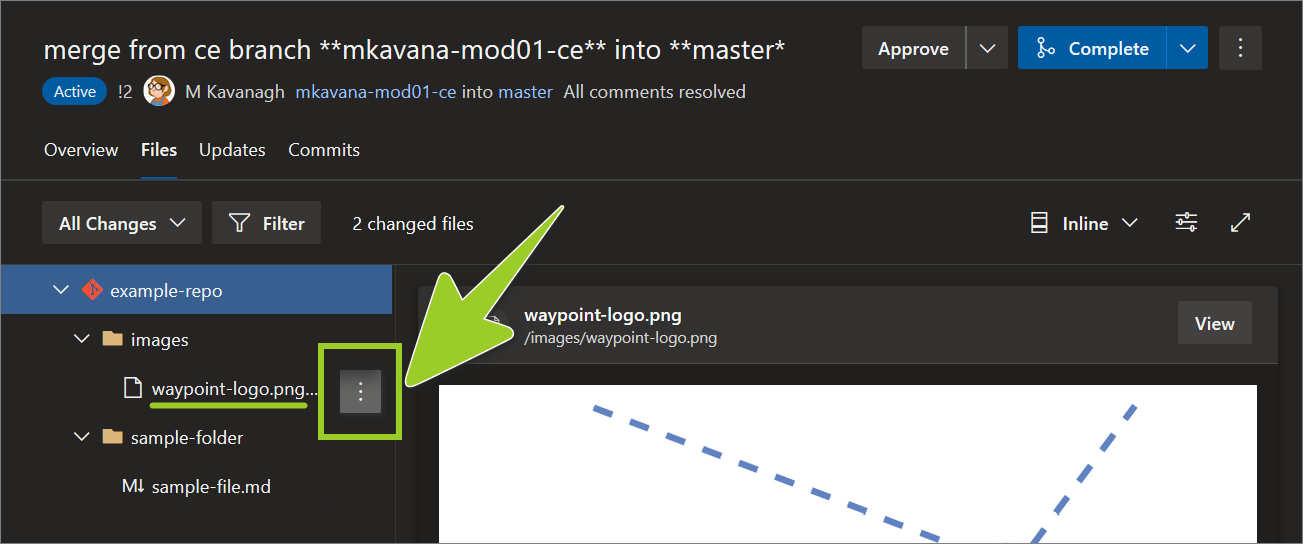
-
To add a comment to the image file, from the context menu, choose Add comment.
For example, in the following image, the option Add comment is selected from the context menu for the PNG image file waypoint-logo .png.
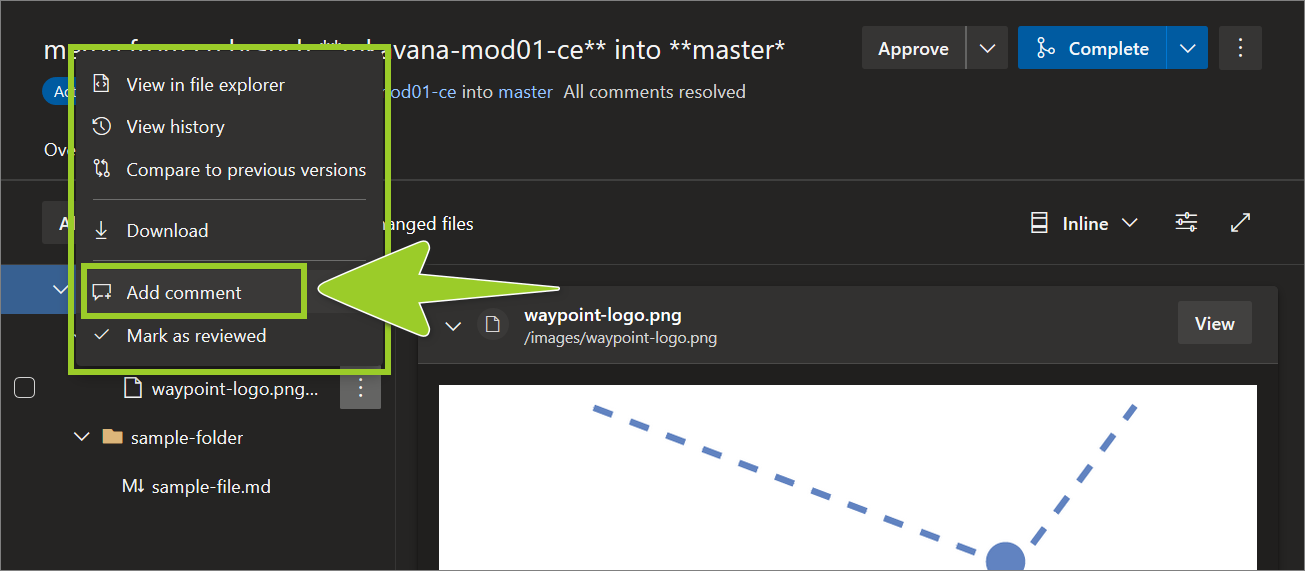
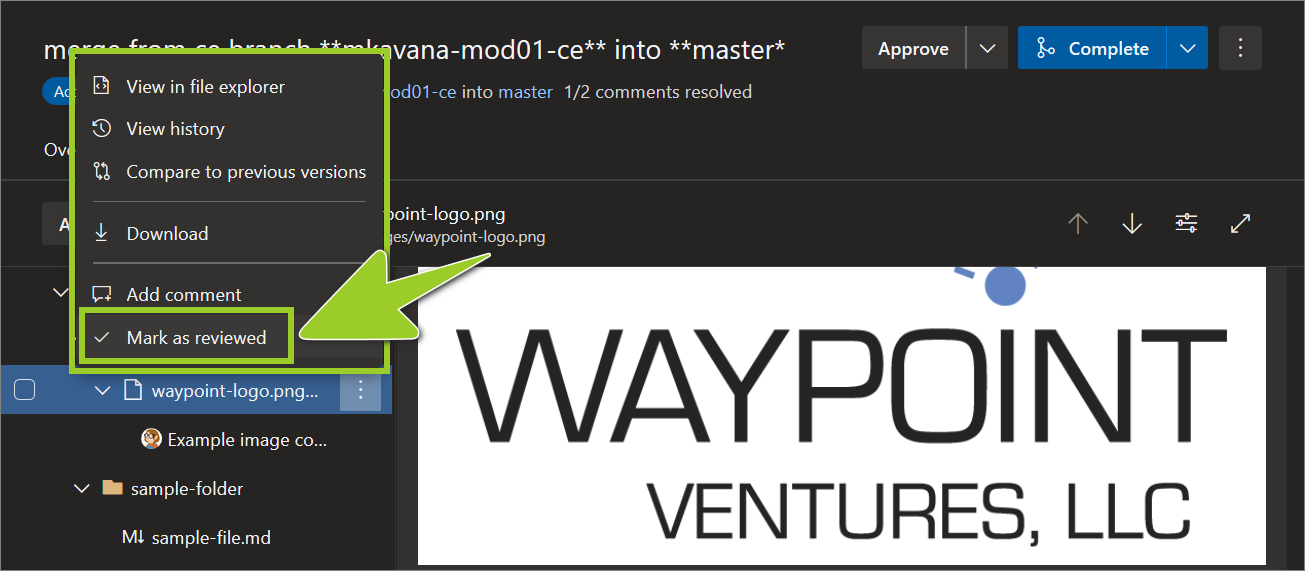
Note: Other context menu options include: View in file explorer, View history, Download, and Mark as reviewed.
-
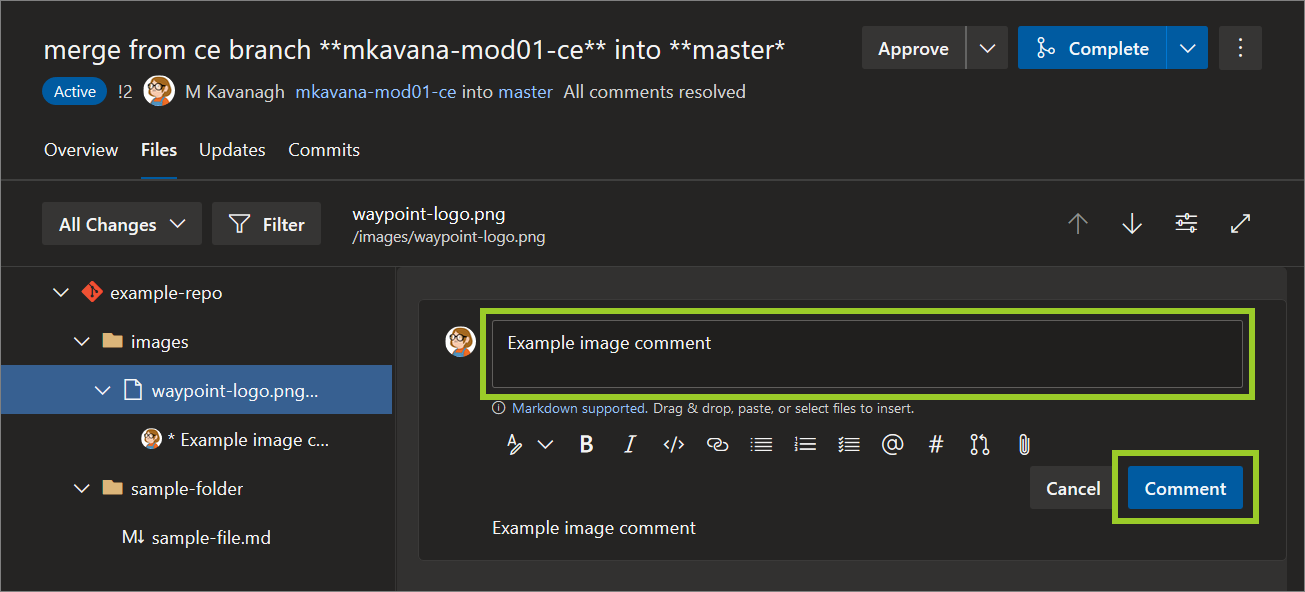
Enter your comment text, and then select Comment.
For example, in the following image, the comment Example image comment is added to the image file waypoint-logo .png.
Note: Use comments and replies to facilitate discussion between stakeholders about image files, and to propose file changes. To reply to comments and resolve comments, refer to Add and resolve AzDevOps PR review comments. To designate an image file as Reviewed, refer to Mark a file as reviewed in an AzDevOps PR.
-
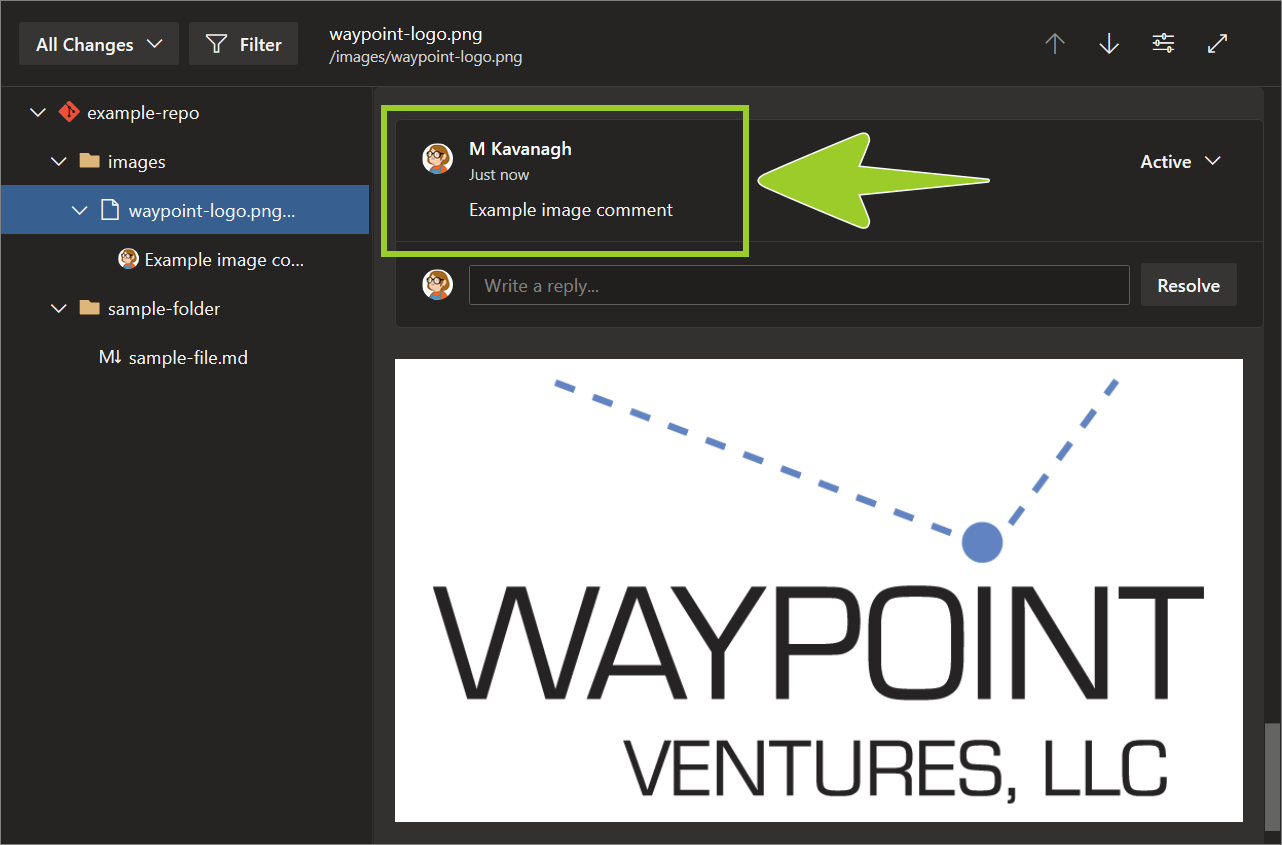
Your comment is listed in the Files pane above the image file.
For example, in the following image, the comment Example image comment is listed in the Files pane, above the image file waypoint-logo .png.
You’ve opened an image file in an AzDevOps PR and added a comment successfully.
Mark a file as reviewed in an AzDevOps PR
Complete the following steps to mark a file as Reviewed in an AzDevOps PR.
-
Open a file in an AzDevOps PR by referring to Open a file in an AzDevOps PR.
From within the PR, in the Files pane, select the vertical ellipsis (
⋮) icon beside the file to designate as Reviewed.For example, in the following image, the vertical ellipsis (
⋮) icon is selected beside the image file waypoint-logo .png in the PR merge from ce branch **mkavana-mod01-ce** into **master**.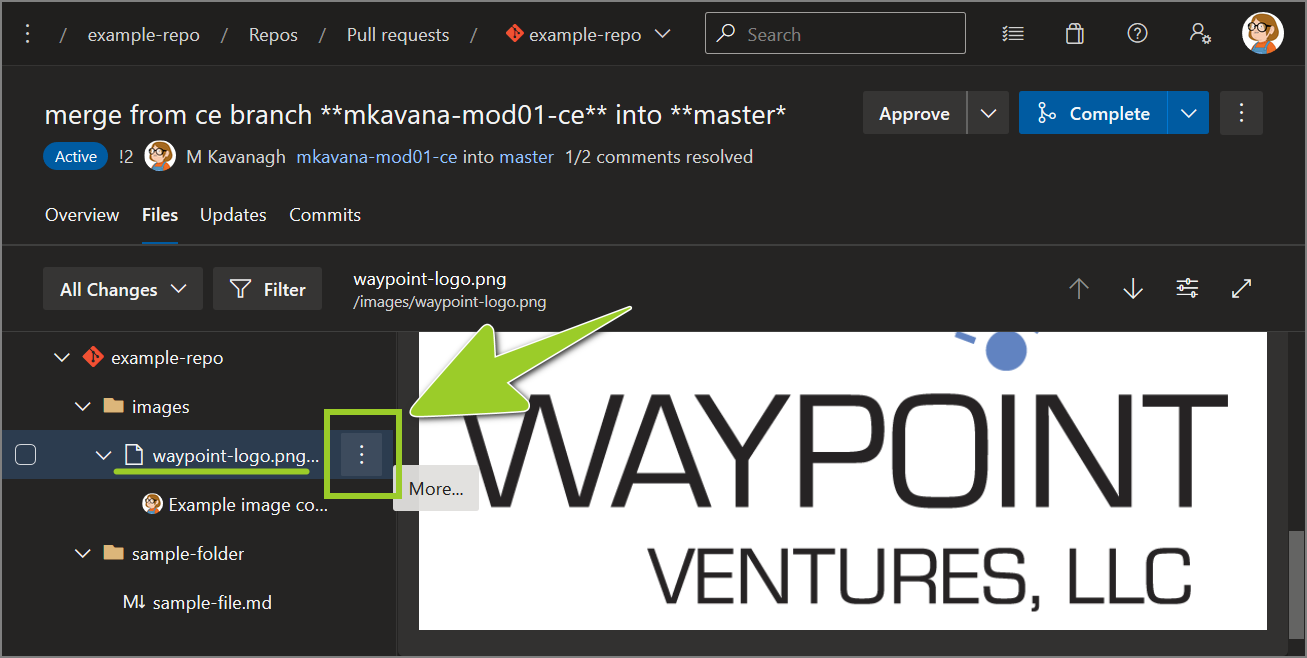
Note: In the previous image, a PNG file is used as an example. You can mark any type of file in an AzDevOps repo as reviewed.
-
In the context menu, choose Mark as reviewed.
For example, in the following image, the image file waypoint-logo .png is set to Mark as reviewed in the context menu.
-
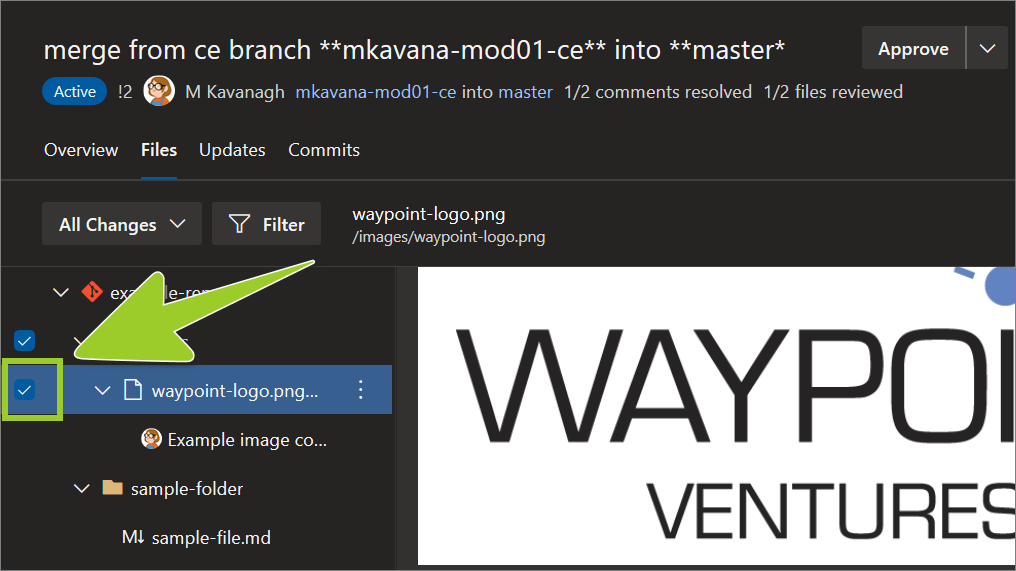
In the Files pane, the checkbox beside the file indicates that the file is designated as Reviewed.
For example, in the following image, in the Files pane, the checkbox beside the image file waypoint-logo .png indicates the file is set to Mark as reviewed.
Note: AzDevOps does not indicate the name of the user who designates a file as Reviewed. If an AzDevOps repo has many reviewers, ensure that only files that have actually been reviewed are designated as Reviewed.
You’ve marked a file as reviewed in an AzDevOps PR successfully.
Note You’ve evaluated a PR on AzDevOps successfully, and your PR will be merged according to the guide Merge a pull request.
Appendices
Check the following supplementary Appendices for more details and context.